


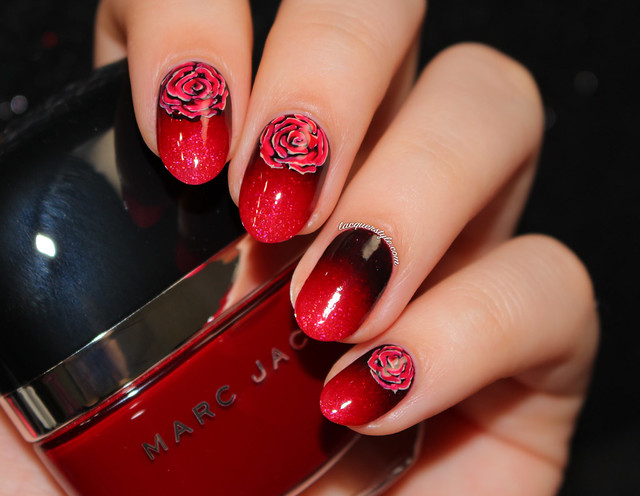
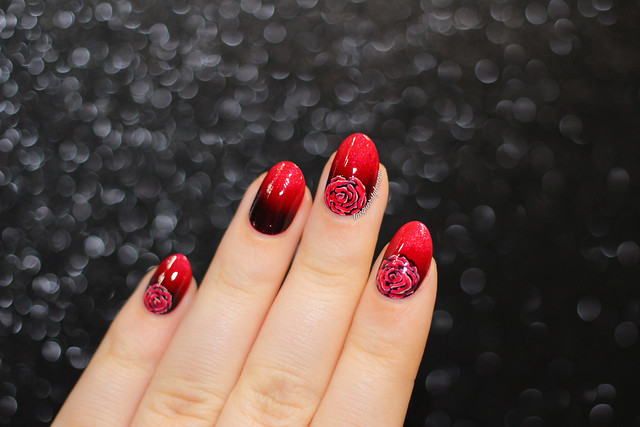
I have decided to try to attempt the 31 Day Challenge again this year (and try to actually complete it this time). I'm hoping that it will keep me posting more on my blog, since I've been really slacking for a while now. I think that it helps to have a theme for some inspiration as well. Today was the first day, so I created some gradient rose nails for the red theme. I created a quick photo tutorial as well, which you can view down below!
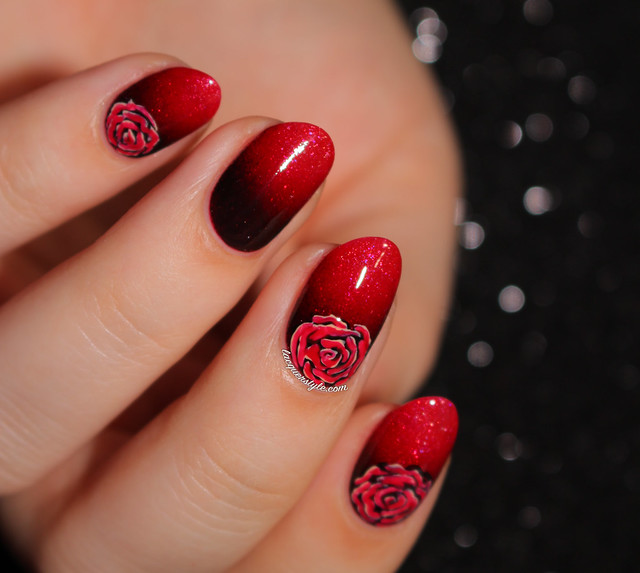
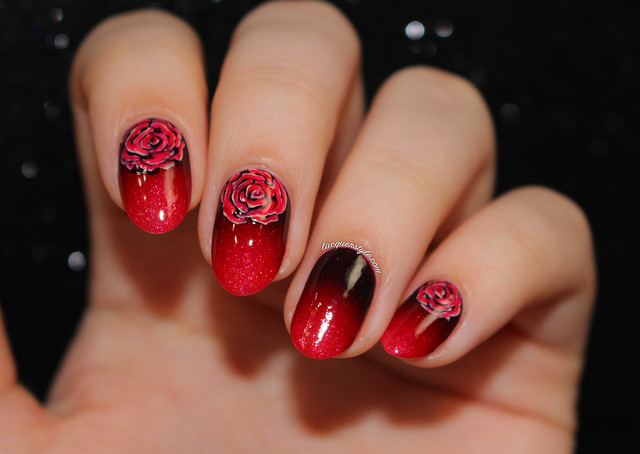
I won't go into too much detail since you can read the steps below, but I was definitely inspired by all of the Rouge Louboutin inspired mani's I've seen lately, with the gorgeous black and red gradient mimicking the bottle. For my version, I decided it needed a bit of holo of course, so I went with piCture pOlish O'hara as my base. I really love the simplicity and gothic quality about them.
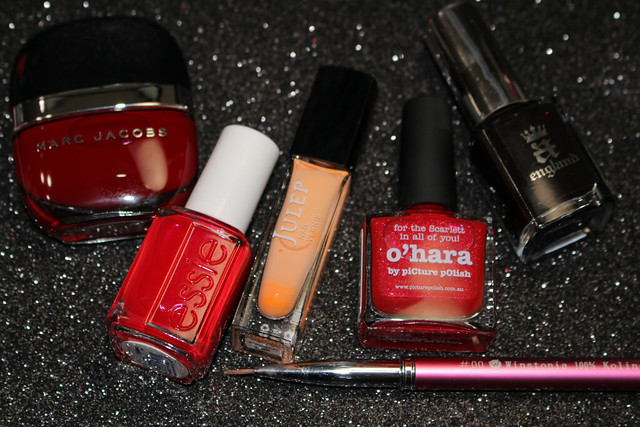
Marc Jacobs Jezebel, Essie Trombone, Julep Hayden, piCture pOlish O'hara, a-England Lancelot, and Winstonia Store #00 brush

Here's the tutorial if you would like to recreate them:
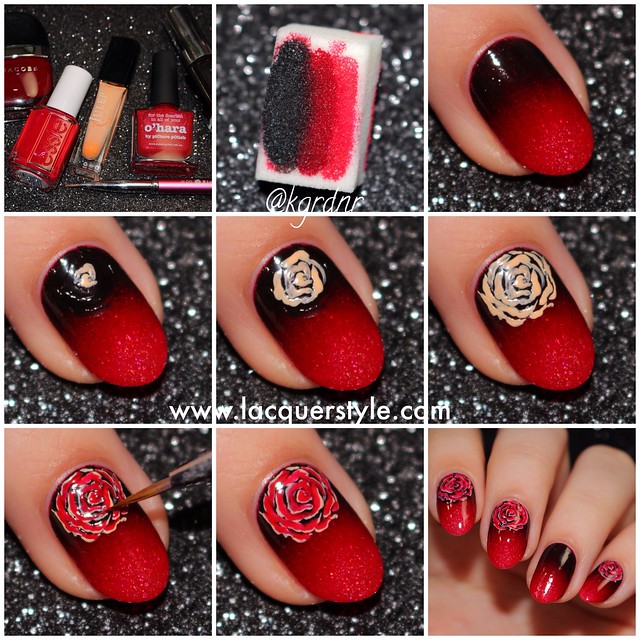
1. Apply one coat of red nail polish, or one with holographic shimmer as I have shown.
2. Grab a sponge and paint a few layers of black, a deep burgundy red, and your base color directly onto the sponge.
3. Sponge lightly onto the nail. I had to do this a few times to deepen the black.
4. Using a peach nail polish, begin the rose near the cuticle of the nail. I like to start with a centre dot and a half circle sticking out from the side. Make sure you leave some black area peeking through to give some depth to the rose.
5. Paint similar petal shapes around the centre. I like to make some squiggly and pointy edges to create a more realistic shape.
6. Keep creating petals until the rose is the size you like. If it helps, you can also see me create the same rose shape in a previous video I made here: Negative Space Rose Nails
7. Using a red polish (similar to your base color), and a nail art brush, paint directly on top of the peach lines leaving a tiny space at the outer edge of each petal.
8. Once you have all of the red filled in, wait a few minutes, then add your top coat. Have fun!
Thank you all for reading! If you're also doing the challenge, let me know, as I would love to follow along with your posts as well! :)
Kristin

I really love it! Good luck to the challenge!
ReplyDeleteThank you! :)
DeleteFirst I thought the roses are decals, they look absolutely perfect. Gorgeous manicure!
ReplyDeleteThis is the best one i have seen on my dashboard so far <3 i would really love to try this, thanks for the tutorial!
ReplyDeletei am attemptint to do the 31dc but in a slower pace, since my nails are very bittle at the moment and i dont wanna dry them out too much by doing a different design every day
Thank you! I would love to see them if you do. A slower pace is a good idea too; I’m hoping I can do a few in one day and then have a bit of a break, but some might just have to go up a bit late too. We’ll see how it goes! :)
DeleteLovely!
ReplyDeleteThank you! :)
DeleteMy sincerest compliments, it is gorgeous *_*
ReplyDeleteSo sensual and beautiful. Loving the detail (: You are so talented :')
ReplyDeletei cant get over how stunning this is! going to try this one :)
ReplyDeleteThank you so much! I would love to see it. :)
Deletevery very fabulous. And that gradient is to die for x
ReplyDeleteThank you! :)
DeleteI love these roses! Stunning!
ReplyDelete