Hello! :)
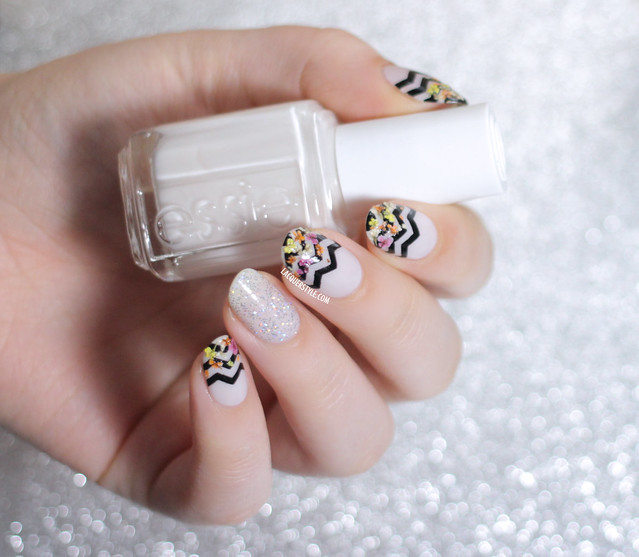
My most recent design is another floral print (you can view my previous florals on my
Instagram, which is also in the sidebar). I have really been into florals lately. They always look so beautiful and complicated, and I won't lie, it's pretty funny when people ask you if your nails are stickers or stencils! My new set of nail art brushes from
Born Pretty Store, are what I have used to create this look:
For the past few months, I have just been using the same tiny old paintbrush (yes, just one!) from my kit when I was taking art in high school. So, I knew it was about time I get myself a fresh set of real nail art brushes! While I was at it, I picked up some multicolored loose glitter as well, and I am addicted!
I'll have a bonus glitter mani at the end of this post, but for now here's what my order consisted of from the lovely
Born Pretty Store:
Look at the gorgeous colors!
The brushes are really great! I used all four to create my floral print, and it was so nice to have a selection of sizes so I could use one for each color on my nails. They are perfect for fine details like the small flowers and dots in the center of the flowers.
Here's what one of the brushes looks like compared to my nail. See how small it is?
These are the polishes I used to get this look:
Butter London Billy No Mates and Stag Do, Essie Instant Hot (on the accent nail) and Blanc, and Misa Great Grape and Lime Love.
And here's a little bonus glitter placement:
The base is Essie The Girl's Are Out.
It's so fun placing the individual glitters in different shapes or patterns, and it's not a pain to remove after a few days. You will definitely see some more glitter placement nails from me soon!
If you would like to order from
Born Pretty Store, (their prices are great, and it's free worldwide shipping!) you can use this coupon for 10% off your order:
Have a lovely day! :)
Kristin