Showing posts with label orly. Show all posts

Tuesday, June 02, 2015

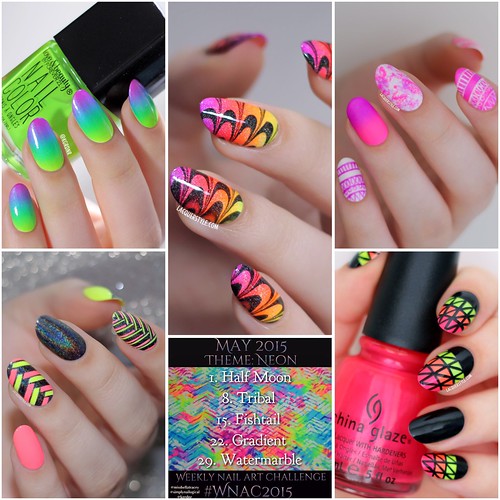
#WNAC2015 - May / Neon: Roundup (+ Tutorials!)

Tuesday, June 02, 2015
Hello everyone!

Today I have a roundup of my nail art from the #WNAC2015 posts for May to share with you.  The theme was Neon, which was so fun!  Totally had me in a happy mood, and I think I came up with some awesome nail art (a few didn't quite make it to my Instagram either, so I'll share them with you here!).

lacquerstyle kgrdnr watermarble neon nail art nail artist hand painted ombre gradient summer nails tutorial tutorials tribal fishtail holographic china glaze

Friday, April 03, 2015

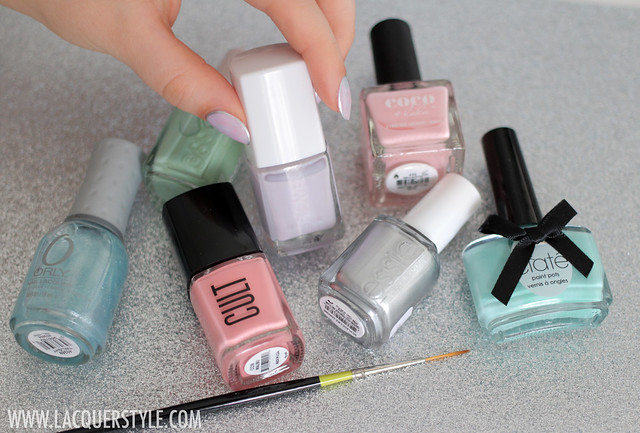
#WNAC2015 - April / Pastel: Simple Outlined Nails

Friday, April 03, 2015
Hi everyone!

Today was the first post of our Weekly Nail Art Challenge (#WNAC2015) for April.  The overall theme is pastel, and our first prompt is “simple”.

IMG_5224-

Sunday, December 28, 2014

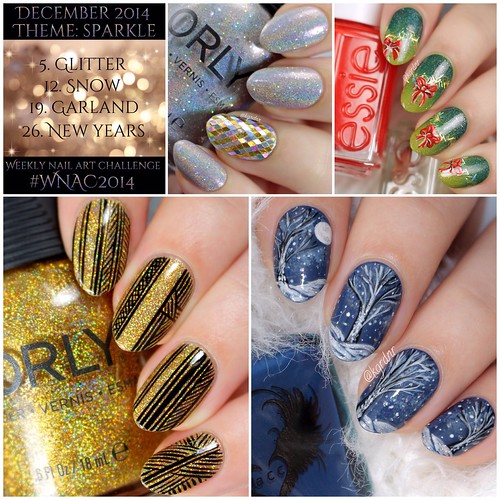
#WNAC2014 - December / Sparkle: Roundup

Sunday, December 28, 2014
Hi everyone! I hope you're all having or had lovely holidays!

We're nearing the end of December, and our Weekly Nail Art Challenge for the month was sparkle themed - so perfect for the holidays!  Here's a quick roundup of all of the nail art I've been posting on Instagram, after the jump.

  #WNAC2014 - December / Sparkle

Wednesday, February 05, 2014

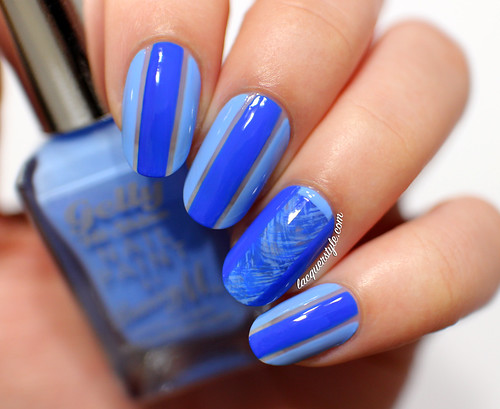
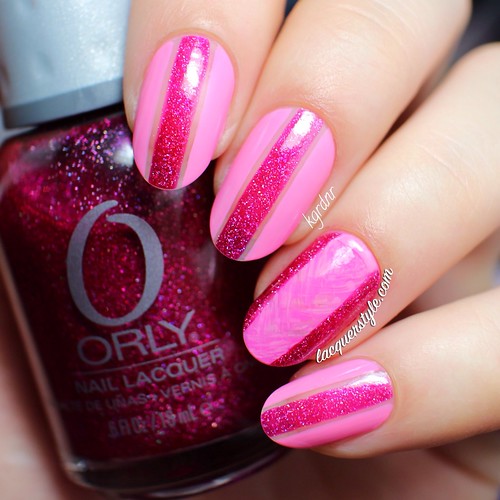
Negative Space “Racing Stripes” + Tutorial (Valentine’s Version)

Wednesday, February 05, 2014
Hi everyone!

I’m back with some negative space nails for you today.  It’s funny, because I used to never really care for the negative space look, but ever since my nails are no longer yellow-stained, I just can’t get enough of them!

IMG_0206-3

The “racing stripes” idea was actually inspired by a video I found by Jin Soon on Sephora’s website.  It’s such a simple design and I absolutely love the look of it.

I went with a blue theme originally, because I’ve been dying to use Color Club Bright Night and Barry M Blueberry Gelly, and I think they look gorgeous together.  I really loved wearing them!


I filmed a tutorial for these nails as well, but instead of the blues, I created a Valentine’s version with a few different shades of pink (CND Taffy Pink & Girlie Pink, and Orly Miss Conduct).  You can watch the video down below!

Untitled


Enjoy! :)


Thank you for reading!


Kristin


Connect with me:
Instagram  |  Twitter  |  Facebook  |  Pinterest

Follow on Bloglovin


Sunday, December 15, 2013

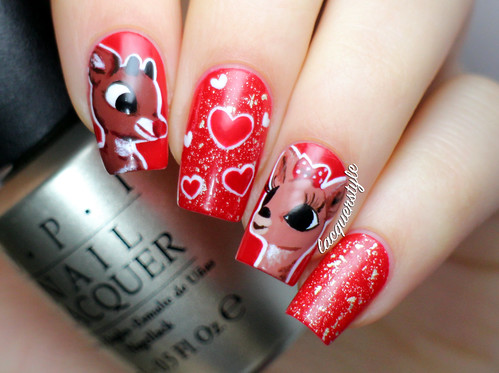
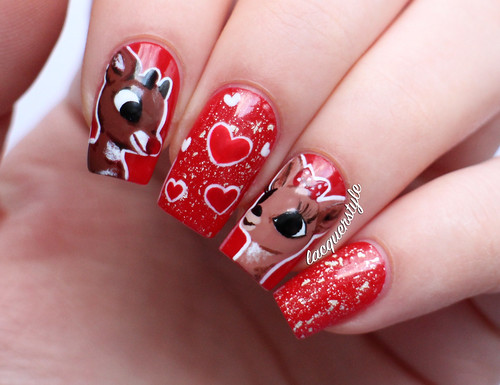
Reindeer Love - Rudolph & Clarice

Sunday, December 15, 2013
Hello everyone!

The theme for the final week of the Nail Polish Canada Holiday Challenege is “holiday memories”.  I don’t really have the greatest holiday memories, as sad as that may sound, but I do remember always watching Rudolph the Red Nosed Reindeer on TV for years when I was younger, so that was my inspiration!

IMG_3717----1

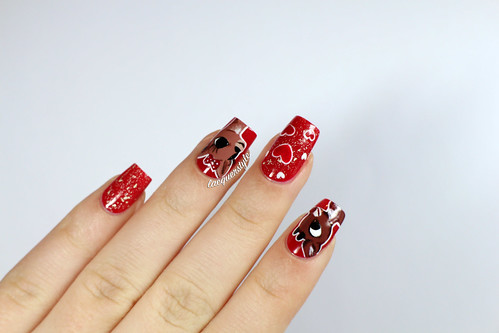
The base of these nails (CND Rouge Red) was kind of a happy accident;  I was originally going to do some sort of pale blue snowy background with snowflakes or something, but I already had this red on my nails from the day before and wanted to practice painting Rudolph.  It ended up being pretty cute over red, and Rudolph turned out great on my first try so I just decided to keep it!

IMG_3480-1

Rudolph and Clarice were painted with a size 5/0 brush from Michael’s using a bunch of browns and tans from Essie, which I’m so glad I had in my collection!  I outlined both of them in white so that they really stand out on the bright red base.   What I really think makes the whole design though, is OPI Pure, the 18K White Gold & Silver top coat.  It looks really beautiful over red and makes it really festive for the holidays.

IMG_3724-1
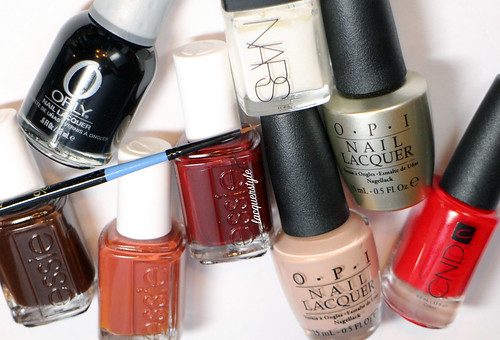
Orly Liquid Vinyl, Nars Ecume, OPI Pure, CND Rouge Red, OPI Don’t Pretzel My Buttons, Essie Chocolate Cakes, Very Structured, and Little Brown Dress

I’m extremely happy with how these turned out;  I think I’ll probably make them matte before removing them though, so I might update this with some more photos.

IMG_3613-1


If you have a few seconds, please head over to NPC and vote for me!  Just select lacquerstyle.com from the drop down menu, I would really appreciate it! :)


I hope you all enjoyed these nails, and thank you for reading!


Kristin


Connect with me:
Instagram  |  Twitter  |  Facebook  |  Pinterest

Follow on Bloglovin


Monday, December 09, 2013

Festive Poinsettia Nails

Monday, December 09, 2013
Hi everyone!

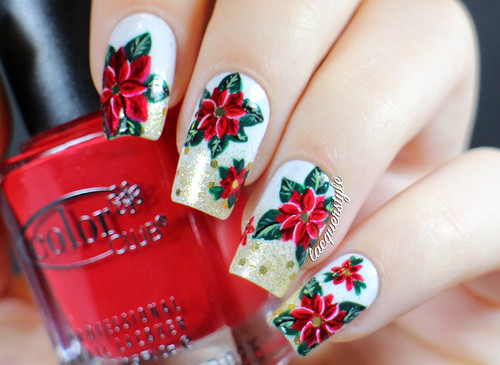
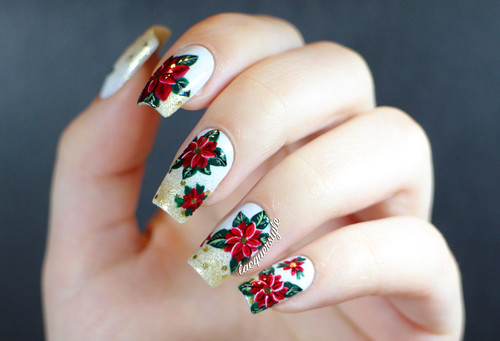
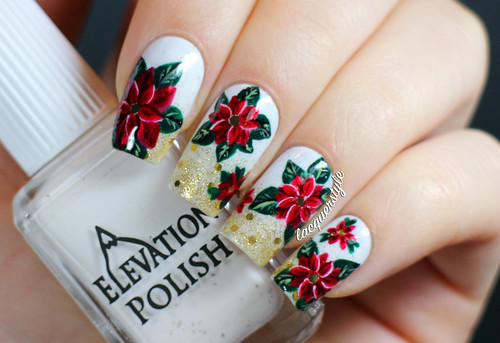
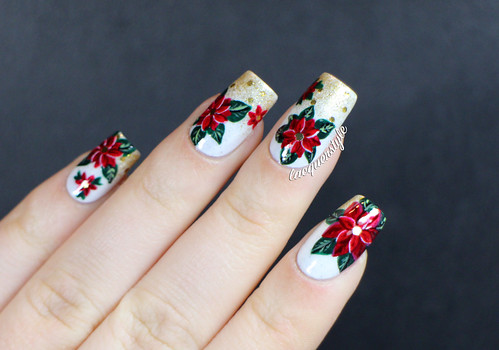
I created these nails for the second week of the Nail Polish Canada Holiday 2013 Nail Art Challenge. The theme was "decorations".  I figured everyone else participating would go for Christmas trees or lights, so I decided to go a different route and I chose to paint some poinsettias.

IMG_3031-1

My Nana (grandmother), always likes to have poinsettias around her house during the holidays, so that's where my inspiration came from.  I googled photos of poinsettias for reference, but in the end I just painted them on randomly around my nails since I didn't want them to be too symmetrical.

IMG_3056-1

IMG_3037-1

IMG_3019-1

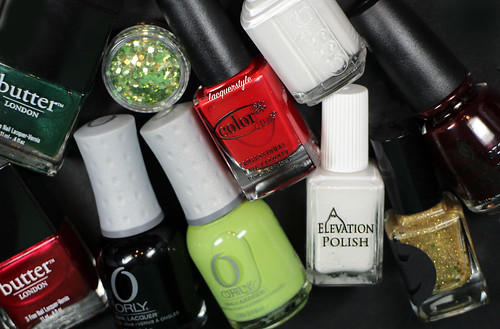
I used a bunch of different polishes for these nails, as usual.  My base is Elevation Polish Mont Blanc, a really pretty white with silver glass flecks and multicolored shimmer, and I added Cirque Trousseau to the tips for a bit of a glitter gradient.  The poinsettias are a combination of metallics and cremes, and I added a goldish-green glitter in the center of each flower.  The names of all the polishes used to create the flowers will be listed below.

IMG_2981-1
Butter London British Racing Green, Butter London Knees Up, Orly Liquid Vinyl, Orly Green Apple, Color Club Mamba, Essie Blanc, Elevation Polish Mont Blanc, Cirque Trousseau, and China Glaze Prey Tell

IMG_3059-1


Thank you for reading!


Kristin


Join me on my other social networks:
Instagram  |  Twitter  |  Facebook  |  Pinterest


Thursday, December 05, 2013

Red & Black Lumberjack Plaid Tutorial

Thursday, December 05, 2013
Hello everyone!

I created some red & black plaid nails last week and got quite a few requests for a tutorial on Instagram.  I did actually film the original ones, but I decided to scrap the video because the lighting was off.  Instead, I created a photo tutorial (or pictorial) for you all.

If you missed my original post for these nails then you can view it here!

So, onto the tutorial!

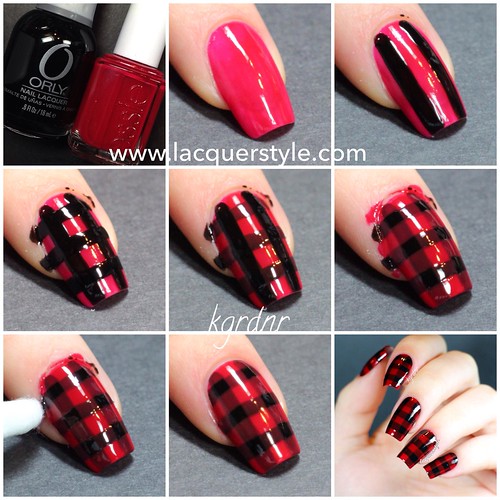
  Red & Black Plaid Nails Tutorial

1. This tutorial is very simple; it only requires a black polish and your color of choice.  You must use a jelly or sheer polish for your color for the best effect though!  I chose red, and for this tutorial I used Essie Garnet.  The black is Orly Liquid Vinyl.

2. Apply one coat of your base.  It doesn't matter if it's a bit uneven or streaky because we will be adding a few layers.  Tip: At this point, you could also tape off your cuticles if you are using a red or color you know will stain your cuticles.  You don't want to spend ages cleaning up after, I made that mistake the first time! :P

3. Paint vertical lines in black.  I painted two, but depending on the size of plaid you want, you may want more.  I just used the polish brush from the bottles, but if you are more comfortable you could use a striper or even tape to create perfect lines.

4. Create a grid by painting horizontal lines in black.  You may need more or less depending on the length of your nails or size of plaid like the previous step.

5. Now, using your red (or other) jelly, paint vertical lines overlapping some of the black.  I painted one down the center, and one on either side of the black vertical lines.

6. Then, paint horizontal lines the same way as the previous step.  I did four red horizontal lines, so I ended up leaving the little 6 black opaque squares you can see in the photo.

7. Clean up around your cuticles with some remover and a cotton swab or brush dipped in acetone (I used both.)

8. Add top coat and your plaid nails are complete! 


I hope you all enjoyed this quick tutorial, and let me know if you have any other questions.

You can always share your recreations with me by tagging me (@kgrdnr) in your photo on Instagram, or showing me on Twitter or Facebook (yes, I am now on Facebook!).

Thank you for reading! :)


Kristin


Join me on my other social networks:
Instagram  |  Twitter  |  Facebook  |  Pinterest


Saturday, November 23, 2013

Negative Space Rose Nails + Tutorial

Saturday, November 23, 2013
Hi everyone!  I have a quick post today, but it includes a new tutorial!

I created these negative space style rose nails for Nail It! Magazine's bridal theme that I noticed on Instagram recently.  I will be entering these nails for consideration, so I'm hoping they make it into the March/April issue.  Wish me luck! :)


I love the design I came up with; I think it looks more complicated than it actually is (quite a few people on Instagram actually thought I stamped it!), and yet it's very delicate with a bit of blind.  I think I might even have to try them in different color combinations in the near future .. Maybe a darker version!


Elevation Polish Mount Feathertop, Essie Blanc, China Glaze Angel Wings, Orly Prisma Gloss Silver, and a brush (size 10/0) I got at Michael's recently.


 And a little bonus shot:
 This was my original accent nail idea, but I ended up going with a simple gold nail instead.


Here is the video if you would like to see how I created them:


Enjoy!


Thank you for reading! :)


Kristin

Saturday, November 09, 2013

Holographic Pastel Galaxy Nails + Tutorial!

Saturday, November 09, 2013
Well, it's no secret that one of my favourite designs to wear on my nails is galaxies.  They aren't very fall / winter appropriate, but I've wanted to try a pastel version for a while now, so I finally decided to attempt it.

I'm a little bit obsessed with how they turned out, so I'm just warning you now .. there will be a lot of photos in this post!  Of course I also filmed a tutorial, so you can watch how I created them down below! :)


I used so many different polishes for these galaxy nails, but I managed to fit them all in one photo!

Essie Cascade Cool, Full Steam Ahead, Love & Acceptance, and Pure Pearlfection.  Nars Ecume, Color Club Miss Bliss, Eternal Beauty, and Over the Moon.


I also made them matte before I removed them:


And, here's how I created them:


I hope you all love it!


Thank you for reading! :)


Kristin


Thursday, September 12, 2013

31 Day Challenge - Day 9: Rainbow Nails

Thursday, September 12, 2013
Day 9 of the #31DC2013 was Rainbow Nails.

I just did some rainbow nails recently, so I wasn't too excited about creating another set.  I am pretty happy with how take two turned out though; I might even like them better than the first ones!


I started with two coats of Lime Crime Milky Ways, then I freehanded some curved lines for each color of the rainbow, leaving some of the base peeking through.  The accent nail is one coat of Enchanted Polish TenderHeart, and I placed one of the heart glitters in the middle of my nail.  Then, I added some loose red hexes surrounding the heart, and a few more randomly around my nail.

OPI Conquistadorable Color, Essie Action, Square Hue Bikini Beach, Barry M Key Lime Gelly, Bourjois Bleu Fabuleux, Orly Beach Cruiser, Lime Crime Milky Ways, and Enchanted Polish TenderHeart


My little one (Chloe) wanted in on the rainbow love as well, so here is her first feature on my blog! :)


Thank you for reading!


Kristin


Sunday, August 18, 2013

Rainbow Gradient Nails + Tutorial!

Sunday, August 18, 2013
On Instagram last week, a bunch of nail accounts (111!) joined together to create some rainbow nails as part of one big collaboration hosted by @nailslikelace.  I always love to participate in collaborations with others; it's really exciting to see so many different interpretations of a general theme.

For my rainbow nails, I decided to create a simple rainbow gradient.  This was my first time using so many colors in one gradient, but I'm very happy with how it turned out.  I figured my rainbow needed a pot of gold, so for my accent nail I used two coats of Chanel Gold Fingers, one coat of Gosh Greed, and then I placed some loose holographic gold glitter to create a glitter gradient effect.


Zoya Sooki, China Glaze Sun Worshiper, Orly Glowstick, Love & Beauty Neon Green, and Essie Avenue Maintain


I've been slacking on YouTube (I really need to get a routine going!), so I decided to film this look as well!

Here is the tutorial:


Let me know what you think, and as always, thank you for reading! :)


Kristin


Lacquerstyle.com © 2014