Showing posts with label Marc Jacobs Beauty. Show all posts

Sunday, November 30, 2014

#WNAC2014 - November / Metallic: Roundup

Sunday, November 30, 2014
Hello everyone!

This is a quick roundup post for my November / Metallic #WNAC2014 (Weekly Nail Art Challenge).  The theme for the month was metallic, which was the perfect theme for leading into the holidays, I would say!

Untitled


Tuesday, September 02, 2014

31 Day Challenge 2014 - Day 1: Red

Tuesday, September 02, 2014
Hello everyone!

I have decided to try to attempt the 31 Day Challenge again this year (and try to actually complete it this time).  I'm hoping that it will keep me posting more on my blog, since I've been really slacking for a while now.  I think that it helps to have a theme for some inspiration as well.  Today was the first day, so I created some gradient rose nails for the red theme.  I created a quick photo tutorial as well, which you can view down below!

IMG_0501-1

IMG_0463-1

I won't go into too much detail since you can read the steps below, but I was definitely inspired by all of the Rouge Louboutin inspired mani's I've seen lately, with the gorgeous black and red gradient mimicking the bottle.  For my version, I decided it needed a bit of holo of course, so I went with piCture pOlish O'hara as my base.  I really love the simplicity and gothic quality about them.

IMG_0471-1

IMG_0476-
Marc Jacobs Jezebel, Essie Trombone, Julep Hayden, piCture pOlish O'hara, a-England Lancelot, and Winstonia Store #00 brush

IMG_0482-1

IMG_0460-1


Here's the tutorial if you would like to recreate them:

Untitled

1.  Apply one coat of red nail polish, or one with holographic shimmer as I have shown.

2.  Grab a sponge and paint a few layers of black, a deep burgundy red, and your base color directly onto the sponge.

3.  Sponge lightly onto the nail.  I had to do this a few times to deepen the black.

4.  Using a peach nail polish, begin the rose near the cuticle of the nail.  I like to start with a centre dot and a half circle sticking out from the side.  Make sure you leave some black area peeking through to give some depth to the rose.

5.  Paint similar petal shapes around the centre.  I like to make some squiggly and pointy edges to create a more realistic shape.

6.  Keep creating petals until the rose is the size you like.  If it helps, you can also see me create the same rose shape in a previous video I made here: Negative Space Rose Nails

7.  Using a red polish (similar to your base color), and a nail art brush, paint directly on top of the peach lines leaving a tiny space at the outer edge of each petal.

8.  Once you have all of the red filled in, wait a few minutes, then add your top coat.   Have fun!


Thank you all for reading!  If you're also doing the challenge, let me know, as I would love to follow along with your posts as well! :)


Kristin


Connect with me:
Instagram  |  Twitter  |  Facebook  |  Pinterest

Follow on Bloglovin


Sunday, April 06, 2014

Nude & Metallic Ikat Nails

Sunday, April 06, 2014
Hello everyone!

The blogger Konad Addict and I recently did the #maniswap tag on Instagram, so I recreated one of her mani’s and she recreated one of mine.  I chose to recreate her ikat nails, and I’m so happy with how they turned out!

IMG_9598--1

I used two coats of Marc Jacobs Nirvana as my base, which is a deep military green jelly that’s just gorgeous.  The nude base on my ring finger is my favorite nude polish ever, Marc Jacobs Funny Girl (two coats).  For the ikat, I added a hint of China Glaze Mingle With Kringle, and Cirque Colors Cerrillos (which you’ll be seeing swatches of soon!).  I didn’t have the same studs that Konad Addict used, so I went with some diamond shaped ones, and I think they look awesome anyways.

IMG_9611--1
China Glaze Mingle With Kringle, Marc Jacobs Funny Girl, Marc Jacobs Nirvana, Cirque Colors Cerrillos

IMG_9575--1

Here’s the #maniswap collage I posted on Instagram:
Untitled


Thank you for reading! :)


Kristin


Connect with me:
Instagram  |  Twitter  |  Facebook  |  Pinterest

Follow on Bloglovin


Tuesday, August 27, 2013

Marc Jacobs Beauty: Oui! - Enamored Hi-Shine Lacquer Swatches & Review

Tuesday, August 27, 2013
I was extremely excited when I first heard about Marc Jacobs Beauty.  I have been a lover of everything Marc Jacobs for years now, so I've been waiting for months for the arrival.  The collection finally launched on August 9th at Sephora, and I was there the same day to purchase the Enamored Lacquers of course.

The first lacquer I will be showing you is Oui!, a stunning metallic magenta that just glows.  It is one of those halfway between pink and purple colors that I always seem to buy because I'm constantly searching for the perfect one, and I am pleased to say that this is it!


The formula is perfect in two coats, without any dragging or issues at all, and I couldn't believe how smooth it was to apply top coat over it.  I thought this polish might have some visible brushstrokes, but they are practically invisible in person (the camera picked them up in a few photos unfortunately).  I'm very impressed overall, but I knew Marc wouldn't let me down!


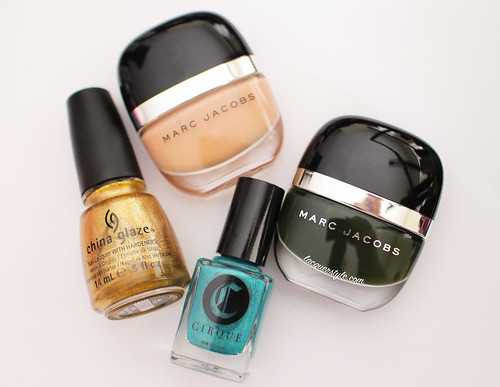
My first MJ Beauty haul:
Lash Lifter Gel Volume Mascara, and lacquers in Blue Velvet, Nirvana, Petra, and Oui!

You can see my reflection in the bottles, they are so beautiful and glossy!


I purchased the Enamored Lacquers at Sephora for $22 CAD each ($18 US).  I actually ended up going back for a few more lacquers, the Genius Gel Super-Charged Foundation, and the Moisture Balm too.  If you want me to review any of those, let me know!  I just can't get enough of Marc Jacobs Beauty!


Thank you for reading! :)


Kristin


Lacquerstyle.com © 2014