I'm excited to share this post with you, for the first prompt of the August #WNAC2015 (Weekly Nail Art Challenge). And yes, I finally have a new tutorial, which you can view at the end of the post! :)
Lacquerstyle.com features unique hand painted nail art (and tutorials on how to achieve them), as well as reviews of the latest nail polish and beauty products. Written by a Certified Nail Artist / Manicurist & Blogger from Toronto, Canada.
Showing posts with label julep. Show all posts
Saturday, August 08, 2015
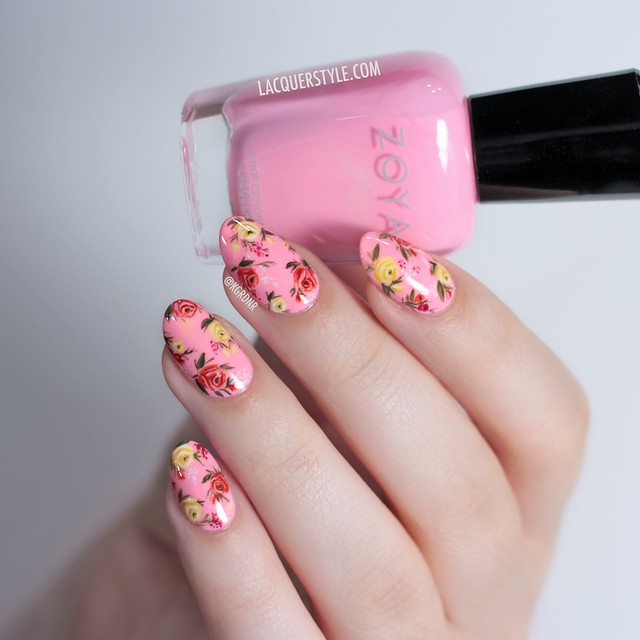
#WNAC2015 - August / Summer: Classic Pink Floral Nails (+ Tutorial!)
Saturday, August 08, 2015
Hello everyone!
Labels:
#wnac2015
,
cult cosmetics
,
essie
,
floral nails
,
florals
,
julep
,
lacc
,
lime crime
,
nail art
,
nail polish
,
opi
,
the body shop
,
zoya
Friday, October 03, 2014
#WNAC2014 - October / Fall: Leaves
Friday, October 03, 2014
Hello everyone!
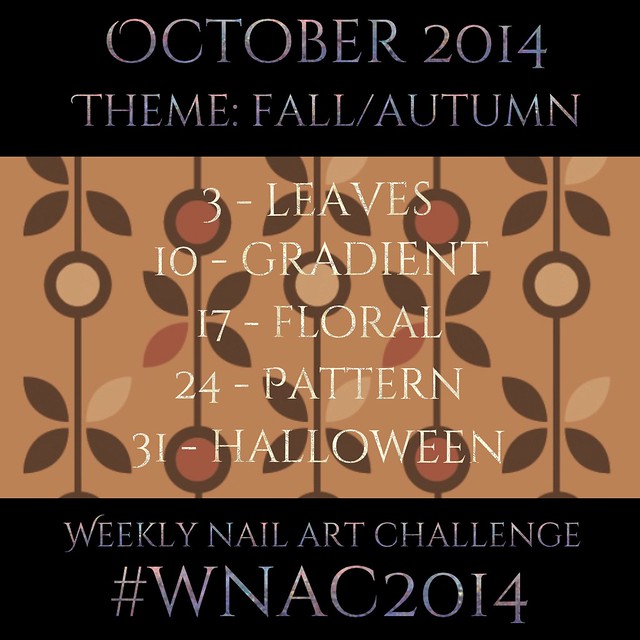
Today is the start of a new nail art challenge, that two fellow artists (@missbellatracey & Simply Nailogical) and I have come up with. It is a weekly nail art challenge, which is much more manageable for me than the daily ones. For October, the theme is of course Fall, and you're all welcome to join us in the challenge if you'd like. You can check out the schedule down below, if you're interested!
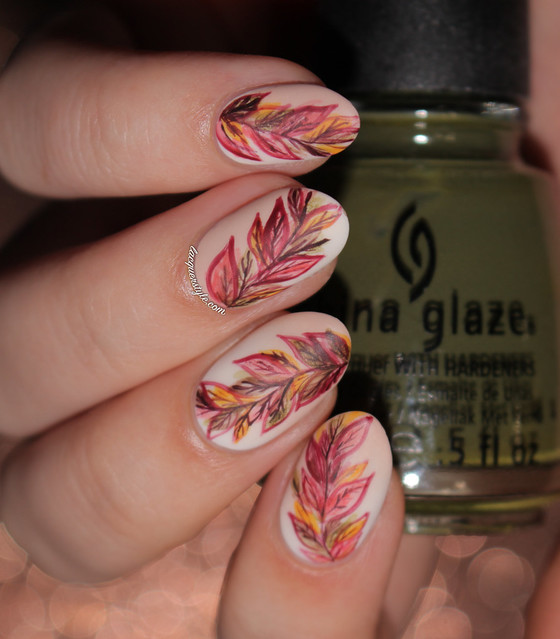
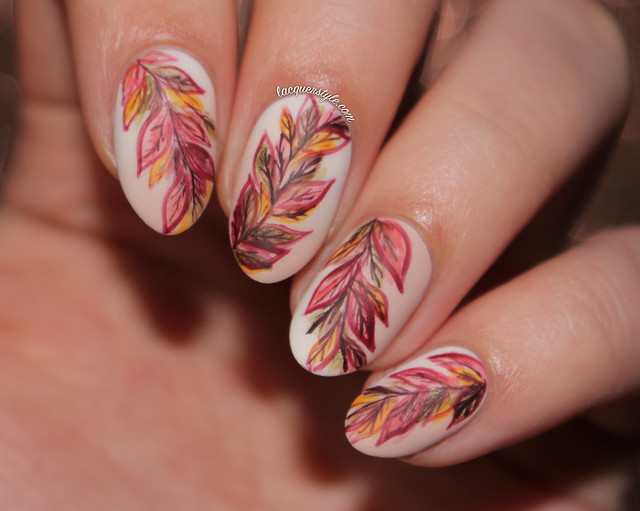
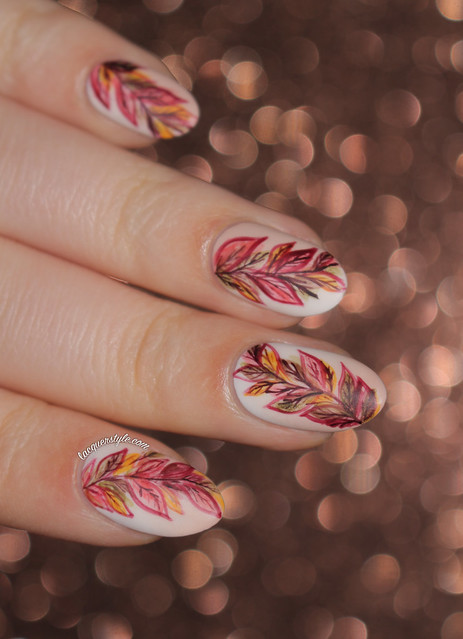
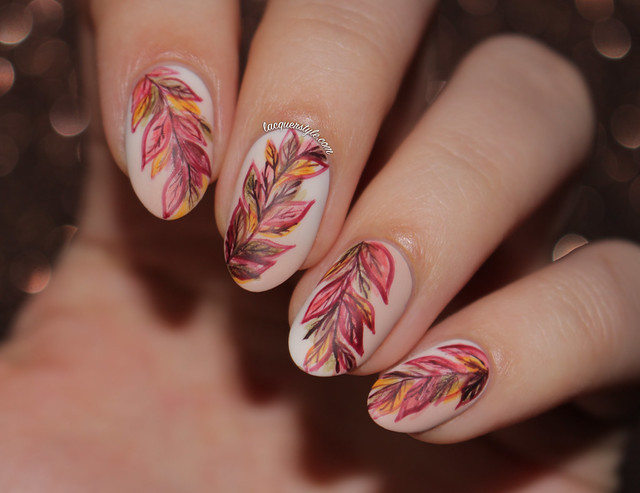
The first day is leaves, so I've created some artsy color changing leaves for today's nail art.
I started with a subtle diagonal gradient using ivory and nude polish (Love & Beauty Ivory and Julep Pippa). Then, with a "watercolor" technique similar to my video here, I created the base of the leaves in several different Fall colors (Square Hue Scorched Summer & Swahili Charm, China Glaze Westside Warrior, Julep Parker and Finger Paints Bauhaus Burgundy), and finally added the leaf details using a England Lancelot and my 18/0 Round brush from Michael's.
The gradient sadly got kind of washed out in the photos, but it was very noticeable in person. I finished the design with JINsoon Matte Maker top coat, which created a really nice effect to the leafy details.
I hope you all will join in with us in the challenge, and if you do, then I can't wait to see what you come up with! I think it's going to be a great month for nail art; there will be new posts for each one (I promise this time!) and you might even get several new videos from me as well, so I'm excited!
Thank you for reading! :)
Kristin
Today is the start of a new nail art challenge, that two fellow artists (@missbellatracey & Simply Nailogical) and I have come up with. It is a weekly nail art challenge, which is much more manageable for me than the daily ones. For October, the theme is of course Fall, and you're all welcome to join us in the challenge if you'd like. You can check out the schedule down below, if you're interested!
The first day is leaves, so I've created some artsy color changing leaves for today's nail art.
I started with a subtle diagonal gradient using ivory and nude polish (Love & Beauty Ivory and Julep Pippa). Then, with a "watercolor" technique similar to my video here, I created the base of the leaves in several different Fall colors (Square Hue Scorched Summer & Swahili Charm, China Glaze Westside Warrior, Julep Parker and Finger Paints Bauhaus Burgundy), and finally added the leaf details using a England Lancelot and my 18/0 Round brush from Michael's.
The gradient sadly got kind of washed out in the photos, but it was very noticeable in person. I finished the design with JINsoon Matte Maker top coat, which created a really nice effect to the leafy details.
Here's the October schedule for the Weekly Nail Art Challenge:
Thank you for reading! :)
Kristin
Labels:
#wnac2014
,
a-england
,
autumn
,
china glaze
,
fall
,
finger paints
,
julep
,
leaves
,
love & beauty
,
nail art
,
nail art challenge
,
nail polish
,
square hue
Tuesday, September 02, 2014
31 Day Challenge 2014 - Day 1: Red
Tuesday, September 02, 2014
Hello everyone!
I won't go into too much detail since you can read the steps below, but I was definitely inspired by all of the Rouge Louboutin inspired mani's I've seen lately, with the gorgeous black and red gradient mimicking the bottle. For my version, I decided it needed a bit of holo of course, so I went with piCture pOlish O'hara as my base. I really love the simplicity and gothic quality about them.
1. Apply one coat of red nail polish, or one with holographic shimmer as I have shown.
2. Grab a sponge and paint a few layers of black, a deep burgundy red, and your base color directly onto the sponge.
3. Sponge lightly onto the nail. I had to do this a few times to deepen the black.
4. Using a peach nail polish, begin the rose near the cuticle of the nail. I like to start with a centre dot and a half circle sticking out from the side. Make sure you leave some black area peeking through to give some depth to the rose.
5. Paint similar petal shapes around the centre. I like to make some squiggly and pointy edges to create a more realistic shape.
6. Keep creating petals until the rose is the size you like. If it helps, you can also see me create the same rose shape in a previous video I made here: Negative Space Rose Nails
7. Using a red polish (similar to your base color), and a nail art brush, paint directly on top of the peach lines leaving a tiny space at the outer edge of each petal.
8. Once you have all of the red filled in, wait a few minutes, then add your top coat. Have fun!
Thank you all for reading! If you're also doing the challenge, let me know, as I would love to follow along with your posts as well! :)
Kristin
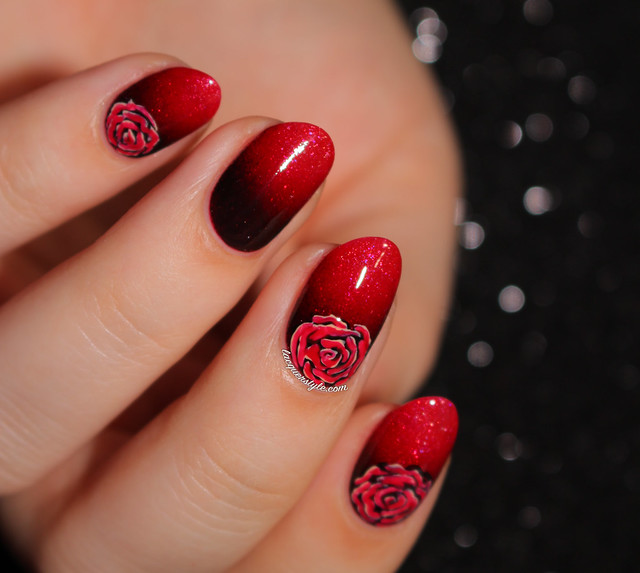
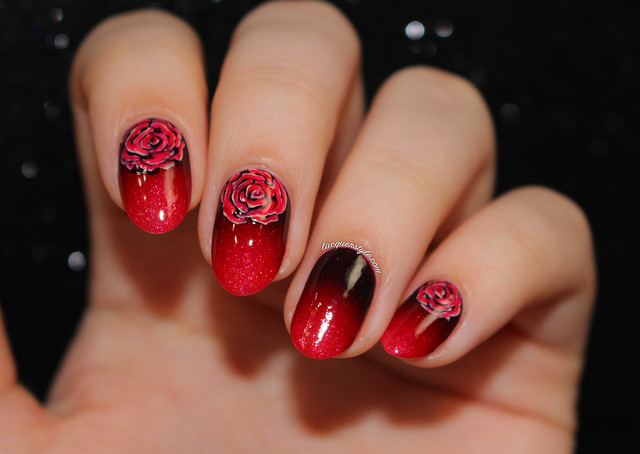
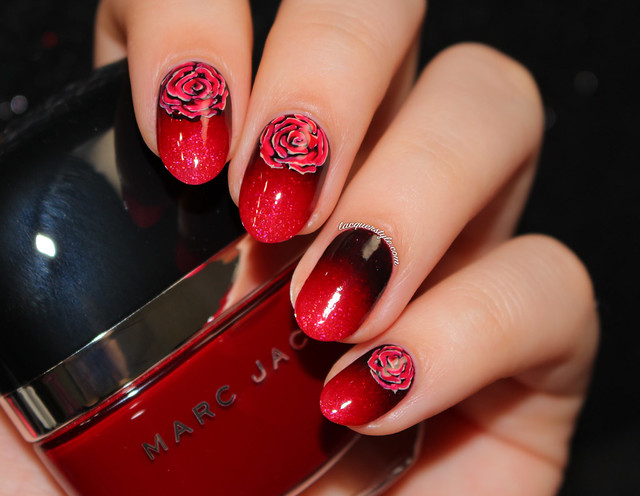
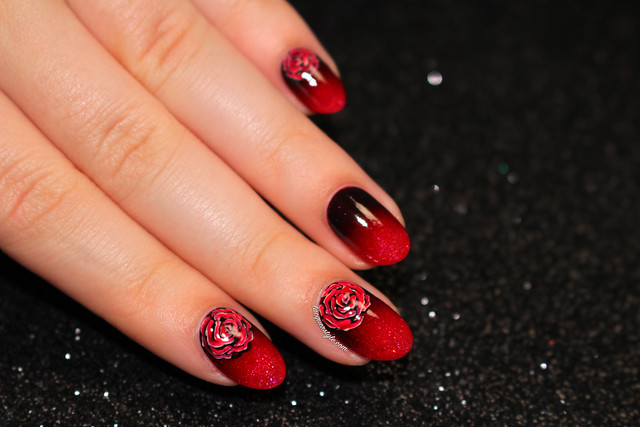
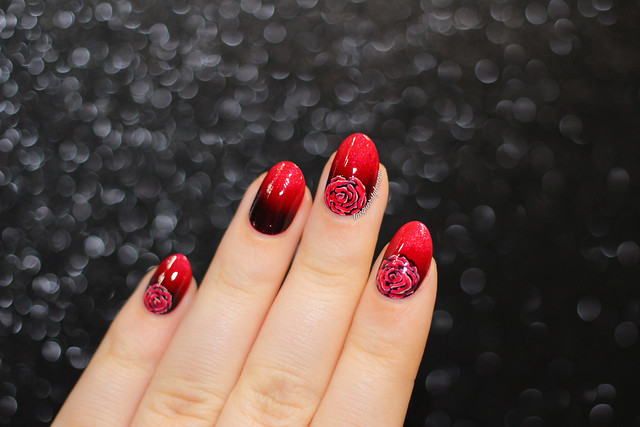
I have decided to try to attempt the 31 Day Challenge again this year (and try to actually complete it this time). I'm hoping that it will keep me posting more on my blog, since I've been really slacking for a while now. I think that it helps to have a theme for some inspiration as well. Today was the first day, so I created some gradient rose nails for the red theme. I created a quick photo tutorial as well, which you can view down below!
I won't go into too much detail since you can read the steps below, but I was definitely inspired by all of the Rouge Louboutin inspired mani's I've seen lately, with the gorgeous black and red gradient mimicking the bottle. For my version, I decided it needed a bit of holo of course, so I went with piCture pOlish O'hara as my base. I really love the simplicity and gothic quality about them.
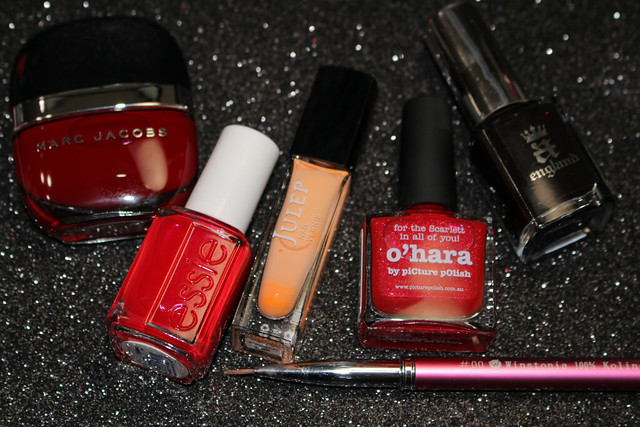
Marc Jacobs Jezebel, Essie Trombone, Julep Hayden, piCture pOlish O'hara, a-England Lancelot, and Winstonia Store #00 brush
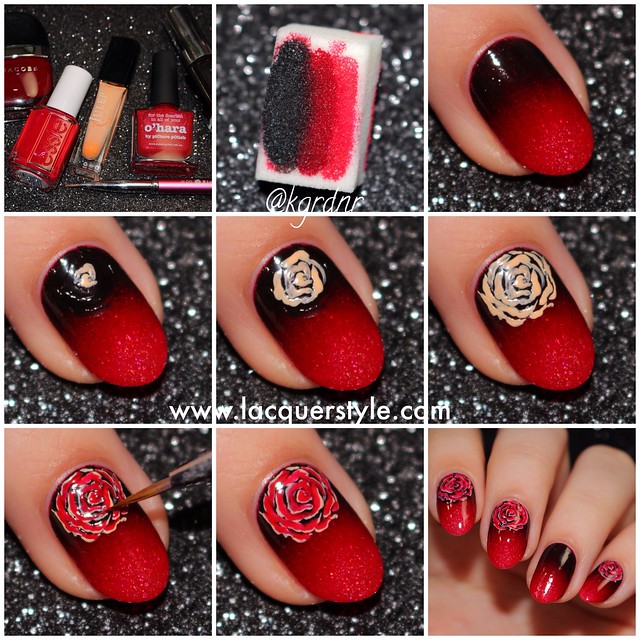
Here's the tutorial if you would like to recreate them:
1. Apply one coat of red nail polish, or one with holographic shimmer as I have shown.
2. Grab a sponge and paint a few layers of black, a deep burgundy red, and your base color directly onto the sponge.
3. Sponge lightly onto the nail. I had to do this a few times to deepen the black.
4. Using a peach nail polish, begin the rose near the cuticle of the nail. I like to start with a centre dot and a half circle sticking out from the side. Make sure you leave some black area peeking through to give some depth to the rose.
5. Paint similar petal shapes around the centre. I like to make some squiggly and pointy edges to create a more realistic shape.
6. Keep creating petals until the rose is the size you like. If it helps, you can also see me create the same rose shape in a previous video I made here: Negative Space Rose Nails
7. Using a red polish (similar to your base color), and a nail art brush, paint directly on top of the peach lines leaving a tiny space at the outer edge of each petal.
8. Once you have all of the red filled in, wait a few minutes, then add your top coat. Have fun!
Thank you all for reading! If you're also doing the challenge, let me know, as I would love to follow along with your posts as well! :)
Kristin
Tuesday, July 01, 2014
Simple, Realistic Galaxy Nails + Tutorial, featuring JINsoon Obsidian
Tuesday, July 01, 2014
Hello everyone!
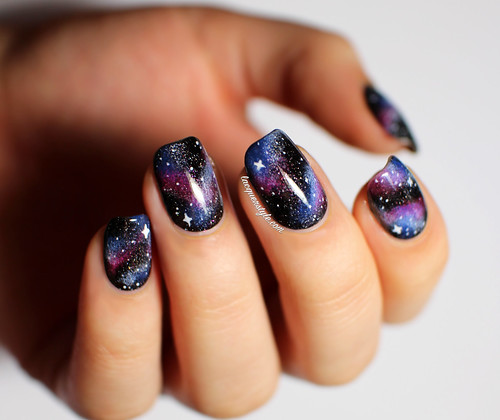
I've taken a little break from blogging lately, as you may have noticed, but I've still been posting quite often over on Instagram. Last week, I posted an updated version of my galaxy nails, and they got a really great response. I was so happy about how well they were received, because they are definitely the most simple, but also most realistic version I've created so far, I think!
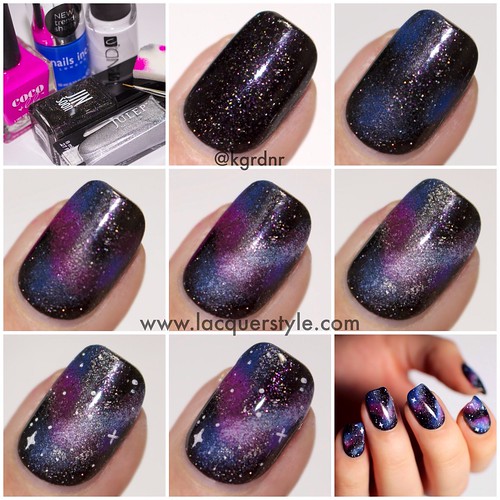
When I created this version a few months ago, I also made a photo tutorial to share with all of you, so you can view it at the end of the post.
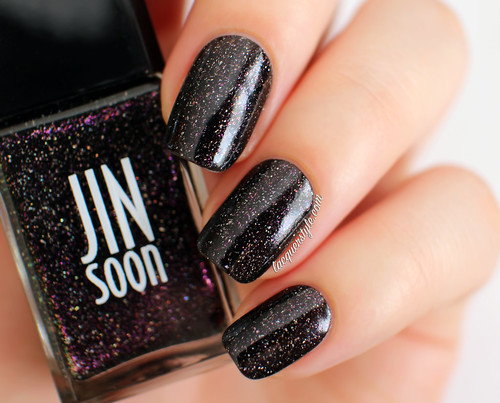
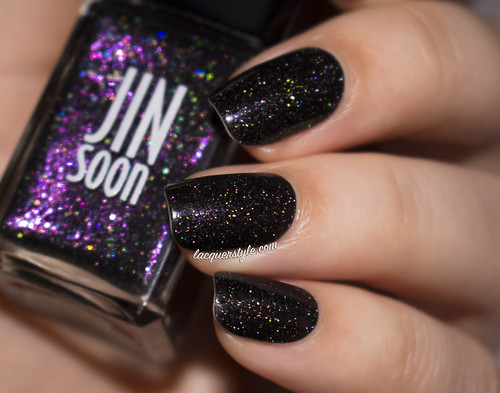
The one major difference between this version and my previous ones, is that I let my base do all the work. I used two coats of the incredible JINsoon Obsidian, which is a black base filled with holographic flecks and bright purple shimmer.
I've taken a little break from blogging lately, as you may have noticed, but I've still been posting quite often over on Instagram. Last week, I posted an updated version of my galaxy nails, and they got a really great response. I was so happy about how well they were received, because they are definitely the most simple, but also most realistic version I've created so far, I think!
When I created this version a few months ago, I also made a photo tutorial to share with all of you, so you can view it at the end of the post.
The one major difference between this version and my previous ones, is that I let my base do all the work. I used two coats of the incredible JINsoon Obsidian, which is a black base filled with holographic flecks and bright purple shimmer.
In natural daylight (above) the purple shimmer is very visible, then, in the sun, or once you switch on some bright lights (or with flash, as shown below), the beautiful holographic shimmer sparkles. It's amazing, but not totally in your face like some holos can be (although that is not a bad thing!). I wore this on my nails for several days, before adding the galaxy on top, so there is the slightest tip wear in the photos.
To create the galaxy, I used the technique shown below in my tutorial. Of course I am only showing one nail, but definitely try to have fun with different placement and colors to create the feel of movement on the nails. I think that is the best way to create a more realistic design!
Now, onto the tutorial!
(click for full size)
1. Gather your supplies and prep your nails with a base coat. You will need a cosmetic sponge, a nail art brush (or dotting tool), a black or navy with holographic shimmer, two bright or neon colors, a white (I prefer a semi-sheer one), and a holographic silver polish (optional).
2. Paint one or two coats of your base color. I used JINsoon Obsidian, which is this amazing black base filled with holographic flecks, and bright purple shimmer. Zoya Storm could be a good alternative, or just a black creme with a holographic shimmer top coat (like inm Northern Lights) could be an option as well.
3. Sponge on a cobalt blue in a few spots on the nails. I used Nails Inc. Baker Street, one of my favorite blue polishes.
4. Sponge on a neon pink overlapping some of the blue polish. I used Coco & Lulu Ma Belle, an amazing fuchsia neon polish.
5. Lightly sponge on a bit of white polish over the other two colors. I used CND Brilliant White. I've realized, looking at a bunch of actual galaxy photos, that the white should be used more sparingly. And, it almost gives a 3D effect to the other colors.
6. Lightly sponge on a silver holographic polish to the edges of the white polish. I used Julep Rebel, which has a pretty subtle holographic effect. This gives such a great sort of misty effect, and of course a little added sparkle.
7. With a nail art brush or dotting tool, add a few tiny white dots and "stars". For the bigger stars, I always just create a + and then fill in the inner corners slightly.
8. Finish with a shiny or matte top coat, and enjoy! :)
If you have any questions, feel free to leave them down below. And, if you need any other tips for galaxy nails, or would rather watch a video, I have a few tutorials on YouTube here:
Thank you all for reading! :)
Kristin
Labels:
coco & lulu
,
galaxy nails
,
holographic
,
jin soon
,
julep
,
nail art
,
nail polish
,
nails inc.
,
neon
,
pictorial
,
tutorial
Saturday, March 29, 2014
Katy Perry (Brit Awards 2014) Neon Tribal Nails + Tutorial
Saturday, March 29, 2014
Hi everyone!
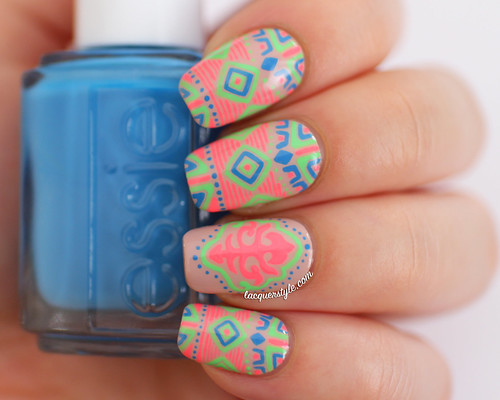
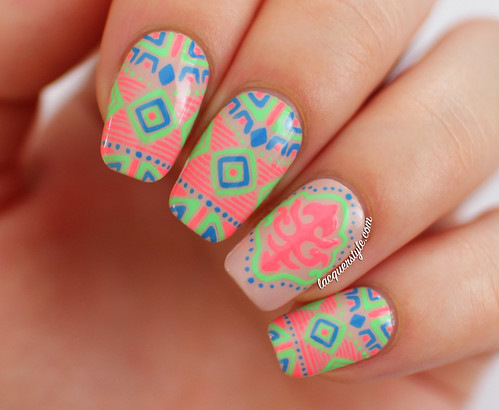
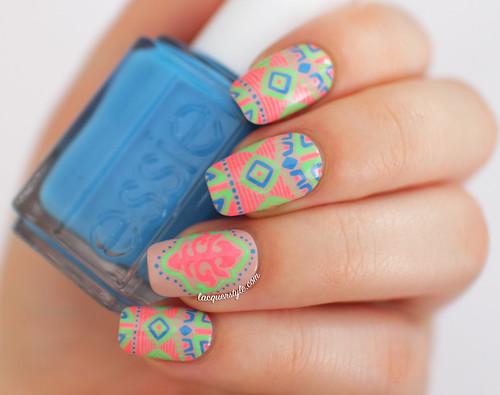
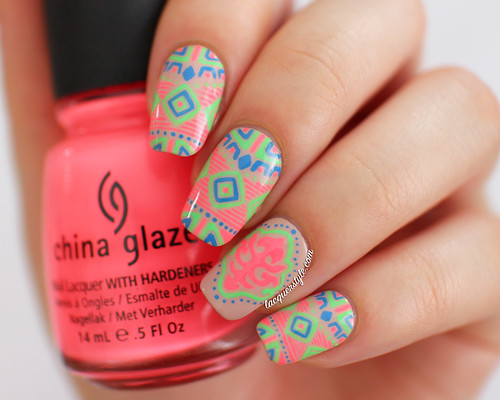
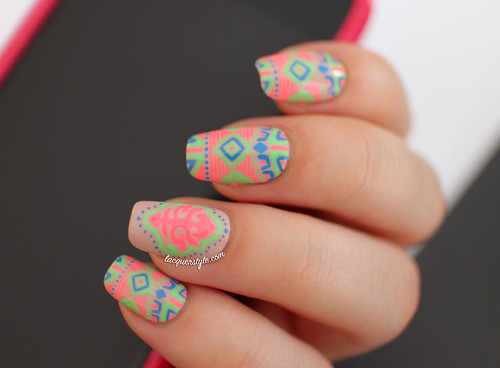
Today, I am finally showing you my most recent nail art, which was inspired by Katy Perry’s outfit from her Dark Horse performance at the 2014 Brit Awards. As soon as I saw the photos a few weeks ago, I’ve been dying to recreate a similar pattern on my nails. I also filmed it, so you can view the tutorial at the end of the post.


Today, I am finally showing you my most recent nail art, which was inspired by Katy Perry’s outfit from her Dark Horse performance at the 2014 Brit Awards. As soon as I saw the photos a few weeks ago, I’ve been dying to recreate a similar pattern on my nails. I also filmed it, so you can view the tutorial at the end of the post.

I fell in love with this color combination, and immediately knew that I had to use China Glaze Flip Flop Fantasy for the majority of the design, along with Color Club Twiggie. I had a hard time choosing the blue since I don’t have many “neon” blues, so I settled on Essie’s Avenue Maintain, and I am happy with how it looks. The base is one of my favorite, new (to me) nudes, Julep Pippa.


These did take quite a long time to paint, even longer than my Vintage Floral Nails, which is a bit crazy, I know. I also used the same brush to paint these, and I write more in depth about it in that post, if you would like more info. The accent nail came from a similiar shape on her sleeve / chest, if you’re all wondering, and I’m really happy with how it turned out.
I also posted this photo on Instagram last week, next to my inspiration:
And finally, here is the video:
Enjoy!
Thank you for reading! :)
Kristin
Labels:
china glaze
,
color club
,
essie
,
julep
,
nail art
,
nail polish
,
neon
,
tribal
Monday, January 06, 2014
White Negative Space Mix & Match Nails
Monday, January 06, 2014
Hello everyone!
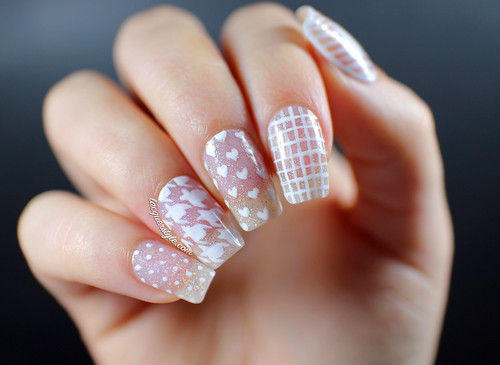
I created some black and white negative space nail art on my thumbs last week (which I never ended up posting), and I loved them so much that I was inspired to create some more negative space nails.
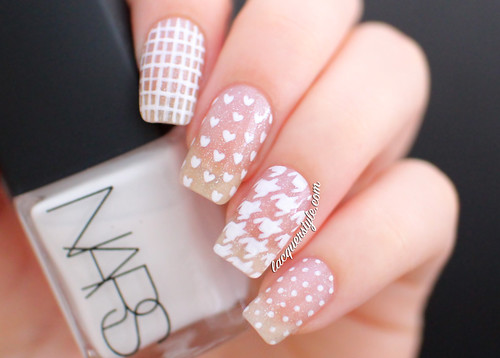
This time, I decided to keep them all white, and I am really happy with how they turned out. :)
For the base, I used one coat of Julep Gwyneth (a sheer pink) and one coat of Nicole by OPI Imagine If… (a fine holographic flake shimmer in a clear base). Then, I used one of my favorite white polishes for nail art, Nars Ecume, and a 5/0 brush from Michael’s to create each pattern.
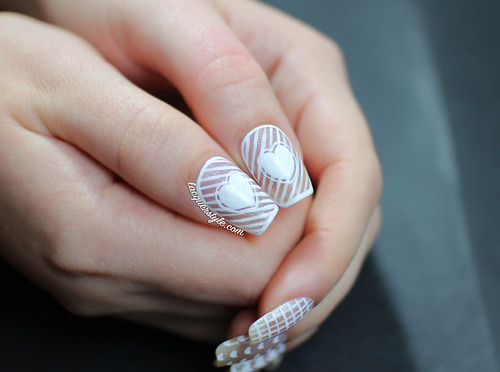
I painted a simple grid on my index nail, hearts on my middle nail, and tiny polka dots on my pinky. On my ring finger, which turned out to be my favorite nail, I painted a houndstooth print; I’ve tried houndstooth once before and it wasn’t exactly right, but I’m really proud of it this time.
I’ve been wearing these nails for several days now, so I thought I would take a few photos of both hands as well!
I hope you all enjoy these as much as I do, and thank you for reading! :)
Kristin
I created some black and white negative space nail art on my thumbs last week (which I never ended up posting), and I loved them so much that I was inspired to create some more negative space nails.
This time, I decided to keep them all white, and I am really happy with how they turned out. :)
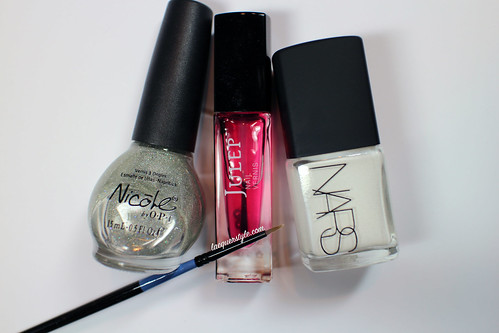
For the base, I used one coat of Julep Gwyneth (a sheer pink) and one coat of Nicole by OPI Imagine If… (a fine holographic flake shimmer in a clear base). Then, I used one of my favorite white polishes for nail art, Nars Ecume, and a 5/0 brush from Michael’s to create each pattern.
Nicole by OPI Imagine If…, Julep Gwyneth, Nars Ecume, 5/0 brush from Michael’s
I’ve been wearing these nails for several days now, so I thought I would take a few photos of both hands as well!
Kristin
Tuesday, December 17, 2013
Glamorous Mix & Match Nails + Tutorial
Tuesday, December 17, 2013
Hello!
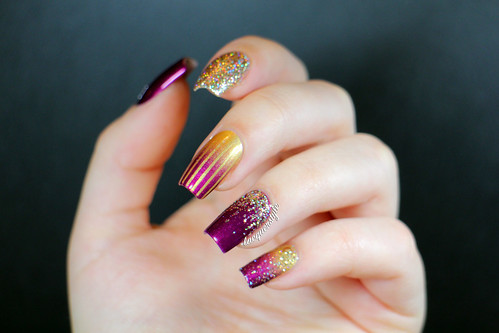
I posted these nails two weeks ago on Instagram, and I was surprised at the amazing response they received! Originally, I wasn’t even going to post them anywhere, but I’ve had a few requests, so I decided to finally share them on my blog. You can view the tutorial down below! :)

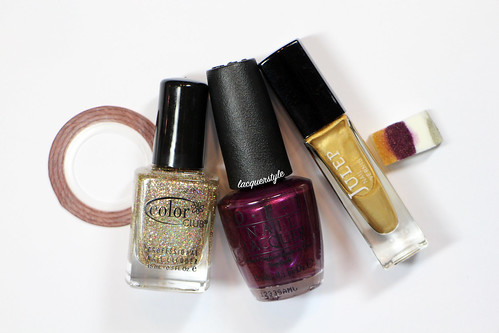
Color Club Gingerbread, OPI Diva of Geneva, Julep Felicity
View the tutorial:
View the tutorial:
Enjoy!
Please let me know if you have any other questions or requests, I would love to answer them!
Thank you for reading! :)
Labels:
color club
,
glam
,
glamorous
,
gold
,
julep
,
mix & match
,
nail art
,
nail polish
,
opi
,
tutorial
,
youtube
Friday, September 06, 2013
31 Day Challenge - Day 5: Blue Nails
Friday, September 06, 2013
Blue is one of my favorite colors to wear on my nails. I had quite a few ideas for this theme, but for Day 5 of the 31 Day Challenge (#31DC2013) I decided to go with a simple glitter gradient.
Once again, I'm using polishes that I have never worn before, so this time I have chosen GOSH Attitude (a gorgeous navy jelly), and Bourjois Bleu Fabuleux (an amazing, bright blue that leans a bit periwinkle). I cannot believe I waited this long to use these polishes.
I also thought I would never get any use out of the Julep glitter pots I received in a mystery box several months ago, but surprisingly I've been using them a lot lately and love them. That is what I used for the gradient, and also what I have on my accent nail over one coat of Bleu Fabuleux. They were made for each other!
I hope you have been enjoying these posts. I know I've been a day late for most of them, but hopefully I can get on track soon!
Thank you for reading! :)
Kristin
Sunday, September 01, 2013
Vintage Newspaper Nails & An Apple Nail Art Tutorial!
Sunday, September 01, 2013
A subscriber on YouTube requested to see some "Back to School" nails, and even though I don't attend school anymore, I thought this would be a fun design to attempt!
The first thing that came into my mind was an apple, but I didn't want to just create some simple apple nails, so I went with the apple on my thumb as an accent nail.
For the remaining nails, I created some newspaper nails. I have always wanted to try this technique, but I never have any alcohol in my house, so I ended up using plain tap water after doing some research. As always, I like to give a simple technique a bit of a twist, so I gave my nails a vintage look. I'm really happy with how they turned out, and I have been wearing them all week long!
And finally, here is the video to get this look:
The first thing that came into my mind was an apple, but I didn't want to just create some simple apple nails, so I went with the apple on my thumb as an accent nail.
Colors used: Cult Nails Tempest, Ciate Cream Soda, Dior Gris Montaigne, Zoya Maura
And finally, here is the video to get this look:
Hope you all like it!
Thank you for reading! :)
Kristin
Labels:
a-england
,
apple
,
back to school
,
ciate
,
cream soda
,
cult nails
,
dior
,
glitter
,
gris montaigne
,
julep
,
lancelot
,
maura
,
nail art
,
nail polish
,
newspaper
,
newspaper nails
,
out the door
,
tempest
,
zoya