Showing posts with label essie. Show all posts

Saturday, August 08, 2015

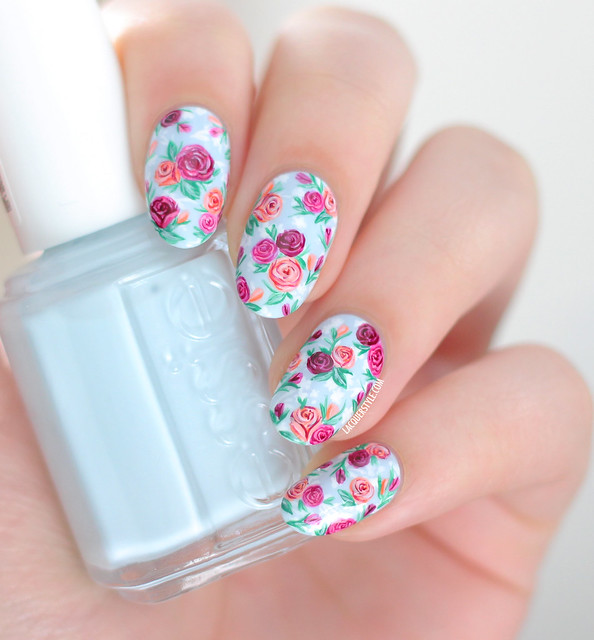
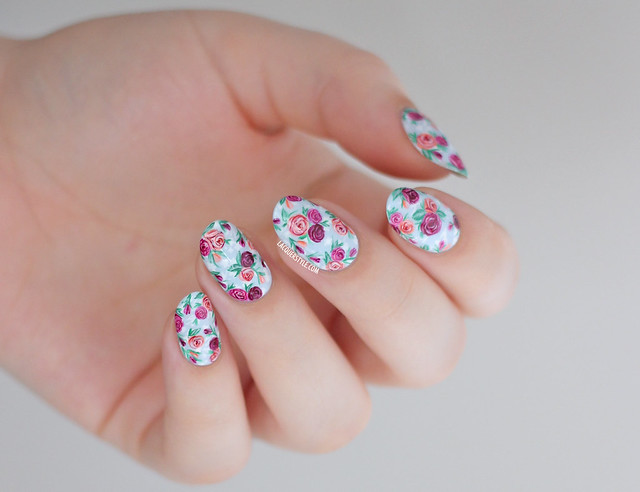
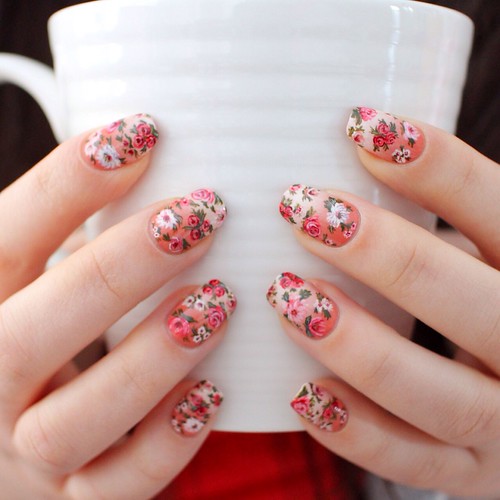
#WNAC2015 - August / Summer: Classic Pink Floral Nails (+ Tutorial!)

Saturday, August 08, 2015
Hello everyone!

I'm excited to share this post with you, for the first prompt of the August #WNAC2015 (Weekly Nail Art Challenge).  And yes, I finally have a new tutorial, which you can view at the end of the post! :)

IMG_8241-2

Wednesday, July 29, 2015

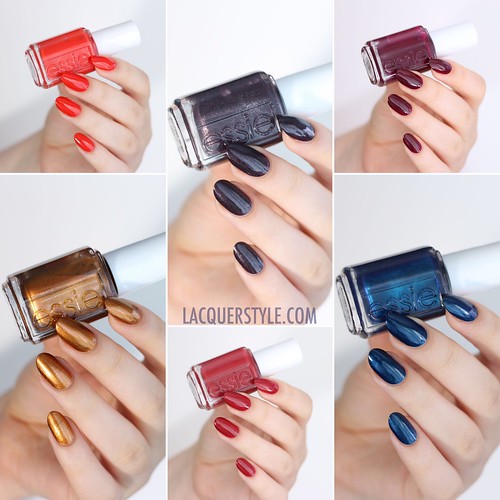
Essie Leggy Legend Fall 2015 Collection - Swatches & Review

Wednesday, July 29, 2015
Hi everyone!

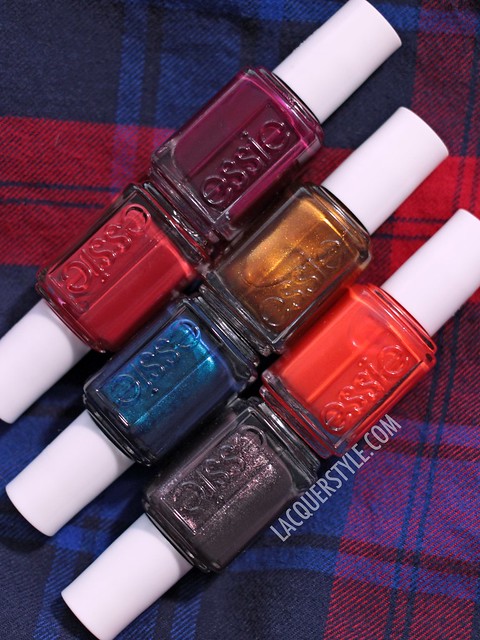
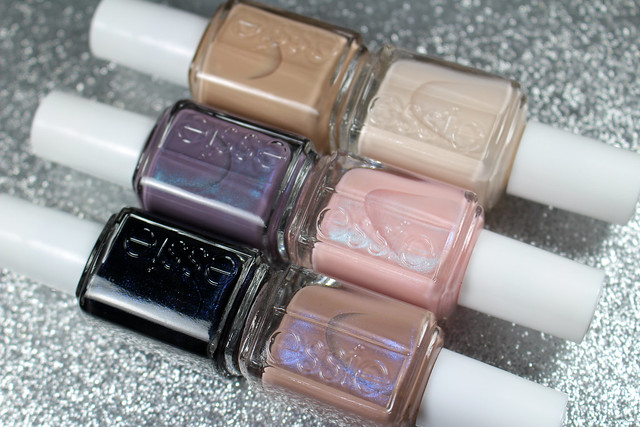
I have the first Fall collection to share with you all today!  It's the new Leggy Legend Fall 2015 Collection by Essie.

I randomly saw this collection pop up online the other day, so I ordered them immediately as I haven't seen them anywhere else yet.  I'm a huge fan of Essie, but even more so a fan of the Fall / Winter collections, which are always pretty exciting, I think!  I can't wait to share these with you, and I hope you all enjoy the swatches!

Essie Leggy Legend Fall 2015 Collection Swatches

Essie Leggy Legend Fall 2015 Collection

Tuesday, April 28, 2015

#WNAC2015 - April / Pastel: Spring Floral Nails

Tuesday, April 28, 2015
Hi everyone!

I have the last design that I created for the Weekly Nail Art Challenge (#WNAC2015) to share with you all today.

The theme for the month was Pastel, and so perfect for Spring of course!  If you missed the first three posts (Simple, Ikat, & Chevron), you can view them here, here, & here.  And, you can find the challenge photo for May at the bottom of the post, if you're interested (hint: neons!)!

IMG_8308--

IMG_8256--1

For the final prompt, Floral, I really wanted to create a new [intense] floral print like some I've done in the past (remember those Gradient Floral Nails (+ Tutorial)?), but of course it always has to be a bit unique ...

Monday, April 27, 2015

#WNAC2015 - April / Pastel: Chevron Floral Nails

Monday, April 27, 2015
Hi everyone!

Hope you all had a great weekend.  I'm catching up on my last two #WNAC2015 posts for April, so you'll see two today, and they're both floral related!

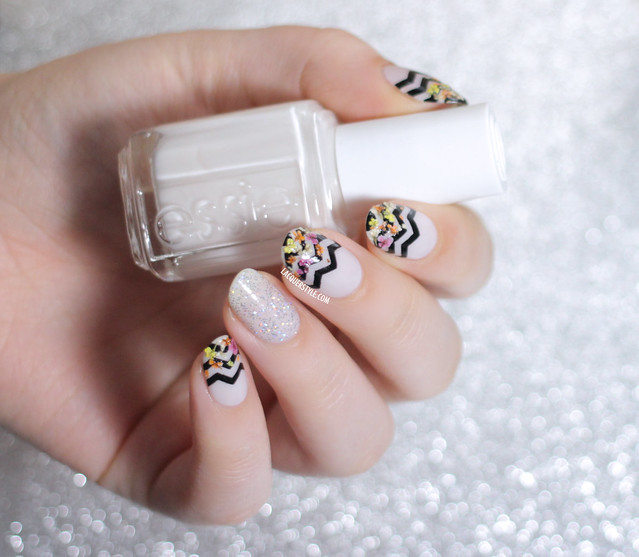
For the Chevron prompt, I found this amazing pattern on Pinterest which combined chevron and florals, so I couldn't resist creating it on my nails.

IMG_6549--

Friday, April 03, 2015

#WNAC2015 - April / Pastel: Simple Outlined Nails

Friday, April 03, 2015
Hi everyone!

Today was the first post of our Weekly Nail Art Challenge (#WNAC2015) for April.  The overall theme is pastel, and our first prompt is “simple”.

IMG_5224-

Saturday, February 28, 2015

Spring "Watercolor" Florals featuring Polished by KPT Roses for Juliet + Tutorial

Saturday, February 28, 2015
Hi everyone!

If you haven't seen my swatches of the Basic Series Thermals by Polished by KPT, which will be restocked tomorrow (March 1st), you can view the post here: Polished by KPT Basic Series Thermals & Nail Care

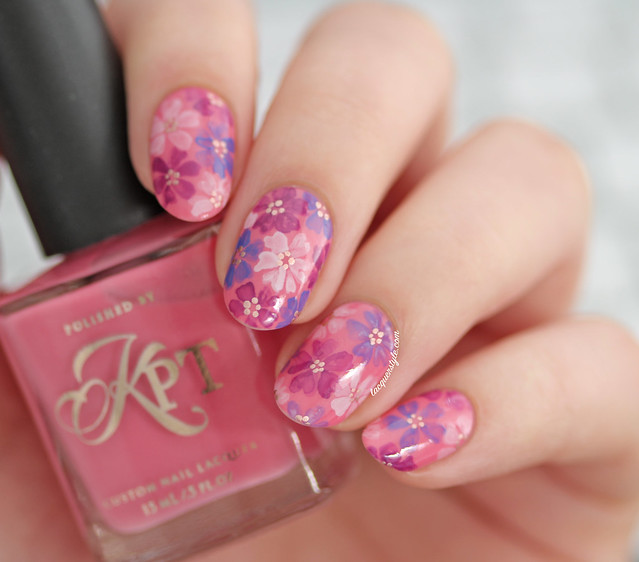
After swatching Roses for Juliet, I knew I wanted to create some sort of floral nail art to go on top.  The pink is so girly and Spring-ish, so I knew it would be the perfect compliment.  I thought it would also be cool to paint the flowers in a "watercolor" style using nail polish, so that when the base transitions to a different color the flowers would look slightly different too.

IMG_7778-

I wont write too much about it here, because I filmed a tutorial for the design and added my first voiceover for the instructions as well.  If you have any other questions though, feel free to leave them in the comments below. :)

Tuesday, December 30, 2014

Essie 2015 Cashmere Matte Collection - Swatches & Review

Tuesday, December 30, 2014
Hi everyone!

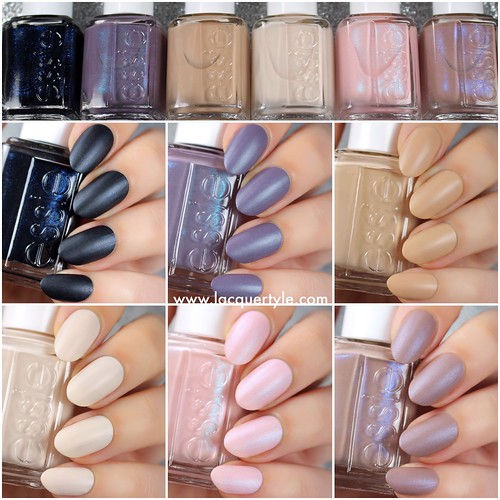
Today, I'm very excited to share swatches of the new Cashmere Matte Collection from Essie with all of you.  I was so shocked when they showed up at my house unexpectedly, but ecstatic, of course.  Essie has always been one of my favorite brands, in fact it probably started my whole love of nail polish to begin with.  

The Cashmere Matte Collection consists of six gorgeous neutrals with a satin-matte finish.  Four of them have an intense duochrome shimmer, which is very noticeable on the nail in both matte and shiny finishes.

Untitled

IMG_9599-

Sunday, December 28, 2014

#WNAC2014 - December / Sparkle: Roundup

Sunday, December 28, 2014
Hi everyone! I hope you're all having or had lovely holidays!

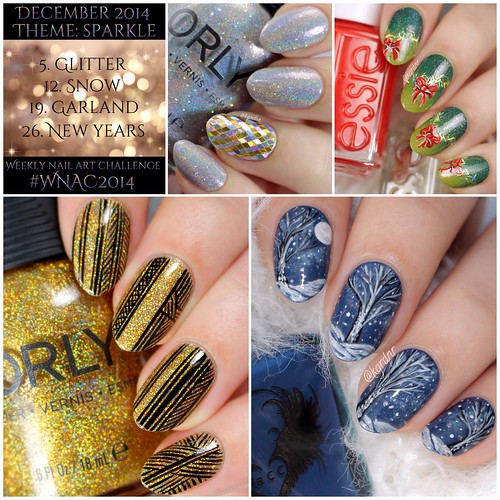
We're nearing the end of December, and our Weekly Nail Art Challenge for the month was sparkle themed - so perfect for the holidays!  Here's a quick roundup of all of the nail art I've been posting on Instagram, after the jump.

  #WNAC2014 - December / Sparkle

Tuesday, September 02, 2014

31 Day Challenge 2014 - Day 1: Red

Tuesday, September 02, 2014
Hello everyone!

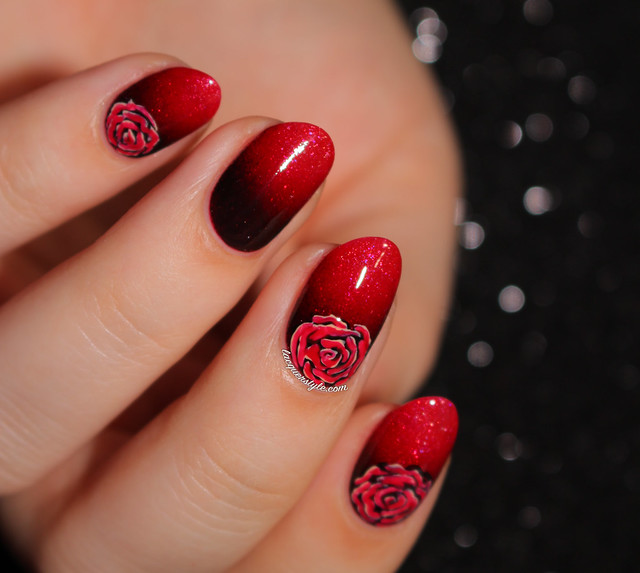
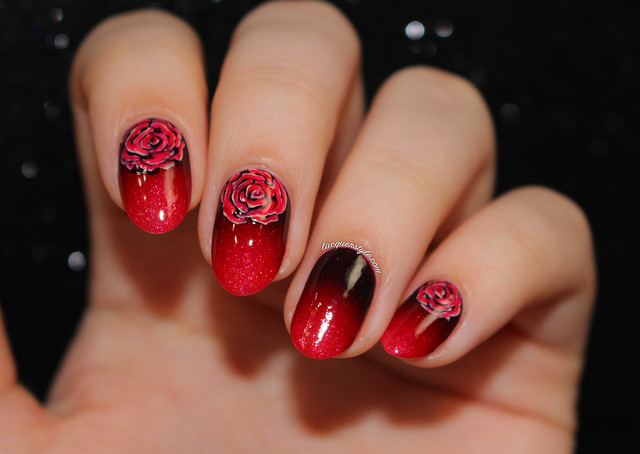
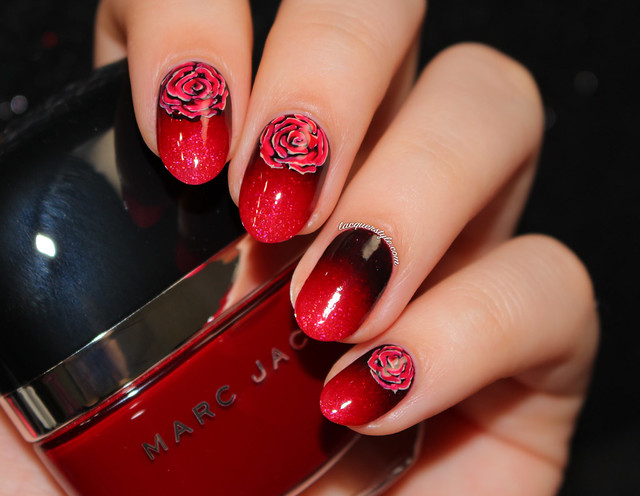
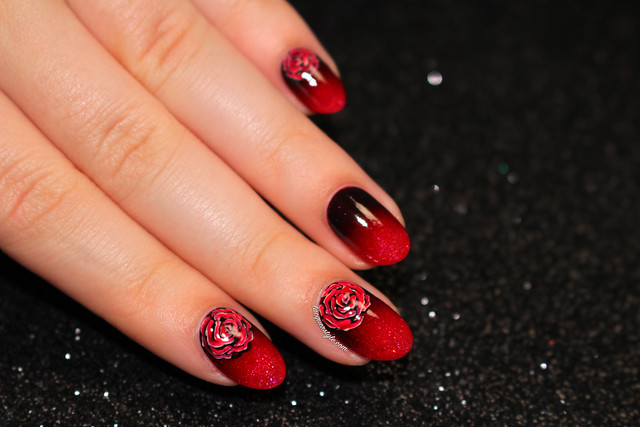
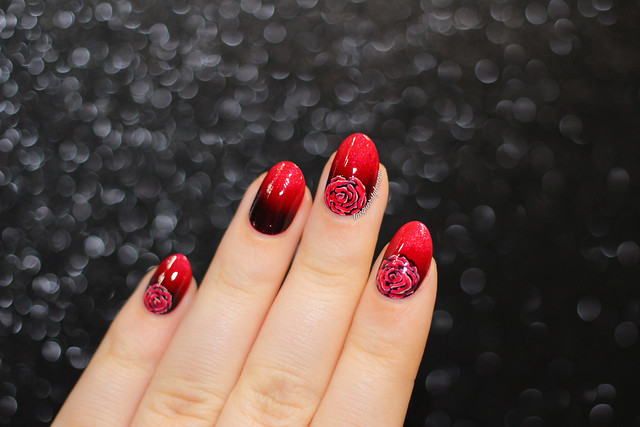
I have decided to try to attempt the 31 Day Challenge again this year (and try to actually complete it this time).  I'm hoping that it will keep me posting more on my blog, since I've been really slacking for a while now.  I think that it helps to have a theme for some inspiration as well.  Today was the first day, so I created some gradient rose nails for the red theme.  I created a quick photo tutorial as well, which you can view down below!

IMG_0501-1

IMG_0463-1

I won't go into too much detail since you can read the steps below, but I was definitely inspired by all of the Rouge Louboutin inspired mani's I've seen lately, with the gorgeous black and red gradient mimicking the bottle.  For my version, I decided it needed a bit of holo of course, so I went with piCture pOlish O'hara as my base.  I really love the simplicity and gothic quality about them.

IMG_0471-1

IMG_0476-
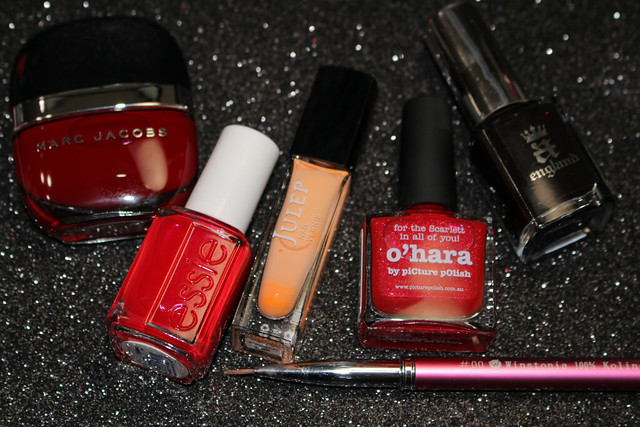
Marc Jacobs Jezebel, Essie Trombone, Julep Hayden, piCture pOlish O'hara, a-England Lancelot, and Winstonia Store #00 brush

IMG_0482-1

IMG_0460-1


Here's the tutorial if you would like to recreate them:

Untitled

1.  Apply one coat of red nail polish, or one with holographic shimmer as I have shown.

2.  Grab a sponge and paint a few layers of black, a deep burgundy red, and your base color directly onto the sponge.

3.  Sponge lightly onto the nail.  I had to do this a few times to deepen the black.

4.  Using a peach nail polish, begin the rose near the cuticle of the nail.  I like to start with a centre dot and a half circle sticking out from the side.  Make sure you leave some black area peeking through to give some depth to the rose.

5.  Paint similar petal shapes around the centre.  I like to make some squiggly and pointy edges to create a more realistic shape.

6.  Keep creating petals until the rose is the size you like.  If it helps, you can also see me create the same rose shape in a previous video I made here: Negative Space Rose Nails

7.  Using a red polish (similar to your base color), and a nail art brush, paint directly on top of the peach lines leaving a tiny space at the outer edge of each petal.

8.  Once you have all of the red filled in, wait a few minutes, then add your top coat.   Have fun!


Thank you all for reading!  If you're also doing the challenge, let me know, as I would love to follow along with your posts as well! :)


Kristin


Connect with me:
Instagram  |  Twitter  |  Facebook  |  Pinterest

Follow on Bloglovin


Saturday, August 09, 2014

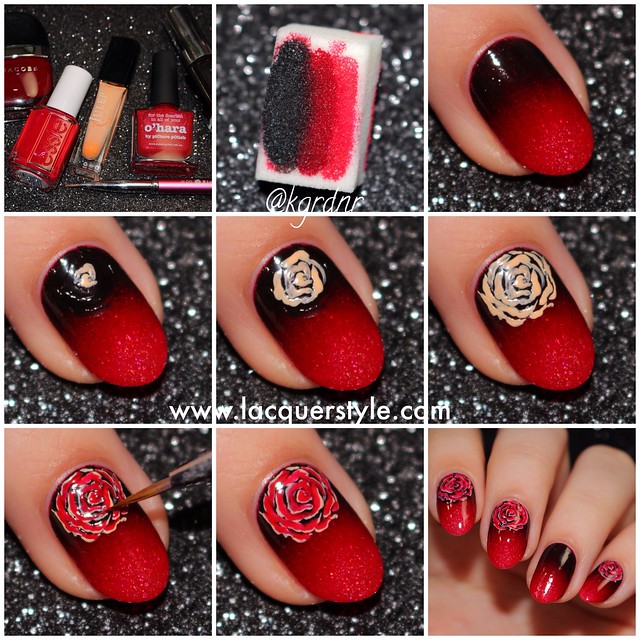
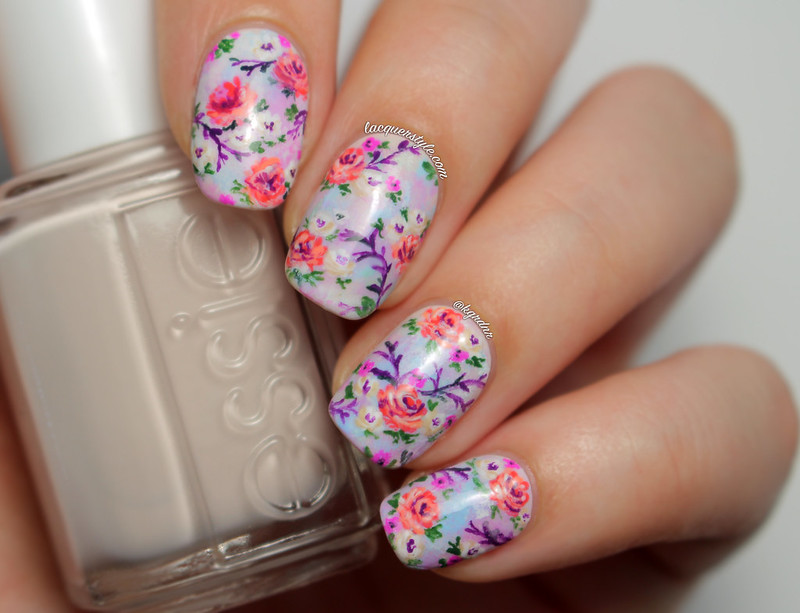
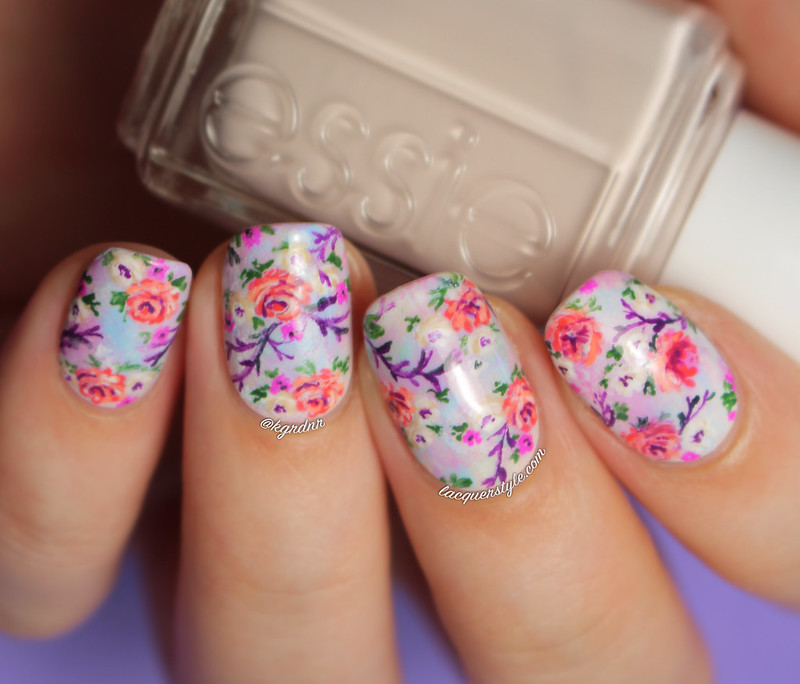
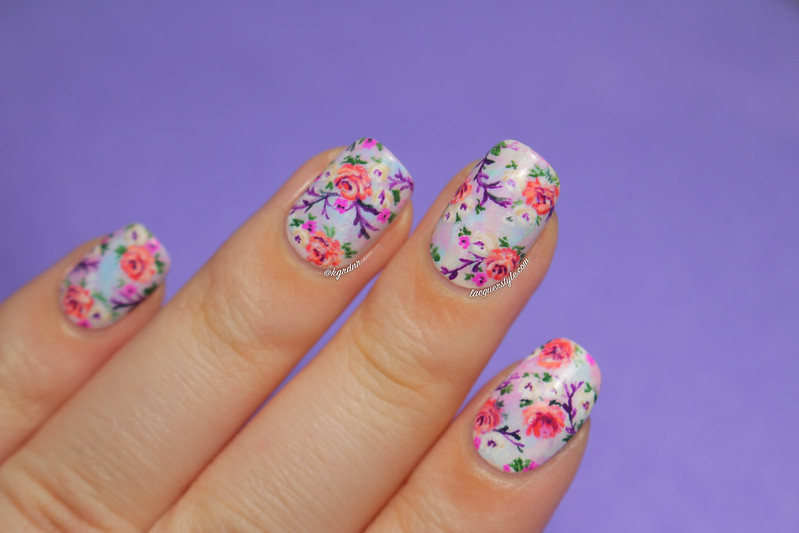
Summer Pastel Floral Nails

Saturday, August 09, 2014
Hello everyone!

This post is going up at a pretty random time, but I'll explain the reason down below.  Anyways, I thought I would point a few things out first, one being that you may notice a change in appearance on the blog.  This past week, I've been completely re-designing it, and I've basically started from scratch doing all the coding myself.  It's not 100% complete, so you might notice a few more changes as the week goes on, but I'm pretty happy with the way it's going so far.  Let me know what you all think though!  Any ideas for a header??

Now onto what I'm really here to show you all today.  I created a new set of floral nails after seeing this really beautiful photo in my google searches.  It was a really lovely floral print in mostly pastels, but has several pops of brighter colors.  It has a sort of romantic, watercolor look to the photo with an amazing multicolored background, so that really spoke to me.  I just loved the combination so much, that I had to recreate them for the Nail Polish Canada Summer 2014 Nail Art Challenge.

IMG_7314-2

IMG_7313-2

Of course, the theme is "Summer", and for me, I just love to wear floral prints in the Spring and Summer, so I thought they would be perfect for the challenge.  I only have a few hours left to submit them, so that's why this post is going up this late!

IMG_7301-1

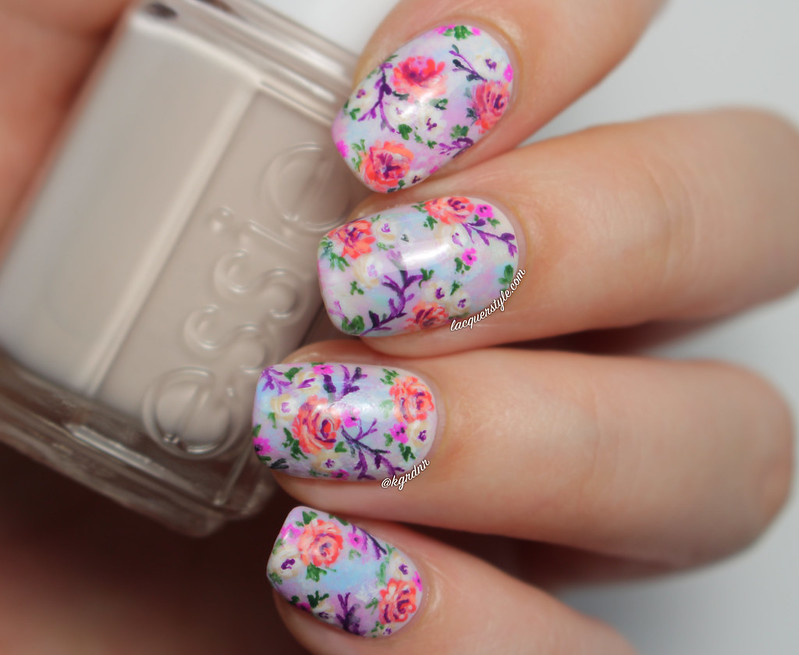
I used several different polishes for the design, mostly pastels by Essie, including the gorgeous Urban Jungle as my base (pictured), and Fashion Underground, Under Where?, Blanc, and Tart Deco are in there somewhere too.  I might update with a full list later, but if you would like to know any specifics, don't be afraid to ask me in the comments below. :)

IMG_7294-1


I hope you all love them!  And, if you would like to vote for me in the challenge, head over to the Nail Polish Canada page, and select "lacquerstyle.com" from the list (you don't have to be signed up or anything).  I would really appreciate it!


Thank you so much for reading, if you made it this far, too! :)


Kristin


Connect with me:
Instagram  |  Twitter  |  Facebook  |  Pinterest

Follow on Bloglovin


Monday, May 05, 2014

Gradient Baroque Nails + Tutorial!

Monday, May 05, 2014
Hello everyone!

I’m sorry I have been super slow at blogging lately.  I need to get a schedule going to get back into it!

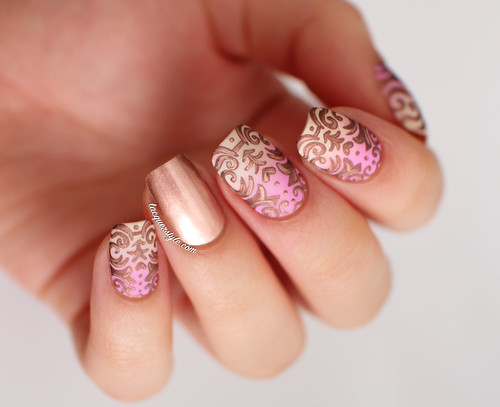
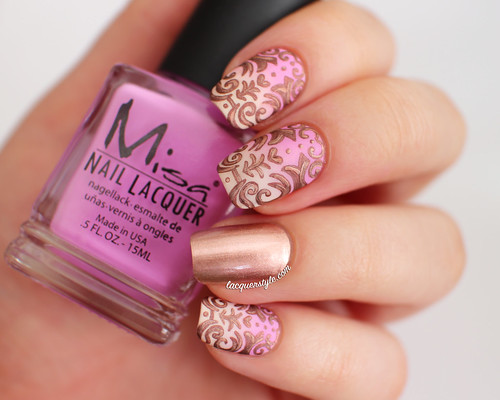
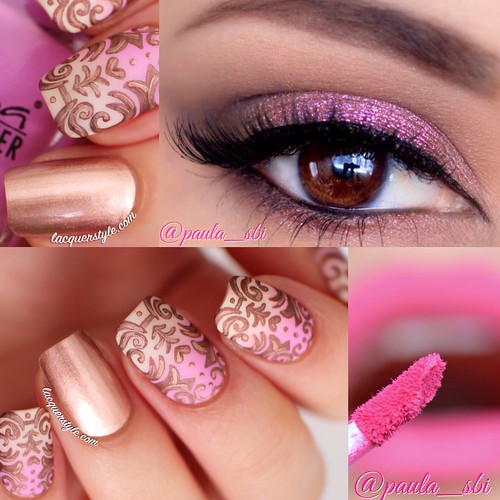
Anyways, I have been creating these baroque-style nails a lot recently (as you may have seen in my previous post), and this time they were inspired by a gorgeous makeup look created by Paula Sbi on Instagram.  We did a collaboration recently, and I think it turned out amazing, which I will show you down below.

IMG_2252-2

IMG_2231-2

As soon as I saw the gorgeous eye makeup that Paula created, I was so inspired by the colors and metallic finish.  Pink’s and brown always seem to play nice together, and the shimmer is very elegant.  The colors I chose for my nails really remind me of Neapolitan ice cream as well, so I thought that was fun.  I think they are the perfect pairing! 

image

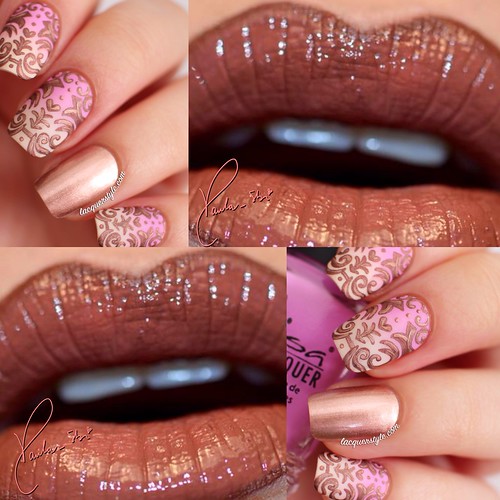
The photo below is an alternate version Paula created with a chocolate brown lip, using Lime Crime Salem as the base.  Love it!

image-2


All of the products I used are listed at the beginning of the video, and if you would like to see how I created this design, here it is:


I hope you all love the design, and let me know what you think of it in the comments below!  Also, if you have any requests I would love to hear them!


Thank you all for reading! :)

Kristin


Connect with me:
Instagram  |  Twitter  |  Facebook  |  Pinterest

Follow on Bloglovin


Saturday, March 29, 2014

Katy Perry (Brit Awards 2014) Neon Tribal Nails + Tutorial

Saturday, March 29, 2014
Hi everyone!

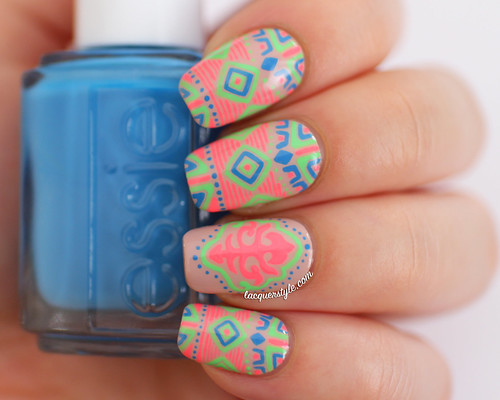
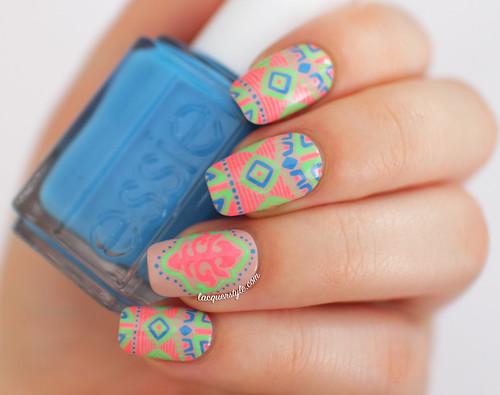
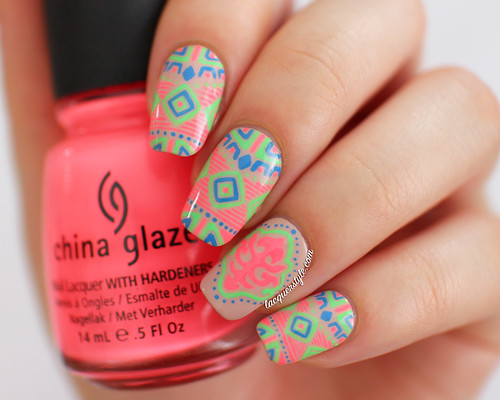
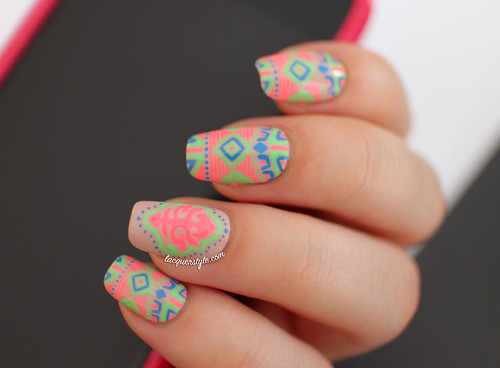
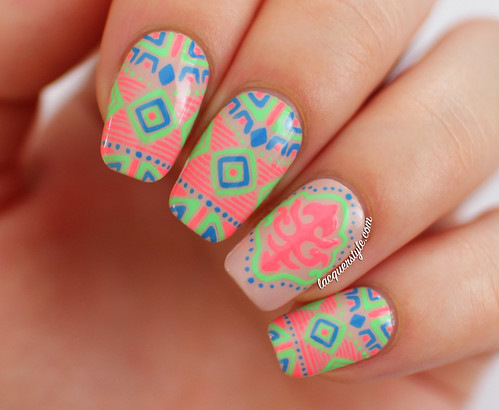
Today, I am finally showing you my most recent nail art, which was inspired by Katy Perry’s outfit from her Dark Horse performance at the 2014 Brit Awards.  As soon as I saw the photos a few weeks ago, I’ve been dying to recreate a similar pattern on my nails.  I also filmed it, so you can view the tutorial at the end of the post.

IMG_6524-2

I fell in love with this color combination, and immediately knew that I had to use China Glaze Flip Flop Fantasy for the majority of the design, along with Color Club Twiggie.  I had a hard time choosing the blue since I don’t have many “neon” blues, so I settled on Essie’s Avenue Maintain, and I am happy with how it looks.  The base is one of my favorite, new (to me) nudes, Julep Pippa.

IMG_6476-2

IMG_6497-2

These did take quite a long time to paint, even longer than my Vintage Floral Nails, which is a bit crazy, I know.  I also used the same brush to paint these, and I write more in depth about it in that post, if you would like more info.  The accent nail came from a similiar shape on her sleeve / chest, if you’re all wondering, and I’m really happy with how it turned out.

IMG_6487-2

IMG_6447-2


I also posted this photo on Instagram last week, next to my inspiration:
Neon-Katy-Perry-Tribal-Nails


And finally, here is the video:


Enjoy!


Thank you for reading! :)


Kristin


Connect with me:
Instagram  |  Twitter  |  Facebook  |  Pinterest

Follow on Bloglovin


Monday, March 17, 2014

Vintage Gradient Floral Nails - YouTube Tutorial!

Monday, March 17, 2014
Hello everyone!

I just thought I would make a quick post to let you all know about my new YouTube video, if you haven’t seen it yet.  After all of the requests for a tutorial on my Vintage Gradient Floral Nails, I knew I had to finally upload one for you!

It has also been featured on the Nail It! Magazine website today, which is super exciting for me!  You can view the post here: http://nailitmag.com/nail-designs/lacquerstyle/nail-art-tutorial-realistic-hand-painted-flowers

IMG_4929-2


Now without further ado, here is the video!


If you try it (or got inspired), I would absolutely love to see your recreations, so please share them with me on Instagram or Facebook! :)


And finally, thank you all for being so lovely, I really appreciate it!


Kristin


Connect with me:
Instagram  |  Twitter  |  Facebook  |  Pinterest

Follow on Bloglovin


Wednesday, February 26, 2014

Vintage Gradient Floral Nails

Wednesday, February 26, 2014
Hi everyone!

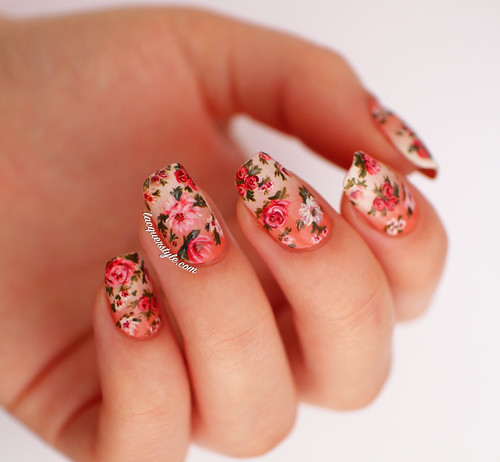
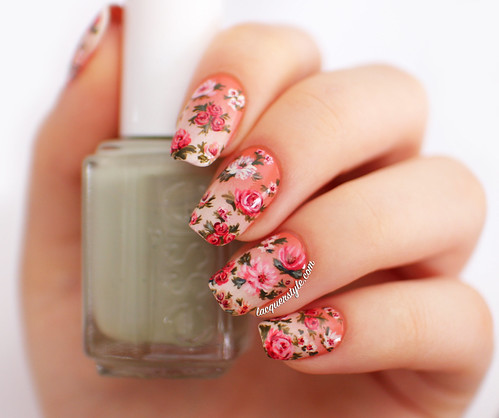
Looking back on some of my favorite nail art that I’ve done this past [almost] year, my favorite has always been my floral Vampire Weekend nails.  I don’t think I could ever recreate them, but whenever I look at them I want to create some new floral nails, and floral nails are just so fun to do!

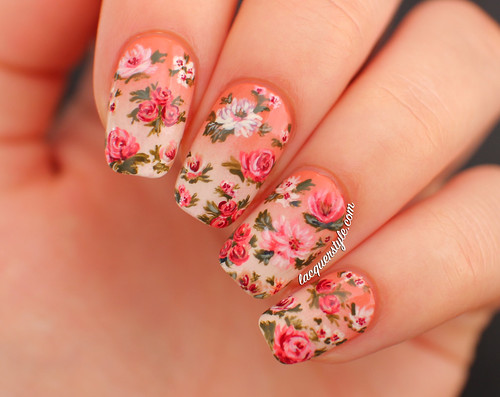
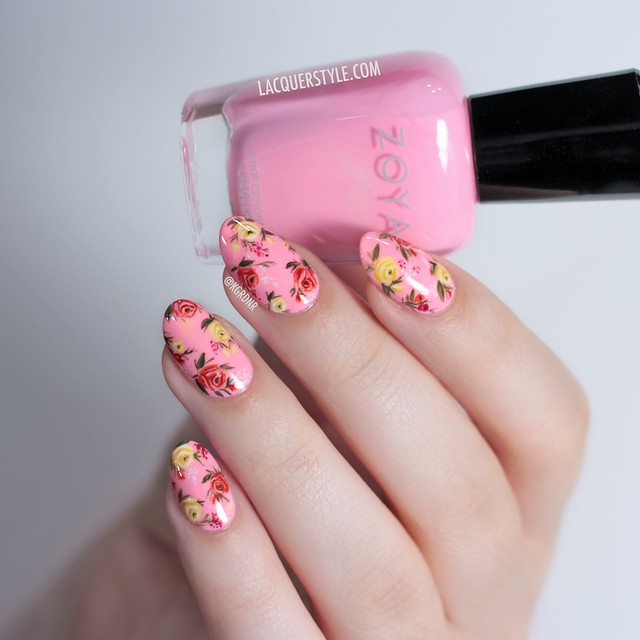
I decided to create some “vintage” florals this time, so I started with two coats of China Glaze V as my base, which is such a beautiful, peachy, terracotta polish.  Then, I added a gradient using Zoya Jacqueline and Square Hue Westminster.  I’ve never painted florals over a gradient base, but I’ve had the idea in my head for a while now.  The flowers took me a few hours to paint (per hand - yes, I did both), because I wanted each nail to be unique, and they turned out just as I had hoped.

IMG_4951-3

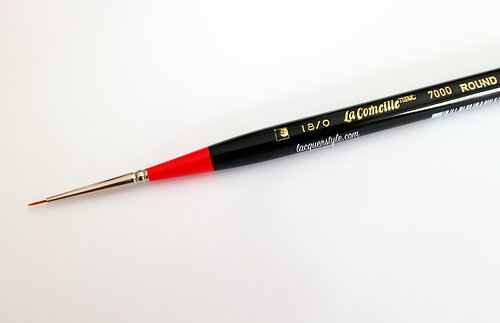
While I was at Michael’s recently, I found this really amazing brush that I wanted to show you all as well.  It’s the only brush I used to paint these floral nails, and I just went back to get another one because it’s that good.  It’s the 18/0 Round brush by La Corneille.

IMG_5132-1

To paint the flowers, I used twelve different polishes.  I know that sounds like a lot, but I like to use at least 3 shades of polish per flower so that they look more realistic.  I’m just going to list all of the polishes I used down below, because I would be writing this for ages if I listed specifics!

Polishes used:
China Glaze: V, and Westside Warrior
CND: Flamingo Feather, and Tropic Coral
Dior: Grege
Essie: Fiji, Da Bush, Mind Your Mittens, and Warm & Toasty Turtleneck
Square Hue: Buckingham, and Westminster
Zoya: Jacqueline

IMG_5082-3

IMG_4929-2

Untitled

I hope you all enjoyed these nails as much as I do, and thank you for reading! :)


Kristin


Connect with me:
Instagram  |  Twitter  |  Facebook  |  Pinterest

Follow on Bloglovin


Thursday, January 30, 2014

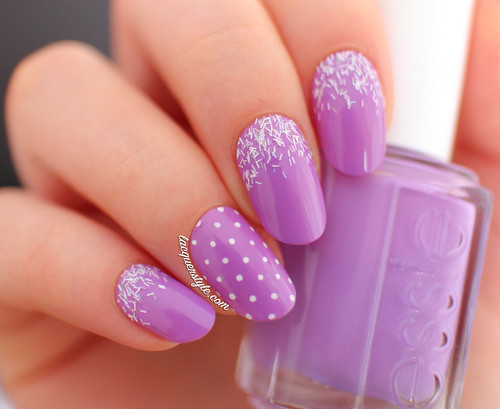
“Radiant Orchid” Nail Art - Featuring Essie Play Date

Thursday, January 30, 2014
Hi everyone!

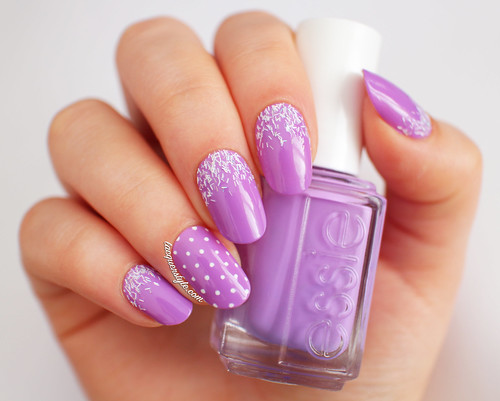
You will probably be surprised by this post if you missed what I posted on Instagram yesterday.  Well, I changed the shape of my nails!  I’ve been going slightly more squoval recently, and I was just about to file them down, but then I decided to try an oval shape for a change.  I’m actually enjoying them more than I thought I would, since I’ve never had anything but square or squoval before, and they should be fun to play around with; I’m hoping to try some different designs that may not have worked on my squares. :)

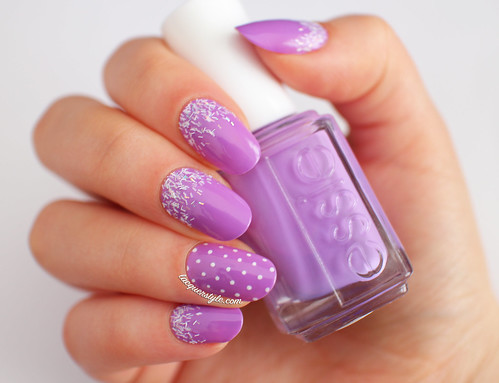
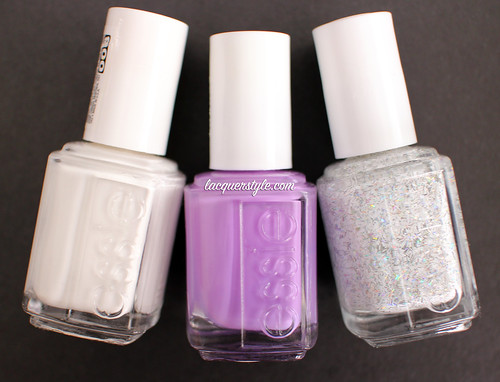
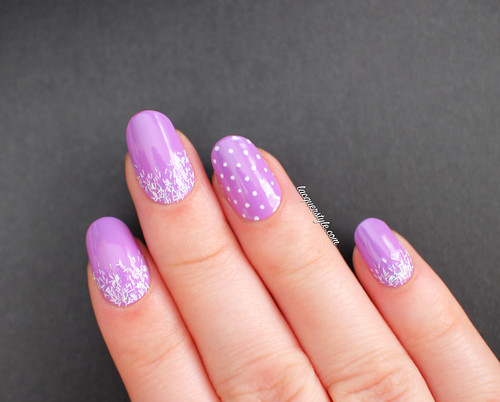
For my nail art today, I chose Essie Play Date as the base.  I’ve been meaning to create some Pantone “Radiant Orchid” themed nails for while now, so I went through all of my purples, and Play Date stood out amongst the others.  It’s a really lovely medium purple that leans a bit pink, and it applies effortlessly in two coats.

IMG_0045-2

IMG_0060-1

IMG_0064-1

I added Essie Peak of Chic (white and holographic bar glitter) as a glitter gradient on top of Play Date, and I think they are so cute together.  Peak of Chic can be quite hard to use over solid colors because the white bar glitters kind of clump together, but I’m loving the way it turned out as a gradient.  To compliment the white glitter, I added some polka dots on my ring fingers using Essie Blanc.

IMG_0116-1
Essie Blanc, Play Date, and Peak of Chic

IMG_0086-1

IMG_0092-2

So, what do you think of the new shape?  I would love to hear your honest opinions.  My nails grow extremely fast, so I don’t know how long they will last, but I’m pretty happy with them at the moment!


Thank you for reading!  And, be sure to check out my giveaway on Instagram, if you haven’t already. :)


Kristin


Connect with me:
Instagram  |  Twitter  |  Facebook  |  Pinterest

Follow on Bloglovin

Lacquerstyle.com © 2014