Showing posts with label pictorial. Show all posts

Tuesday, July 01, 2014

Simple, Realistic Galaxy Nails + Tutorial, featuring JINsoon Obsidian

Tuesday, July 01, 2014
Hello everyone!

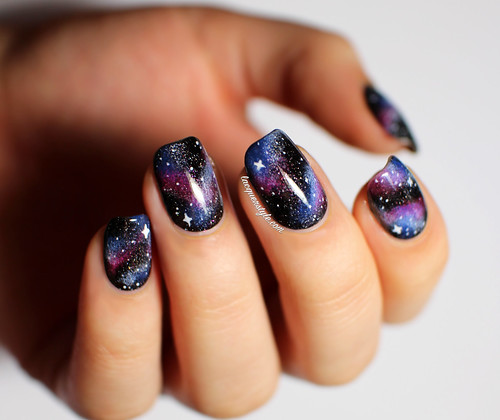
I've taken a little break from blogging lately, as you may have noticed, but I've still been posting quite often over on Instagram.  Last week, I posted an updated version of my galaxy nails, and they got a really great response.  I was so happy about how well they were received, because they are definitely the most simple, but also most realistic version I've created so far, I think!

When I created this version a few months ago, I also made a photo tutorial to share with all of you, so you can view it at the end of the post.
IMG_3576-1

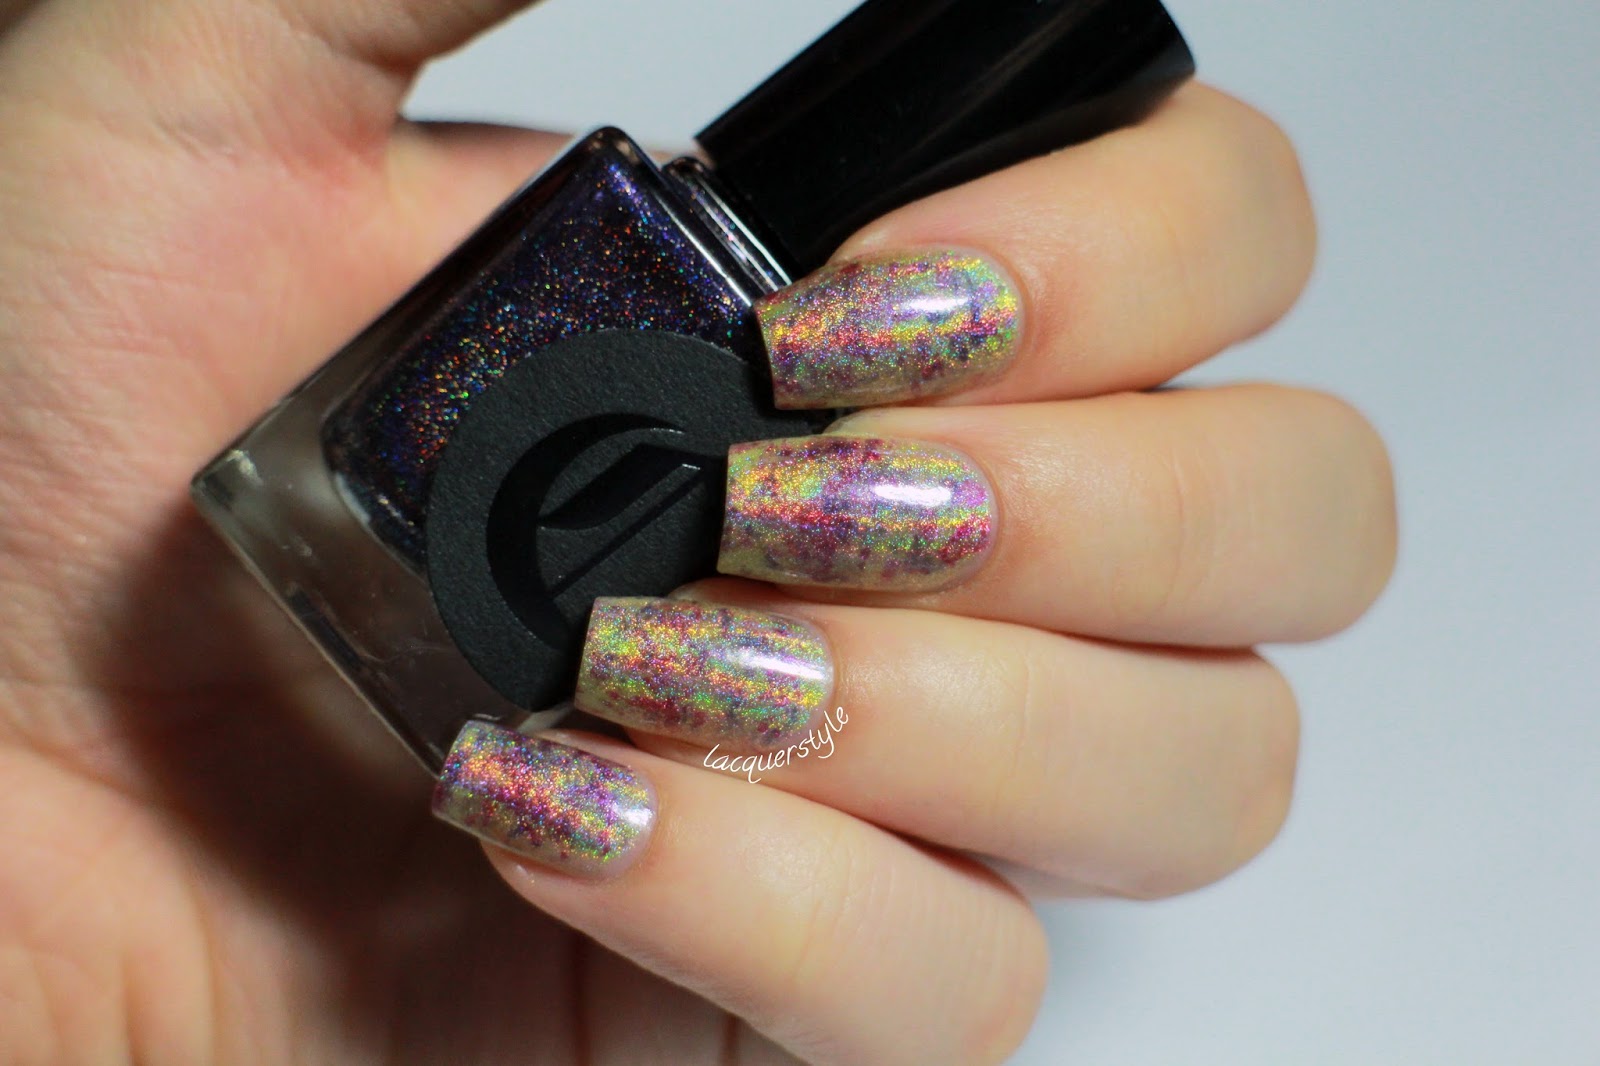
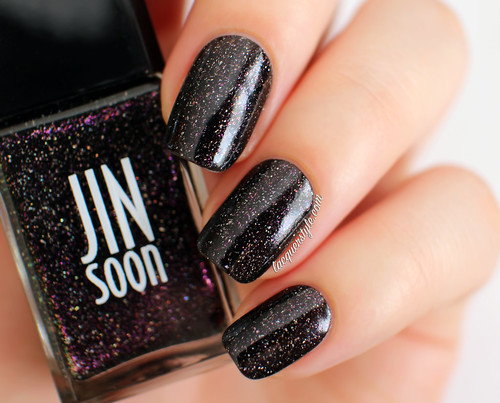
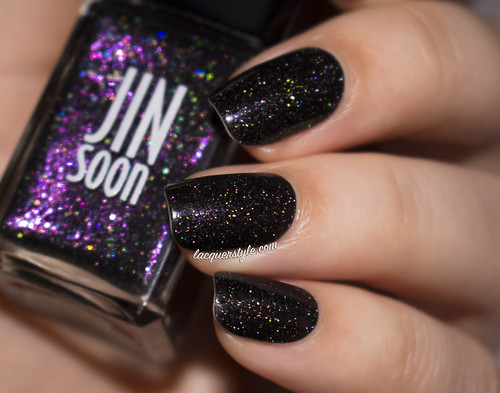
The one major difference between this version and my previous ones, is that I let my base do all the work.  I used two coats of the incredible JINsoon Obsidian, which is a black base filled with holographic flecks and bright purple shimmer.
Jin-soon-obsidian

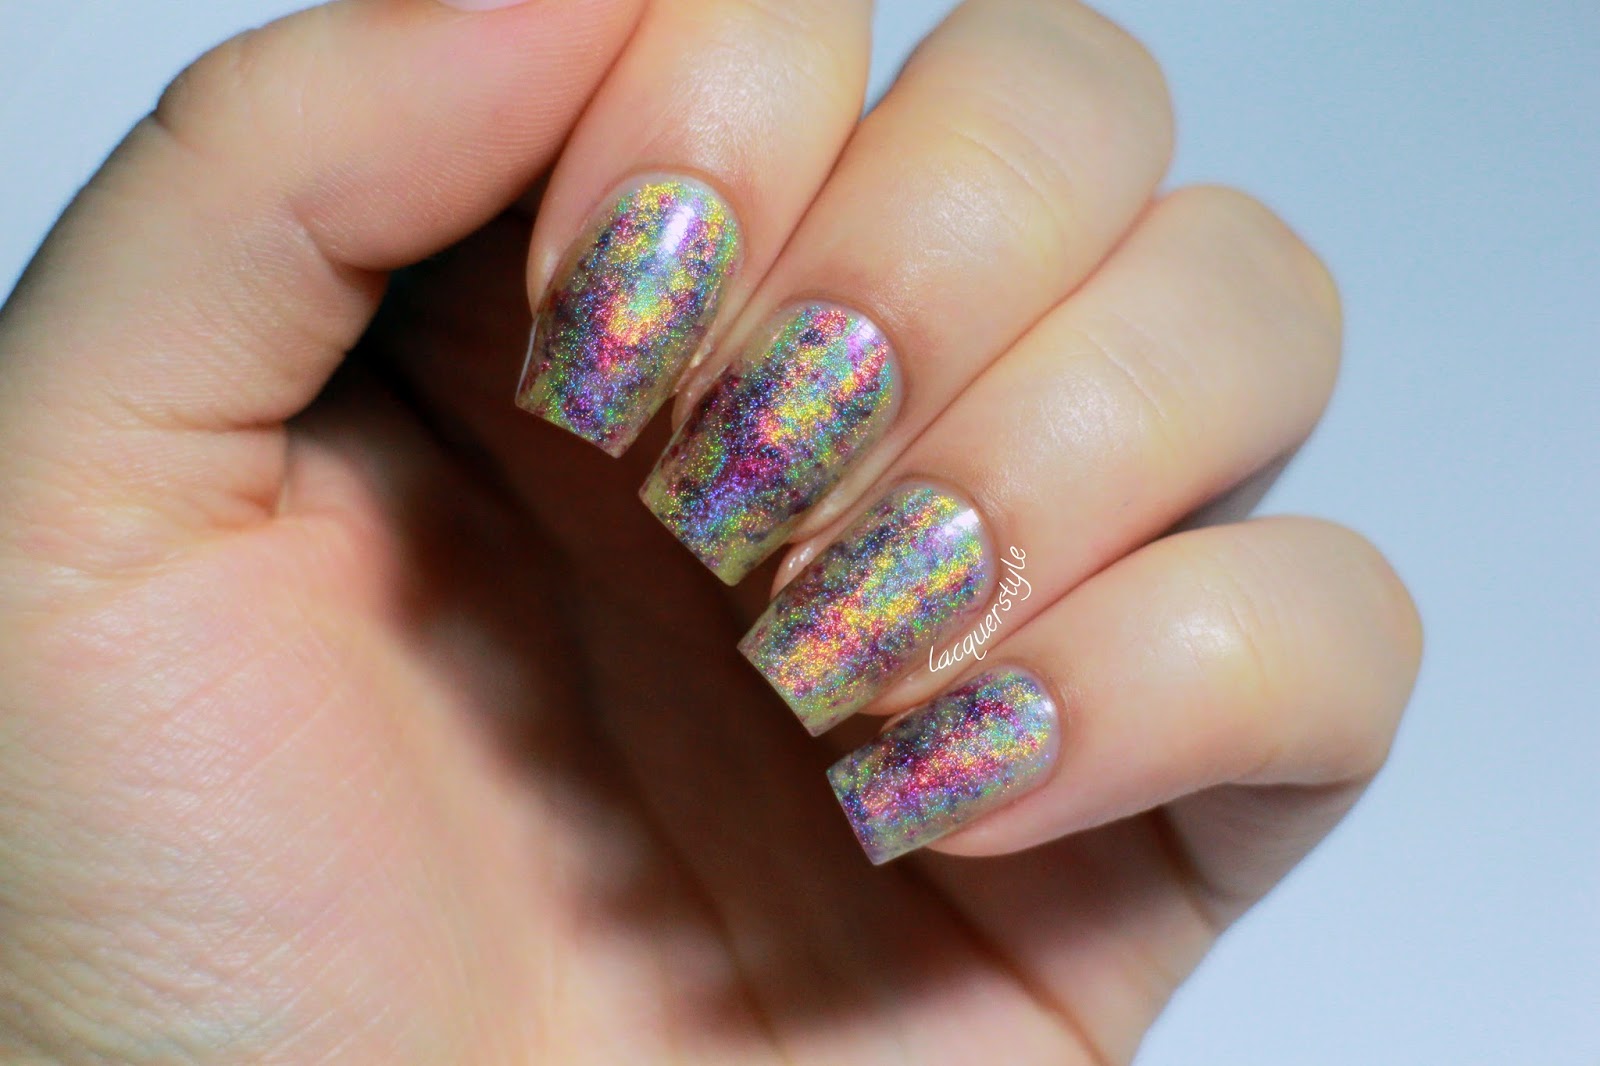
In natural daylight (above) the purple shimmer is very visible, then, in the sun, or once you switch on some bright lights (or with flash, as shown below), the beautiful holographic shimmer sparkles.  It's amazing, but not totally in your face like some holos can be (although that is not a bad thing!).  I wore this on my nails for several days, before adding the galaxy on top, so there is the slightest tip wear in the photos.
IMG_0195-1


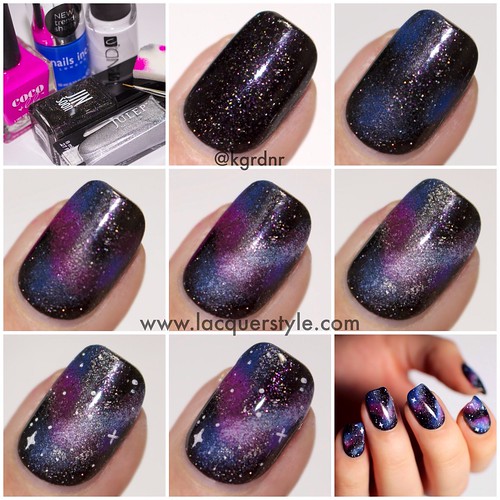
To create the galaxy, I used the technique shown below in my tutorial.  Of course I am only showing one nail, but definitely try to have fun with different placement and colors to create the feel of movement on the nails.  I think that is the best way to create a more realistic design!

Now, onto the tutorial!
(click for full size)

Galaxy-Nails-Tutorial-Simple-Realistic

1.  Gather your supplies and prep your nails with a base coat.  You will need a cosmetic sponge, a nail art brush (or dotting tool), a black or navy with holographic shimmer, two bright or neon colors, a white (I prefer a semi-sheer one), and a holographic silver polish (optional).

2. Paint one or two coats of your base color.  I used JINsoon Obsidian, which is this amazing black base filled with holographic flecks, and bright purple shimmer.  Zoya Storm could be a good alternative, or just a black creme with a holographic shimmer top coat (like inm Northern Lights) could be an option as well.

3. Sponge on a cobalt blue in a few spots on the nails.  I used Nails Inc. Baker Street, one of my favorite blue polishes.

4. Sponge on a neon pink overlapping some of the blue polish.  I used Coco & Lulu Ma Belle, an amazing fuchsia neon polish.

5. Lightly sponge on a bit of white polish over the other two colors.  I used CND Brilliant White.  I've realized, looking at a bunch of actual galaxy photos, that the white should be used more sparingly.  And, it almost gives a 3D effect to the other colors.

6. Lightly sponge on a silver holographic polish to the edges of the white polish.  I used Julep Rebel, which has a pretty subtle holographic effect.  This gives such a great sort of misty effect, and of course a little added sparkle.

7. With a nail art brush or dotting tool, add a few tiny white dots and "stars".  For the bigger stars, I always just create a + and then fill in the inner corners slightly.

8. Finish with a shiny or matte top coat, and enjoy! :)


If you have any questions, feel free to leave them down below.  And, if you need any other tips for galaxy nails, or would rather watch a video, I have a few tutorials on YouTube here:


Thank you all for reading! :)


Kristin



Connect with me:
Instagram  |  Twitter  |  Facebook  |  Pinterest

Follow on Bloglovin


Thursday, December 05, 2013

Red & Black Lumberjack Plaid Tutorial

Thursday, December 05, 2013
Hello everyone!

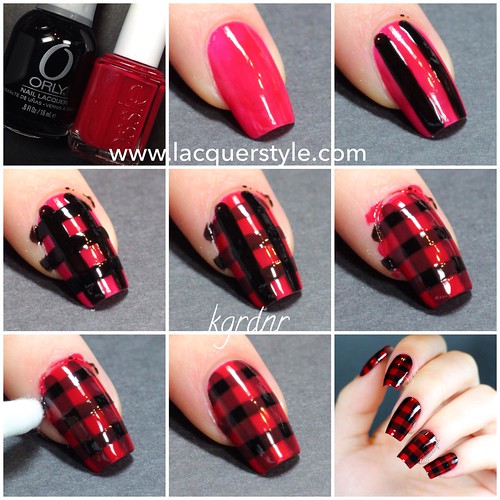
I created some red & black plaid nails last week and got quite a few requests for a tutorial on Instagram.  I did actually film the original ones, but I decided to scrap the video because the lighting was off.  Instead, I created a photo tutorial (or pictorial) for you all.

If you missed my original post for these nails then you can view it here!

So, onto the tutorial!

  Red & Black Plaid Nails Tutorial

1. This tutorial is very simple; it only requires a black polish and your color of choice.  You must use a jelly or sheer polish for your color for the best effect though!  I chose red, and for this tutorial I used Essie Garnet.  The black is Orly Liquid Vinyl.

2. Apply one coat of your base.  It doesn't matter if it's a bit uneven or streaky because we will be adding a few layers.  Tip: At this point, you could also tape off your cuticles if you are using a red or color you know will stain your cuticles.  You don't want to spend ages cleaning up after, I made that mistake the first time! :P

3. Paint vertical lines in black.  I painted two, but depending on the size of plaid you want, you may want more.  I just used the polish brush from the bottles, but if you are more comfortable you could use a striper or even tape to create perfect lines.

4. Create a grid by painting horizontal lines in black.  You may need more or less depending on the length of your nails or size of plaid like the previous step.

5. Now, using your red (or other) jelly, paint vertical lines overlapping some of the black.  I painted one down the center, and one on either side of the black vertical lines.

6. Then, paint horizontal lines the same way as the previous step.  I did four red horizontal lines, so I ended up leaving the little 6 black opaque squares you can see in the photo.

7. Clean up around your cuticles with some remover and a cotton swab or brush dipped in acetone (I used both.)

8. Add top coat and your plaid nails are complete! 


I hope you all enjoyed this quick tutorial, and let me know if you have any other questions.

You can always share your recreations with me by tagging me (@kgrdnr) in your photo on Instagram, or showing me on Twitter or Facebook (yes, I am now on Facebook!).

Thank you for reading! :)


Kristin


Join me on my other social networks:
Instagram  |  Twitter  |  Facebook  |  Pinterest


Tuesday, September 03, 2013

31 Day Challenge - Day 2: Orange Nails + Ikat Tutorial

Tuesday, September 03, 2013
Day 2 of the 31 Day Challenge is Orange Nails!


Recently, I got a few of the Barry M Gelly polishes, and I've been dying to try Mango, so it's perfect for today's orange theme.  It's a really nice medium orange polish, opaque in two coats, and seriously, these Barry M Gelly polishes have the most amazing glossy finish to them; there is absolutely no need to add top coat.  Of course, I had to add some nail art, so I tried my first Ikat print.


Barry M Mango Gelly, CND Blackjack, Lime Crime Once In a Blue Mousse, and Essie Blanc


I took photos of my progress, so I decided I would make them into a photo tutorial as well!

If you have any questions, I would be happy to answer them, and feel free to tag me on Instagram or send me a photo of your recreation; I would love to see them!

Enjoy!


1. Gather your supplies and prep your nails.  I used Barry M Mango Gelly, CND Blackjack, Essie Blanc, Lime Crime Once In a Blue Mousse, Elevation Polish Dzhangi-Tau, and a nail art striper brush (from my Urban Outfitters set).

2. Apply your base color.  I used two coats of orange.

3. Starting with white, map out your shapes where you want them using quick individual strokes of polish.  I made the lines of polish into a diamond shape on my middle & thumb nails, and triangles at the tips of my index and pinky.  I also did a sort of chevron line on my ring finger.  They don't have to be perfect, Ikat almost looks better the more irregular it is.

4. Following in the same shapes you just created in the previous step, apply a contrasting color (in my case a pale blue) inside, leaving just an outline of the white.

5. Once again, following the shape, apply black polish inside, leaving an outline of the previous color.  I also added some glitter over the chevron on my ring finger.  

6. Apply black polish outside of the shapes this time, trying not to cover up too much of the white. 

7. Using the same technique as before, I added a few more Ikat shapes to fill in the blank areas and complete the pattern.

8. Finish with top coat.  Have fun! :)


I will be back again tomorrow for Day 3!

Thank you for reading!


Kristin


Saturday, June 22, 2013

Holographic Plastic Wrap Nail Art + Video & Tutorial!

Saturday, June 22, 2013
You may or may not have noticed a little YouTube button in my side bar.  Well, the time has come, and I have finally uploaded my first ever video!

It is a very simple look that I have recreated per request from some of my followers on Instagram.  I really loved it the first time I wore it (about 20 weeks ago according to IG!), and this time is no different.  I really hope you enjoy the video, and when my new camera lens arrives hopefully I can create many more videos with a closer detailed look (floral nails, yes!).


And, here is my original look and Instagram tutorial (my nails were super long here!):


1. Gather your supplies and prep your nails.  I used Nfu Oh Aqua Base, Layla Gold Idol and Purple Illusion, Cirque Fascination Street, a piece of plastic wrap (bunched into a ball), a few precision tip Q-tips, and a piece of paper.

2. Paint two coats of your base colour.  In this case, I chose a gold holographic polish.  You can use any color combination you desire.  Make sure your base color is completely dry, or use a quick dry top coat before moving to the next step.

3. Work quickly with the next few steps!  Place a few drops of your first polish on a piece of paper.  Dip the plastic wrap into the polish, and dab it a few times on the paper before applying it to your nails. 

4. Immediately "sponge" the polish on your nails in a few random spots.  Don't overdo it, or your base color won't show through.  You want a nice balance of colours.

5. Repeat steps 3 and 4 as much as necessary, to achieve the desired effect.

6. If you are using a third color, repeat steps 3 and 4 in another contrasting color.  I chose a darker one so that it would pop against the light base color.

7. Make sure you are happy with the effect.  You may have to touch up a few spots if you feel it is not balanced enough.

8. Clean up around the cuticles with some nail polish remover.

9. Finish with a top coat.  

Have fun! :)


Please let me know what other tutorials and designs you would like to see in the future!


Kristin


Saturday, June 08, 2013

Turquoise Stone Nails + Tutorial!

Saturday, June 08, 2013
These turquoise stone nails have been quite a trend lately.  I had seen a couple people try this technique, and was inspired, but I wanted to put my own style on it.

Here is my finished look:


Now, here is the tutorial to get this look:


I tried to make the steps as clear as possible, but as always, if you have any questions please let me know.  And, feel free to send me your results, I would love to see them! :)

1. Gather your supplies and prep your nails. I used CND Stickey, Essie Where's My Chauffeur?, CND Blackjack and Gold Chrome, a piece of plastic wrap (bunched into a ball), a few toothpicks, Scotch tape, hairspray, a paper towel, a cup of luke warm (tap) water, and a piece of paper.

2. Paint two coats of your base colour. In this case, to make them look like turquoise stones, I chose the Essie's Where's My Chauffeur?. Make sure your base colour is completely dry, or use a quick dry top coat before moving to the next step.

3. Tape off your cuticle and sides of your fingers with some scotch tape.

4. Work quickly with the next few steps! Place a few drops of gold polish on a piece of paper. Dip the plastic wrap into the polish, and dab it a few times on the paper before applying it to your nails.

5. Immediately "sponge" the gold polish on your nails in a few random spots. I did this very lightly, to make it look like subtle veins of gold.

6. With a cup of luke warm water, place one drop of black polish into the water. I only used one drop of polish so the black would be quite light and veiny. As it is spreading, spray some hairspray on it. This is the most difficult part, as you may have to repeat this step a few times to get it to look right.

7. I wanted the "veins" to be quite spread out on the nail. If the spots are too close together in the water, you will have too much black on the nail, so if it does not look right in the water, just take a toothpick to remove the polish and try again.

8. Quickly dip your finger into the water, positioned where you want it, and use a toothpick to grab the leftover polish on the surface of the water before removing your nail.

9. Remove the tape. Wait a while before applying top coat so you do not smudge the black lines. Finally, finish with a top coat.

Have fun! :)


Kristin

Lacquerstyle.com © 2014