Showing posts with label dior. Show all posts

Monday, March 17, 2014

Vintage Gradient Floral Nails - YouTube Tutorial!

Monday, March 17, 2014
Hello everyone!

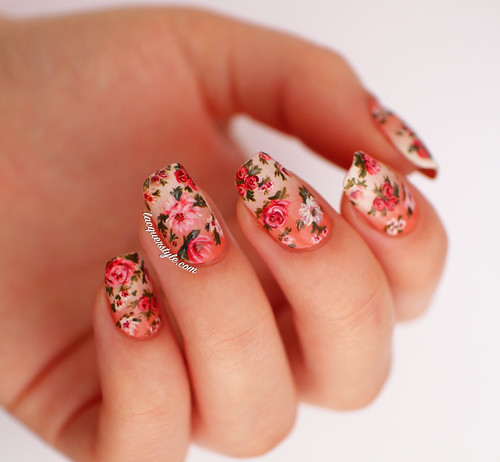
I just thought I would make a quick post to let you all know about my new YouTube video, if you haven’t seen it yet.  After all of the requests for a tutorial on my Vintage Gradient Floral Nails, I knew I had to finally upload one for you!

It has also been featured on the Nail It! Magazine website today, which is super exciting for me!  You can view the post here: http://nailitmag.com/nail-designs/lacquerstyle/nail-art-tutorial-realistic-hand-painted-flowers

IMG_4929-2


Now without further ado, here is the video!


If you try it (or got inspired), I would absolutely love to see your recreations, so please share them with me on Instagram or Facebook! :)


And finally, thank you all for being so lovely, I really appreciate it!


Kristin


Connect with me:
Instagram  |  Twitter  |  Facebook  |  Pinterest

Follow on Bloglovin


Thursday, March 13, 2014

Neon & Nude Houndstooth Nail Art + Tutorial

Thursday, March 13, 2014
Hello everyone!

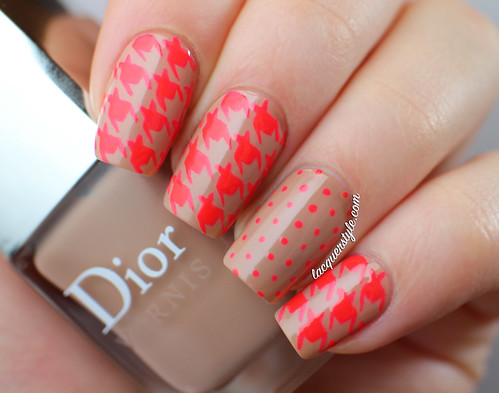
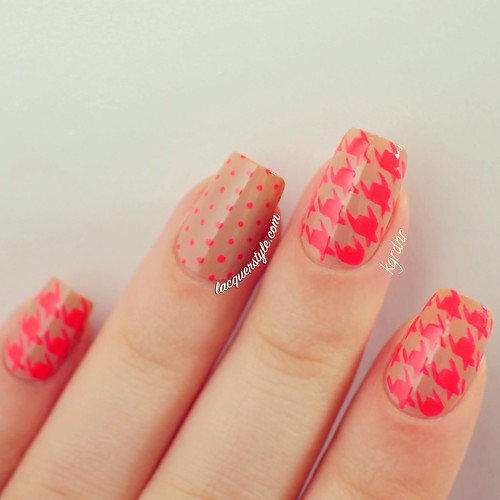
I wore some houndstooth nails a few months ago after creating my white negative space nails.  I was just so happy with how my houndstooth nail turned out that I had to wear a full mani of it!  A few people requested a tutorial for my houndstooth as well, so I made a quick one which you can view at the end of the post. :)

IMG_8743-3

One of my favorite combinations ever is neon & nude.  It’s always so strikingly beautiful, and tones down the neon a bit for everyday wear.  Of course I had to have an accent nail, so I just did a really cute polka dot nail, and I really loved how they looked together.

Untitled

My nude base is two coats of Dior Grège.  I actually don’t love Grège that much, it’s a bit of a weird tone on me, so I’m glad I added China Glaze Pool Party (a crazy coral pink neon), because it definitely made me like the base a bit more.  Pool Party is so difficult to photograph, so I ended up filtering it when I posted these on Instagram yesterday.


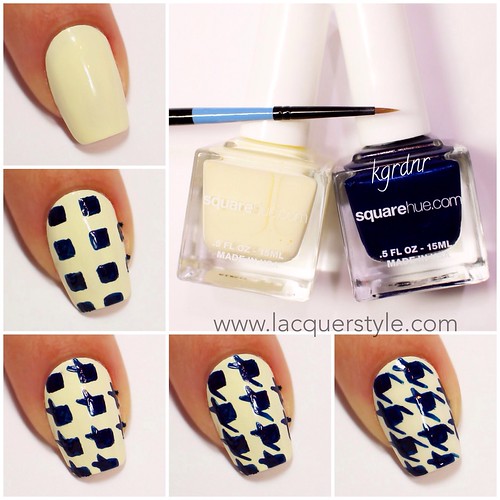
Here is the tutorial I created, showing how I paint my houndstooth nails:

Untitled

1. Apply your base color.  I used two coats of Square Hue Westminster (an ivory creme).

2. Paint rows of squares using a contrasting color (I used Square Hue West End).  Your squares don’t have to be perfect, and I like to paint mine kind of off-centered, but if you are not comfortable painting them freehand, you can always use tape.  Try to keep them as evenly spaced as possible, if you can.

3. Paint tiny triangles at the upper left corner (or right if you are mirroring), one pointing out to the side, and one pointing up towards the aquare above it.

4. Paint a diagonal line from the bottom left corner to the upper right corner of the square just below it.  I like to leave a tiny space so the line doesn’t directly touch the square below it.

5. Paint another diagonal line from the upper right corner to the bottom left corner of the square to the right of it.  I also leave a tiny space here so the line is not touching, but you could have them touch if you want.

6. Clean up around your cuticles if you need to, and wait a while before applying top coat so you don’t smudge your houndstooth.  

I hope that is easy to follow, but if you have any other questions, feel free to leave them in the comments below.

Have fun! :)


Kristin


Connect with me:
Instagram  |  Twitter  |  Facebook  |  Pinterest

Follow on Bloglovin


Wednesday, February 26, 2014

Vintage Gradient Floral Nails

Wednesday, February 26, 2014
Hi everyone!

Looking back on some of my favorite nail art that I’ve done this past [almost] year, my favorite has always been my floral Vampire Weekend nails.  I don’t think I could ever recreate them, but whenever I look at them I want to create some new floral nails, and floral nails are just so fun to do!

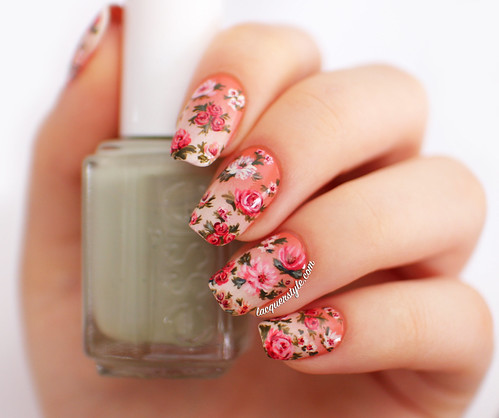
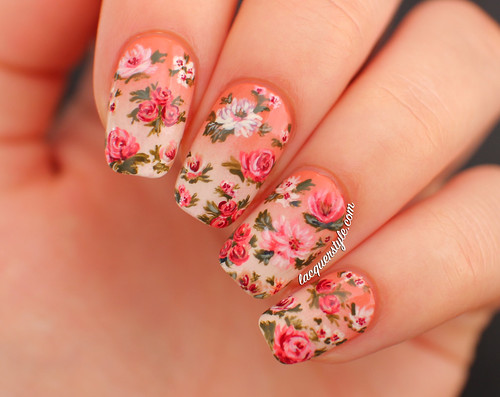
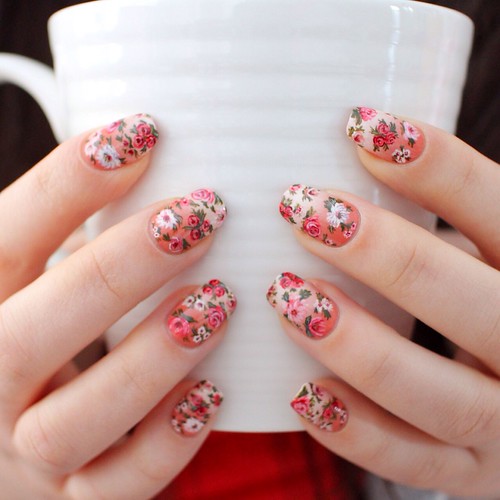
I decided to create some “vintage” florals this time, so I started with two coats of China Glaze V as my base, which is such a beautiful, peachy, terracotta polish.  Then, I added a gradient using Zoya Jacqueline and Square Hue Westminster.  I’ve never painted florals over a gradient base, but I’ve had the idea in my head for a while now.  The flowers took me a few hours to paint (per hand - yes, I did both), because I wanted each nail to be unique, and they turned out just as I had hoped.

IMG_4951-3

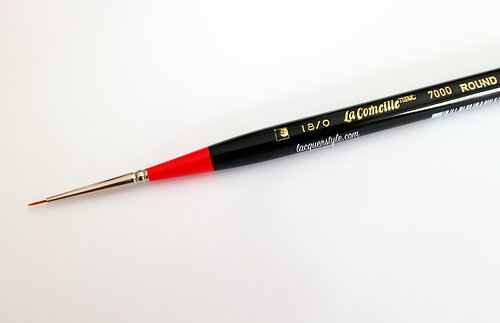
While I was at Michael’s recently, I found this really amazing brush that I wanted to show you all as well.  It’s the only brush I used to paint these floral nails, and I just went back to get another one because it’s that good.  It’s the 18/0 Round brush by La Corneille.

IMG_5132-1

To paint the flowers, I used twelve different polishes.  I know that sounds like a lot, but I like to use at least 3 shades of polish per flower so that they look more realistic.  I’m just going to list all of the polishes I used down below, because I would be writing this for ages if I listed specifics!

Polishes used:
China Glaze: V, and Westside Warrior
CND: Flamingo Feather, and Tropic Coral
Dior: Grege
Essie: Fiji, Da Bush, Mind Your Mittens, and Warm & Toasty Turtleneck
Square Hue: Buckingham, and Westminster
Zoya: Jacqueline

IMG_5082-3

IMG_4929-2

Untitled

I hope you all enjoyed these nails as much as I do, and thank you for reading! :)


Kristin


Connect with me:
Instagram  |  Twitter  |  Facebook  |  Pinterest

Follow on Bloglovin


Wednesday, September 25, 2013

Nails of the Day: Dior Galaxie & piCture pOlish Monroe

Wednesday, September 25, 2013
Fall is always exciting because I love to wear all of my gorgeous vampy colors.  The other day, I was in the mood for something simple yet elegant, so I chose burgundy, one of my all time favorite colors to wear on my nails.  


I've had piCture pOlish Monroe in my untrieds for a while (why?!), and I've been waiting to wear Dior Galaxie for a few weeks now, so I decided to pair them together.  I've been wearing this combination for the past few days now, and it just makes me so happy!  


Galaxie (thumb, index, and pinky) is a dusty plum-burgundy with a red and multicolor shimmer that is quite visible on the nail in most lighting.  The shimmer gives the base color a beautiful glow and so much depth.  I will admit, it is not that unique, but it's definitely hard to resist if you're a burgundy lover like I am!


piCture pOlish Monroe (middle and ring) is a stunning burgundy jelly with big flecks of holographic shimmer.  It is pretty amazing to stare at; the holographic bits look like they are floating in the base, which I don't think could be a more perfect shade of burgundy.  Love!


I can't wait to pull out some of my other jewel tones this Fall!


Thank you for reading! :)


Kristin


Wednesday, September 18, 2013

31 Day Challenge - Day 12: Stripes

Wednesday, September 18, 2013
Day 12 of the #31DC2013 was Stripes.  I'm super behind still as you can tell, but I'm not going to let that stop me.  I will try to complete them all!


For this design, I didn't want to go with typical stripes, so these are very loosely based on the theme, but I am so happy with them!


I used two coats of Dior Destin, a very strange sort of mocha pearly taupe color, as my base.  It just makes me want to put on a comfy sweater because it's one of those colors that I would associate with fall.  It's a really lovely neutral.  Then, I used Color Club Beyond (a black holo) and created a simple tape design on my nails, starting with a big triangle in the center of my nails, and some thinner "stripes" surrounding it.  


 Thank you for reading! :)


Kristin


Sunday, September 01, 2013

Vintage Newspaper Nails & An Apple Nail Art Tutorial!

Sunday, September 01, 2013
A subscriber on YouTube requested to see some "Back to School" nails, and even though I don't attend school anymore, I thought this would be a fun design to attempt!

The first thing that came into my mind was an apple, but I didn't want to just create some simple apple nails, so I went with the apple on my thumb as an accent nail.


For the remaining nails, I created some newspaper nails.  I have always wanted to try this technique, but I never have any alcohol in my house, so I ended up using plain tap water after doing some research.  As always, I like to give a simple technique a bit of a twist, so I gave my nails a vintage look.  I'm really happy with how they turned out, and I have been wearing them all week long!


Colors used: Cult Nails Tempest, Ciate Cream Soda, Dior Gris Montaigne, Zoya Maura


And finally, here is the video to get this look:


Hope you all like it!  

Thank you for reading! :)


Kristin


Sunday, July 07, 2013

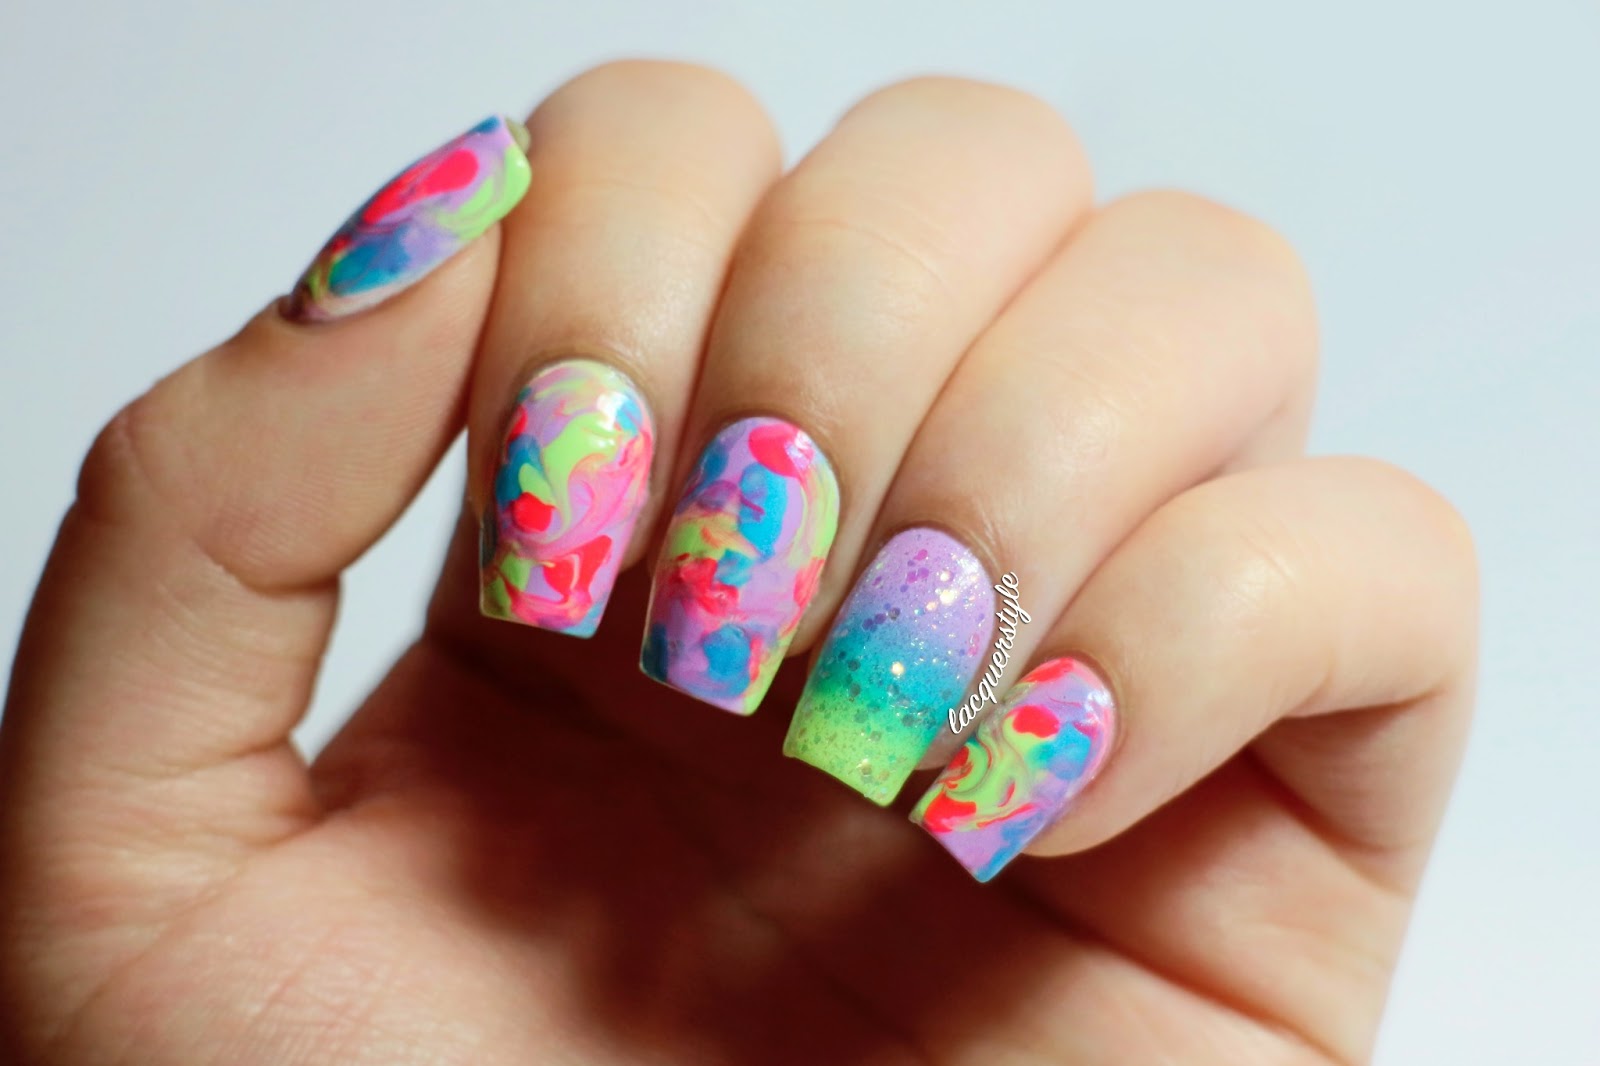
Summer Brights Acetone Marbled Nail Art

Sunday, July 07, 2013
This is one of those cases (which actually happens to me a lot) where this design was supposed to be something completely different.  I still really like the outcome, and I will give you a little description of how I created this design down below.


What I used:

China Glaze Make a Spectacle, China Glaze Pool Party, OPI My Boyfriend Scales Walls, Orly Skinny Dip, Lime Crime Lavendairy and Pastelchio, Dior top coat, a cosmetic sponge, (and Beauty Secrets Pure Acetone & a nail art brush, not pictured)

I used a base of My Boyfriend Scales Walls and added top coat (this is a must when using acetone!).  Then, I made random brush strokes and dabs of polish with each color, very messily covering the majority of the white base.  While the polish was still wet, I dipped a nail art brush in some acetone and swirled or "marbled" the colors together.  I had to dip my brush in acetone and swirl the polishes a few times so they looked the way I wanted.  The accent nail is a simple gradient of Lavendairy, Skinny Dip, and Pastelchio, topped with Make a Spectacle.  I really love how the accent nail turned out!


I love having some super bright nails to look at, especially if I'm not in the greatest mood.  They just cheer me up instantly (I know, that probably sounds really silly!).


Anyways, I hope you enjoyed this post!  I have a lot of swatching to do since I have received an insane amount of nailmail recently, so you will probably be seeing a few swatch posts soon, plus hopefully some new YouTube videos!


Thank you for reading! :)


Kristin


Wednesday, June 19, 2013

Dior Vernis Summer Mix 2013 Swatches + Review

Wednesday, June 19, 2013
Hello!

I've been loving my Dior nail polish these days.  Usually, I'm not a huge fan of the wide brush, but it is growing on me .. a bit.  I'll admit, I still have a few in my collection that I haven't worn yet, but I can't help myself when it comes to their new releases.  The Summer Mix 2013 collection is no exception; the colors are beautiful for summer (or anytime of the year, really!) and are a lovely extension to their beauties from last summer.  I only have three out of the four unfortunately, as I can't manage to locate Capeline near me, which makes me sad since I like having compete collections.

Anyways, onto the swatches!


Créoles is a vibrant hot pink jelly.  Not terribly unique, but still very striking and beautiful.  I always love a good pink.  The formula was perfect for me in two coats.  I actually only have one coat on my thumb nail and you can see a bit of visible nail line.  


Sunnies is a peachy orange jelly with a hint of coral.  I only used two coats for the photo below, but I probably could've used a third.  This color is so pretty for summer!


Tie & Dye is a orange leaning red with a hint of coral.  It is my favorite of the three I have so far.  The formula is amazing, and is a possible one coater for those with shorter nails.  I used two coats for the photo below.


I love this collection more than I thought I would, and hopefully I will be able to get my hands on Capeline to complete the collection.

What do you think of these colors?  Did you pick up anything from this collection?


Kristin


Lacquerstyle.com © 2014