Showing posts with label jin soon. Show all posts

Tuesday, July 01, 2014

Simple, Realistic Galaxy Nails + Tutorial, featuring JINsoon Obsidian

Tuesday, July 01, 2014
Hello everyone!

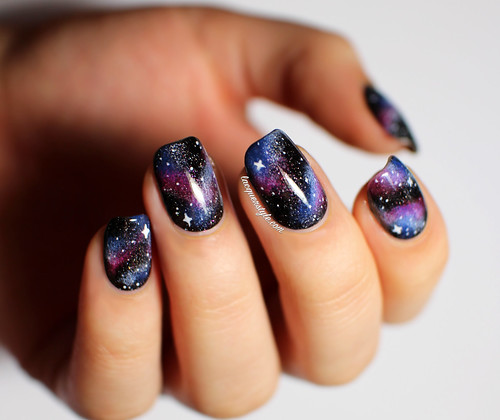
I've taken a little break from blogging lately, as you may have noticed, but I've still been posting quite often over on Instagram.  Last week, I posted an updated version of my galaxy nails, and they got a really great response.  I was so happy about how well they were received, because they are definitely the most simple, but also most realistic version I've created so far, I think!

When I created this version a few months ago, I also made a photo tutorial to share with all of you, so you can view it at the end of the post.
IMG_3576-1

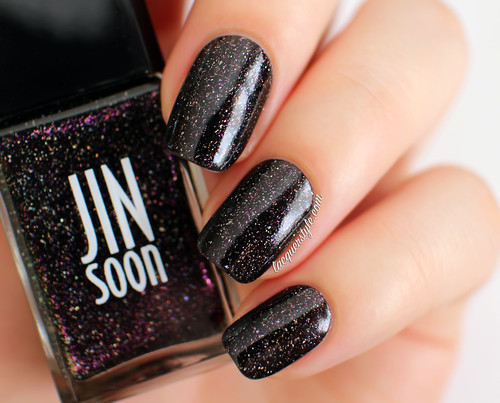
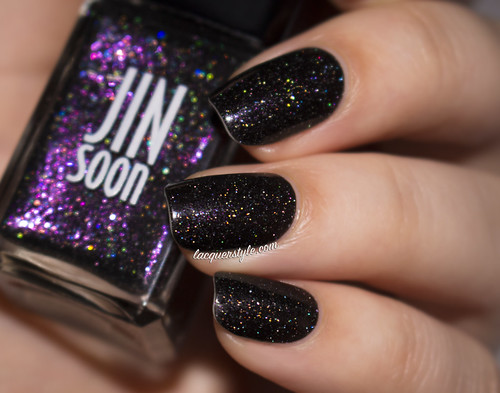
The one major difference between this version and my previous ones, is that I let my base do all the work.  I used two coats of the incredible JINsoon Obsidian, which is a black base filled with holographic flecks and bright purple shimmer.
Jin-soon-obsidian

In natural daylight (above) the purple shimmer is very visible, then, in the sun, or once you switch on some bright lights (or with flash, as shown below), the beautiful holographic shimmer sparkles.  It's amazing, but not totally in your face like some holos can be (although that is not a bad thing!).  I wore this on my nails for several days, before adding the galaxy on top, so there is the slightest tip wear in the photos.
IMG_0195-1


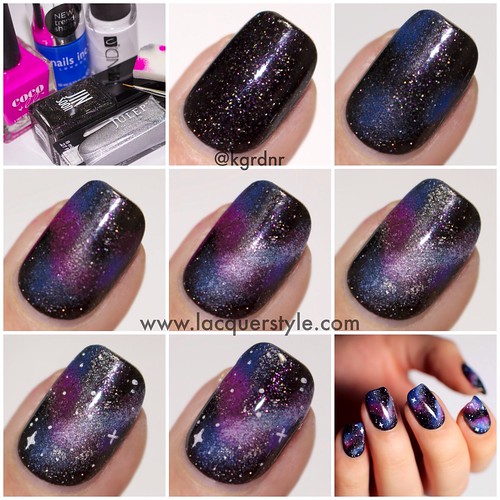
To create the galaxy, I used the technique shown below in my tutorial.  Of course I am only showing one nail, but definitely try to have fun with different placement and colors to create the feel of movement on the nails.  I think that is the best way to create a more realistic design!

Now, onto the tutorial!
(click for full size)

Galaxy-Nails-Tutorial-Simple-Realistic

1.  Gather your supplies and prep your nails with a base coat.  You will need a cosmetic sponge, a nail art brush (or dotting tool), a black or navy with holographic shimmer, two bright or neon colors, a white (I prefer a semi-sheer one), and a holographic silver polish (optional).

2. Paint one or two coats of your base color.  I used JINsoon Obsidian, which is this amazing black base filled with holographic flecks, and bright purple shimmer.  Zoya Storm could be a good alternative, or just a black creme with a holographic shimmer top coat (like inm Northern Lights) could be an option as well.

3. Sponge on a cobalt blue in a few spots on the nails.  I used Nails Inc. Baker Street, one of my favorite blue polishes.

4. Sponge on a neon pink overlapping some of the blue polish.  I used Coco & Lulu Ma Belle, an amazing fuchsia neon polish.

5. Lightly sponge on a bit of white polish over the other two colors.  I used CND Brilliant White.  I've realized, looking at a bunch of actual galaxy photos, that the white should be used more sparingly.  And, it almost gives a 3D effect to the other colors.

6. Lightly sponge on a silver holographic polish to the edges of the white polish.  I used Julep Rebel, which has a pretty subtle holographic effect.  This gives such a great sort of misty effect, and of course a little added sparkle.

7. With a nail art brush or dotting tool, add a few tiny white dots and "stars".  For the bigger stars, I always just create a + and then fill in the inner corners slightly.

8. Finish with a shiny or matte top coat, and enjoy! :)


If you have any questions, feel free to leave them down below.  And, if you need any other tips for galaxy nails, or would rather watch a video, I have a few tutorials on YouTube here:


Thank you all for reading! :)


Kristin



Connect with me:
Instagram  |  Twitter  |  Facebook  |  Pinterest

Follow on Bloglovin


Sunday, December 29, 2013

JINsoon Nail Art - Featuring Epidote Swatches & Review

Sunday, December 29, 2013
Hello everyone!

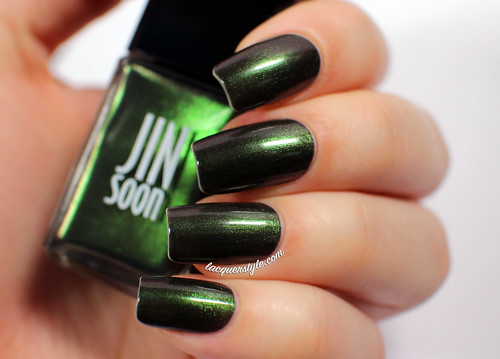
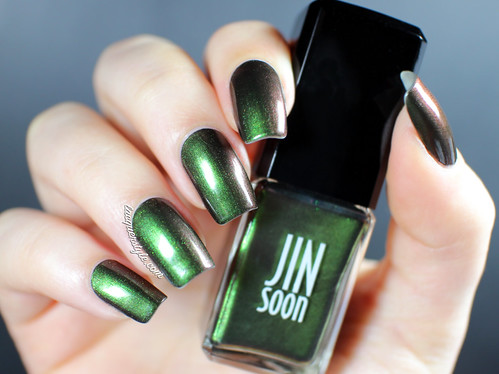
JINsoon Epidote, is actually what I had on my nails for Christmas and the past few days now.  It’s such a “me” color.  I know it might sound strange, but I like to save my JINsoon and other "prized (polish) possessions” for special occasions, or when I know I can keep them on for several days at a time.  I want to be able to enjoy wearing them, rather than swatching and removing right after.  Do any of you do that?  Or am I the only weird one? :P

IMG_4956-1

IMG_5195-1

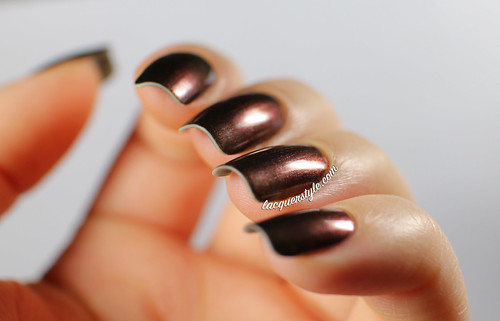
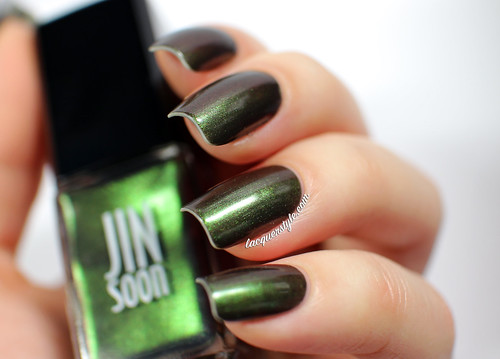
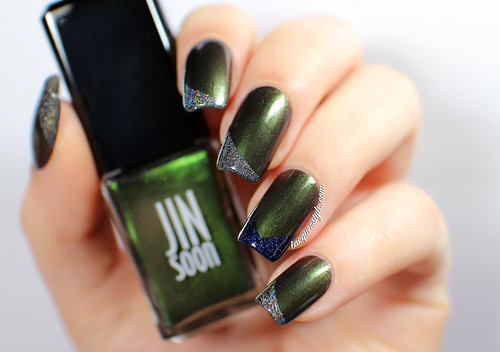
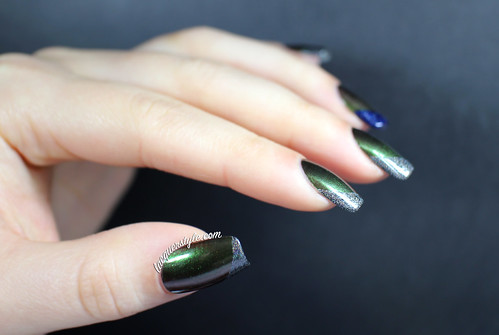
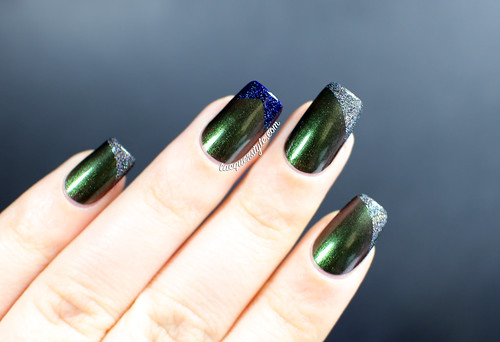
Epidote is described as a metallic green with a multidimensional, chameleon-like effect.  I agree with that description, but basically it looks like a blackened (super glowly), metallic green, with a vibrant green shimmer, and a rusty bronze duochrome most of the time.  This polish is just so beautifully strange and mysterious, and very hard to pinpoint an exact color because of the amazing duochrome it has.

IMG_4988-1

The formula is really lovely like all of the other JINsoon polishes I’ve tried; while the first coat is quite sheer, two coats is perfect.  Plus, it's totally brushstroke free, which is sometimes difficult when it comes to a metallic shade like this one.  I don’t think greens are usually the most elegant looking on the nail, but this one definitely is.

IMG_4962-1

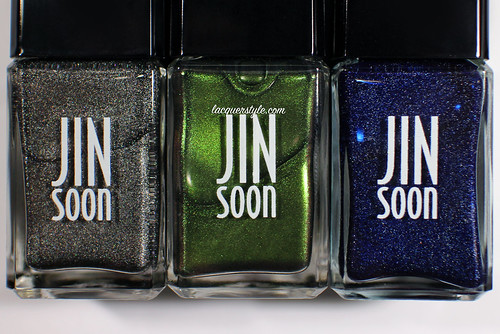
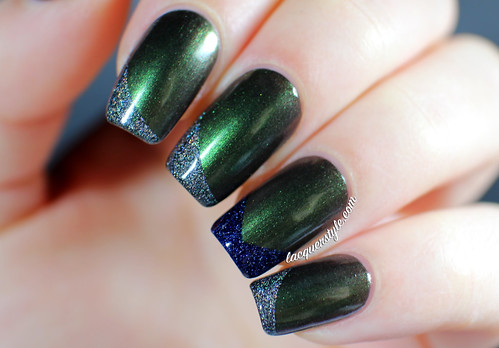
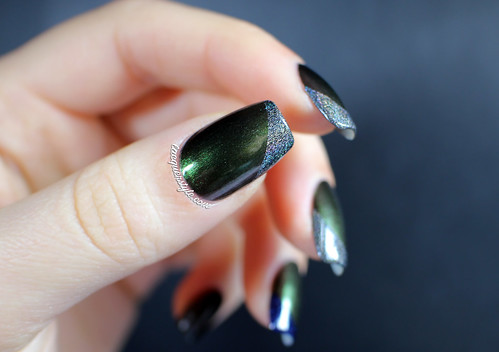
I had a tiny bit of tip wear after a few days, so I decided to refresh Epidote since I did not want to remove it yet.  I ended up going for a full on JINsoon design, adding Mica (a gorgeous charcoal grey holographic creme), as well as Azurite (a navy blue jelly with a subtle holographic shimmer), both from the Fall 2013 Tibi Collection, along with Epidote.

IMG_5097-3

IMG_5310-1
JINsoon Mica, Epidote, and Azurite

IMG_5149-2

I was inspired by all of the cool combinations that I had seen on Jin Soon’s Instagram when this collection first came out, so I added some asymmetrical tips and a chevron accent nail.  I really love how they turned out; simple and edgy.

IMG_5157-2

IMG_5166-2

IMG_5231-2


JINsoon nail polish retails for $18 - $20, and this collection is available at www.jinsoon.com and Sephora.  I have a small collection so far, but I think I’ll be adding some more JINsoon to it very soon!


Thank you all for reading! :)


Kristin


Connect with me:
Instagram  |  Twitter  |  Facebook  |  Pinterest

Follow on Bloglovin


Wednesday, October 30, 2013

My Current Nail Care Routine!

Wednesday, October 30, 2013
Hi everyone!

I get a lot of questions about my nail care on Instagram and YouTube, so I figured it was about time I let you all know my usual routine and go into detail about the products I use.

You can read about what I like to use in depth below, or just watch the video (at the end) for the basic tips and a little demo on how I file my nails.  I hope this answers some of your questions!


Now, my nails are by no means perfect; I am very happy with the shape and health of them at the moment, but the tips are still slightly yellow from wearing so much polish. :( 

Just a little disclaimer before I begin though - I have had a vegan diet for many years now (no animal or dairy products), so I'm not sure if that changes anything, I just thought I should include it since not everything will work the same for everyone.


First up, nail polish remover:  I only use non-acetone to remove my polish, Beauty Secrets Non-Acetone is my favorite.  The only exception is when I clean up around my cuticles because I use a brush dipped in Beauty Secrets Pure Acetone to get a cleaner line.  Sidenote: I always use "lint-free cotton rounds" to remove my polish; I can't stand cotton balls!

Filing / buffing:  I never cut my nails .. ever.  Instead, I file my nails every few days with a glass (or crystal) file before applying fresh polish.  My nails grow extremely fast, so I have to file them often or they get out of control.  When it comes to buffing, I will buff a tiny bit here and there, but it's definitely not healthy to over-buff your nails.

Cuticles:  I have super dry skin from head to toe, so I am constantly applying creams and oils throughout the day.  A favorite for years has been Badger Cuticle Care, a cuticle balm.  I massage and push back my cuticles regularly (no tools, removers, or cutting involved), and make sure they are always nice and moisturized if they are looking dry.  I love to use a moisturizer with shea butter on my hands and cuticles because it's so rich and I don't have to reapply as often.

Base coats:  If I'm going for long-wear, my favorites are CND Stickey or Chanel's Protective Base Coat.  I have multiple backups of Stickey because it works well and it's reasonably priced.  The Chanel is of course a high end product so I use it sparingly (mostly under my Chanel's), but it's the only thing I've really found to be long lasting that also keeps my nails at their whitest.

If I am just swatching or don't expect to wear a polish for very long, I will grab whatever base coat I'm trying to use up.  Lately, I've been grabbing a Julep base coat, or Essie's Grow Faster.  The wear time on the Essie is not great, but it does seem to actually make my nails grow faster, so I would recommend it for those of you who have a hard time growing your nails.


Polishes:  I prefer to use mostly 3-free or 5-free, but I have been changing my polish so often lately that it hasn't been a big deal.  If you're wondering, a few of my favorite brands (in general) are Chanel, Jin Soon, Essie, Color Club, Enchanted Polish, and Elevation Polish.  I could list so many more though!

Top coats:  I have been using inm Out the Door for quite some time now.  I've tried many different top coats over last few years but I always come back to it.  It dries fast, wears well for me, and doesn't seem to get thick or smell awful like some others.  I also really like a-England The Shield, but it can be harder to get so I usually just stick with my OtD.

Additional tips / info:  I always have polish on my nails to keep them strong; honestly, I never even leave the house without at least a base coat on so they do not split or break.  However, if a nail happens to break, I will patch it with some nail glue and a teabag, or use the Orly Nail Rescue kit.  I also always carry a spare glass file in my handbag wherever I go.


Here is the video I put together for my nail care:


Let me know if you have any other questions, or tips & tricks for keeping your nails white; that's one thing I am still working on!

Thank you for reading, especially if you made it this far! :)


Kristin

Friday, July 19, 2013

Jin Soon Coral Peony + Fan Brush Nail Art

Friday, July 19, 2013
Coral Peony is my second Jin Soon nail polish (see Blue Iris here), and I am officially obsessed.  They are quite expensive which is annoying, but the two I have tried so far have the most gorgeous jelly finish and I love everything about them.  The bottle is so sleek and adorable, and the brush is to die for (it's not as wide as OPI's, but flatter and wider than Chanel's).  It makes polishing the nails quick and effortless.  From my experience, they have great lasting power as well.  The photos below were actually taken on day three of wear.


Coral Peony is a darker coral, but still very bright in certain lighting, probably due to the jelly finish.  It leans slightly more red on me in most lighting, but it still has a good amount of pink in it to keep it looking coral.  It glides on without any streakiness, dries very fast, and is opaque in two coats.


My accent nail is one coat of CND Gold Chrome and one coat of piCture pOlish Majesty on top.  Perfection.


I have actually been wearing Coral Peony for four or five days now and it needed a bit of refreshing (I don't think the Dior top coat I used was a good match).  My new set of nail art brushes arrived recently, and a few people on Instagram wanted to see a look using the fan brush.  I did one layer with CND Gold Chrome, and then I added a light layer of Layla Gold Idol on top to play off of Majesty which has some amazing holographic shimmer in it.  I just love pairing coral with gold, and I am really happy with this look!


Coral is one of those colors that I never get tired of.  It always looks so elegant and flattering, yet it's still a bright, happy color that I especially love in the summer months.


Thank you for reading! :)


Kristin


Lacquerstyle.com © 2014