


I wore some houndstooth nails a few months ago after creating my white negative space nails. I was just so happy with how my houndstooth nail turned out that I had to wear a full mani of it! A few people requested a tutorial for my houndstooth as well, so I made a quick one which you can view at the end of the post. :)
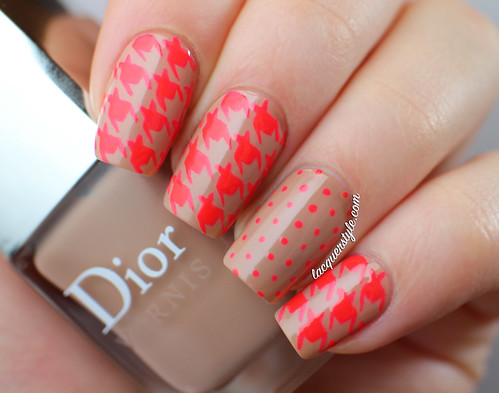
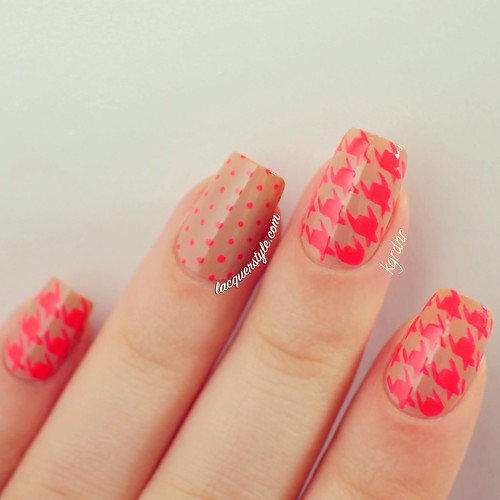
My nude base is two coats of Dior Grège. I actually don’t love Grège that much, it’s a bit of a weird tone on me, so I’m glad I added China Glaze Pool Party (a crazy coral pink neon), because it definitely made me like the base a bit more. Pool Party is so difficult to photograph, so I ended up filtering it when I posted these on Instagram yesterday.
Here is the tutorial I created, showing how I paint my houndstooth nails:
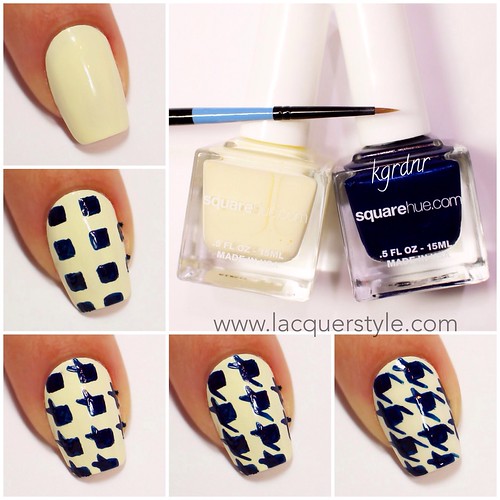
1. Apply your base color. I used two coats of Square Hue Westminster (an ivory creme).
2. Paint rows of squares using a contrasting color (I used Square Hue West End). Your squares don’t have to be perfect, and I like to paint mine kind of off-centered, but if you are not comfortable painting them freehand, you can always use tape. Try to keep them as evenly spaced as possible, if you can.
3. Paint tiny triangles at the upper left corner (or right if you are mirroring), one pointing out to the side, and one pointing up towards the aquare above it.
4. Paint a diagonal line from the bottom left corner to the upper right corner of the square just below it. I like to leave a tiny space so the line doesn’t directly touch the square below it.
5. Paint another diagonal line from the upper right corner to the bottom left corner of the square to the right of it. I also leave a tiny space here so the line is not touching, but you could have them touch if you want.
6. Clean up around your cuticles if you need to, and wait a while before applying top coat so you don’t smudge your houndstooth.
I hope that is easy to follow, but if you have any other questions, feel free to leave them in the comments below.
Have fun! :)
Have fun! :)

For me this is a perfect color and design combination. Love the nude and neon contrast and the tutorial is easy to follow, so thank you for it!
ReplyDeleteHi, I've nominated you for a Shine On award, if you would like to accept here is the post. http://breakrulesnotnails.wordpress.com/2014/03/16/thank-you-and-spam-me/
ReplyDeleteThat’s awesome, thank you! :)
DeleteThank you! :)
ReplyDeleteBeautiful mani. love it
ReplyDeleteThis is So gorgeous and helpful, thank you for sharing! Also just wanted to say that I absolutely love your instagram and had no idea you had a blog going too! Score! You've got some killer design skills <3
ReplyDeleteP.S. Your Essie Shearling Darling+SOtT manicure has been setting off a firestorm of manicure-inspirations in my various nail communities. Can't wait to see more from you :)
Thank you so much. I’m glad you found it helpful!
DeleteAnd that is so amazing to hear about my Essie manicure, I love that!
Thank you for the lovely comments! :)