Showing posts with label opi. Show all posts

Saturday, August 08, 2015

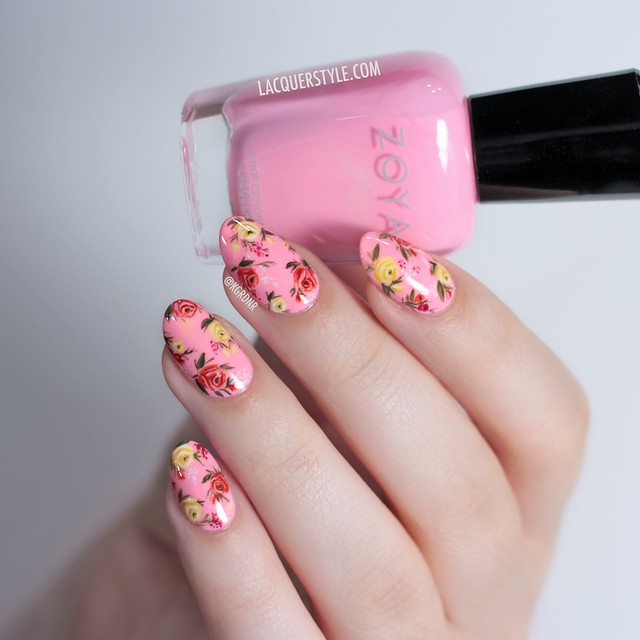
#WNAC2015 - August / Summer: Classic Pink Floral Nails (+ Tutorial!)

Saturday, August 08, 2015
Hello everyone!

I'm excited to share this post with you, for the first prompt of the August #WNAC2015 (Weekly Nail Art Challenge).  And yes, I finally have a new tutorial, which you can view at the end of the post! :)

IMG_8241-2

Monday, June 29, 2015

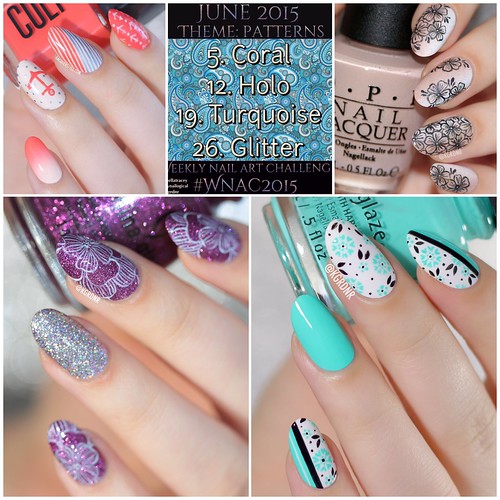
#WNAC2015 - June / Patterns: Roundup

Monday, June 29, 2015
Hello everyone!

I can't believe June is almost over already, crazy!  Since it's the end of the month however, I have my nail art roundup to share with you from our #WNAC2015 (Weekly Nail Art Challenge). :)

The overall theme for the month was "Patterns", so we had to incorporate a different pattern into the prompts each week, which was quite fun.  I think you all know I love my patterns, and I was definitely in a floral mood!

  Untitled  

Saturday, February 22, 2014

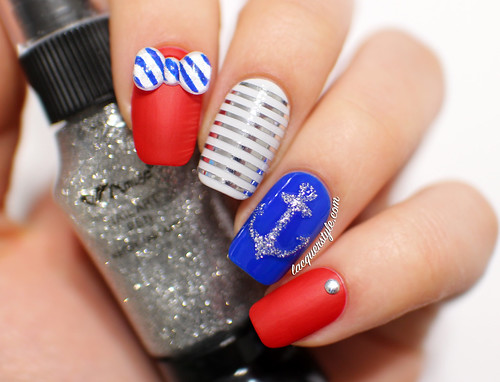
Nautical Nail Art featuring Simply Spoiled Beauty

Saturday, February 22, 2014
Hi everyone!

Recently, I was sent a few products to review from Simply Spoiled Beauty.  I received a bag of some adorable striped bows, and as soon as I saw the navy and white striped bow, I knew I had to create some nautical nails.

IMG_4099-2

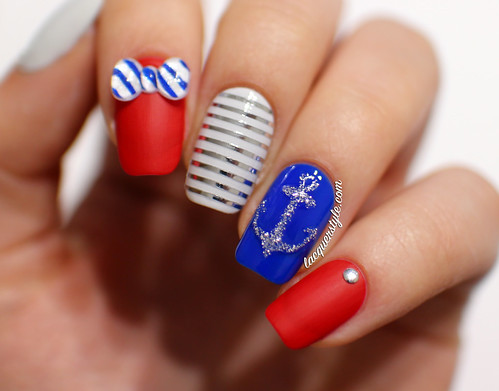
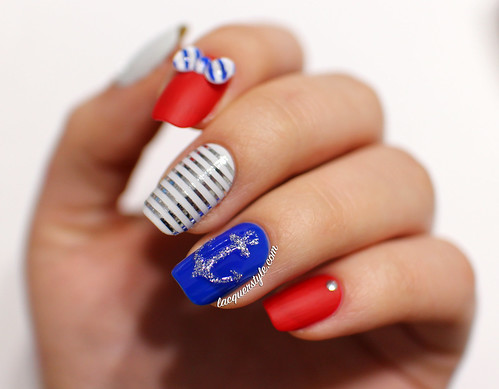
To create my nautical nails, I started with blue, white, and red alternating bases.  From Simply Spoiled Beauty, I also received three nail art pens, so I chose the Silver Sparkle glitter pen to draw the anchor on my ring finger.  The nail art pens have a tiny metal tip where the polish comes out, so it’s easy to paint really clean lines.  There is also a striper brush if you remove the cap, which is great for another option.

IMG_4045-1
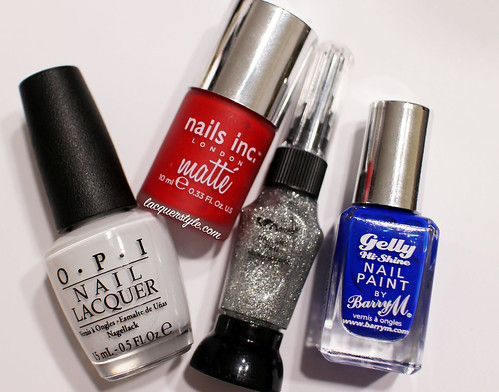
OPI My Boyfriend Scales Walls, Nails Inc. Matte Gatwick, Amuse “Silve Sparkle” Nail Art Pen, and Barry M Gelly Blue Grape

IMG_4065-1

I added a silver stud on my pinky and thumb, and on my middle finger I applied silver striping tape.  Originally, I was going to paint a matte top coat over the tape to create matte and shiny stripes, but I really loved how the silver tape coordinated with the other nails, so I ended up keeping the tape on for a cool mirrored look.

IMG_4056-1


If you would like to order from Simply Spoiled Beauty, you can use my coupon code “lacquer” for 30% off your purchase.  They offer a flat rate of $5 for shipping.


I hope you enjoyed my nautical nail art, and thank you for reading! :)


Kristin


Connect with me:
Instagram  |  Twitter  |  Facebook  |  Pinterest

Follow on Bloglovin


Monday, January 13, 2014

OPI Mariah Carey Holiday 2013 Collection Nail Art

Monday, January 13, 2014
Hello everyone!

My prize from the Nail Polish Canada Holiday Nail Art Challenge arrived last week, and I am still amazed by it all.  Thank you so much to those of you who voted for me throughout the challenge, it made my Christmas and birthday absolutely amazing, and I can't thank you all enough! <3

I received some duplicates, so I made sure to set aside a few things from my prize to add to a giveaway I've been planning for a while now.  You should be hearing about it very soon! :)

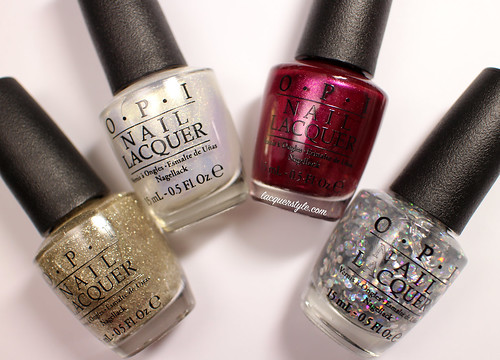
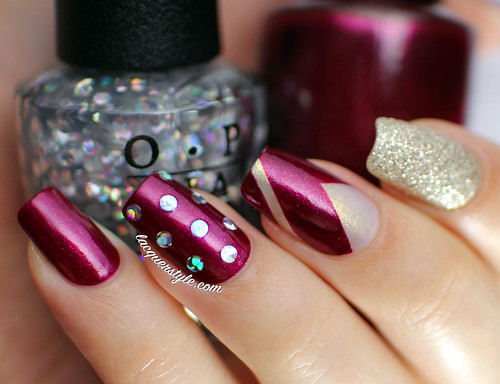
There were 12 beautiful polishes from the OPI Mariah Carey Holiday 2013 Collection in the grand prize, which I had been dying to get my hands on, so I wanted to use as many as I could at one time.  I went with a mix & match featuring one of my favorites from the collection, Cute Little Vixen.

IMG_7906-1

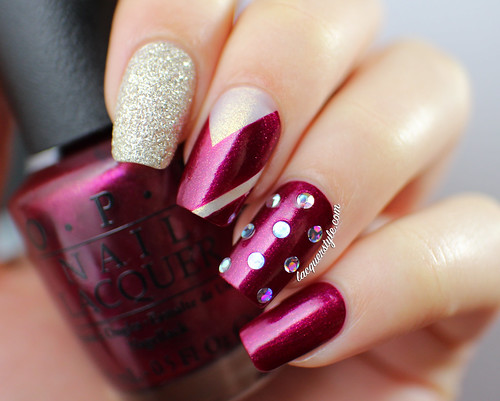
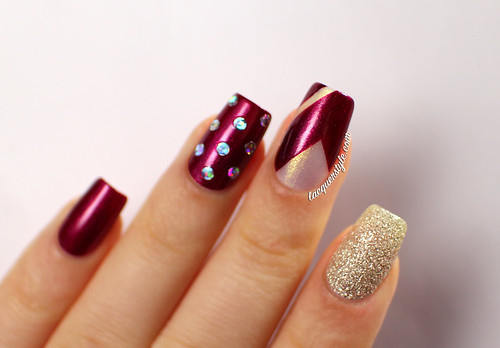
I started with my index nail, applying two coats of My Favorite Ornament, a lovely antique gold flake glitter with a slight texture (I did not apply top coat).  My middle nail is one coat of Ski Slope Sweetie, which I made matte, then over it I created some angular shapes with the brush of Cute Little Vixen (not tape).  On my ring nail, I have added a few of the circle glitters from I Snow You Love Me on top of two coats of Cute Little Vixen to resemble polka dots, similar to what I created here.

IMG_7930-1
My Favorite Ornament, Ski Slope Sweetie, Cute Little Vixen, and I Snow You Love Me

IMG_7914-2

IMG_7847-1

This is always one of my favorite color combinations to wear (if you couldn't already tell from previous posts), and I was a bit sad to remove them! 


Let me know what you think of them, or what you would like to see on Lacquerstyle next, and thank you so much for reading! :)


Kristin


Connect with me:
Instagram  |  Twitter  |  Facebook  |  Pinterest

Follow on Bloglovin


Wednesday, December 25, 2013

OPI Pure 18K Top Coat with Snowflake Nail Art + Tutorial!

Wednesday, December 25, 2013
Hello everyone!  And, Merry Christmas!

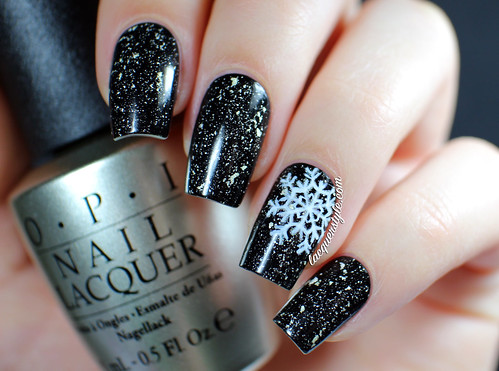
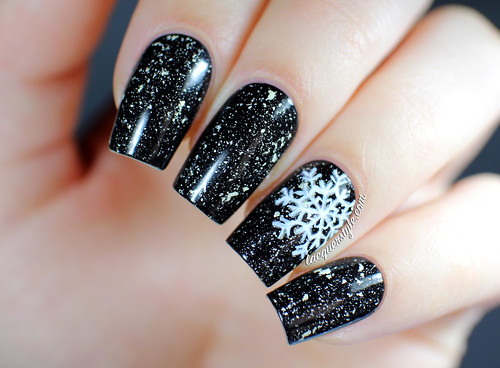
I've been obsessed with OPI Pure lately, the 18K White Gold & Silver top coat (I posted a little glimpse of it here).  I think I even like it more than the gold leaf top coats that were so popular this past year, and I absolutely loved those ones.  I think with this version, the white gold looks amazing over every single color, whereas with the gold, I feel like some colors suit it much better than others.

I don't have the OPI gold version (The Man With the Golden Gun), but compared to several of the other gold leaf top coats that I have, the formula of Pure is just perfection.  It has the perfect amount of clear base to white gold & silver, and it's just a dream to apply.  There are also lots of varying sizes of flakes, so you get really great coverage on the nail in just one coat.

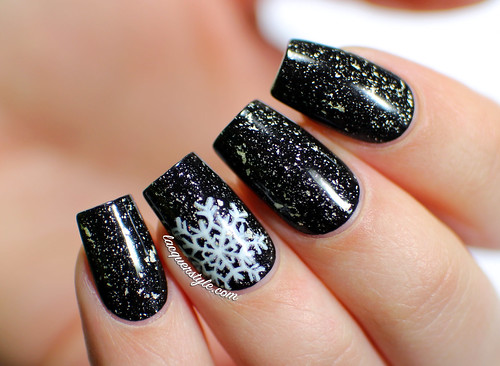
I was looking forward to trying it over black, and the look is so chic and pretty, just as I imagined.

IMG_4602---1

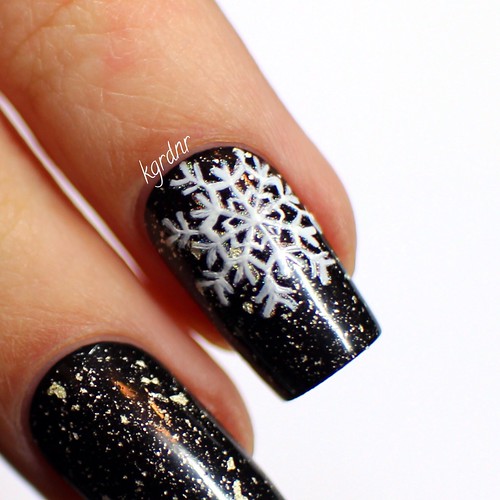
As you can see (or may have already seen on Instagram the other day), I added a snowflake on my ring finger, and I am very happy with how it turned out!  While I was googling photos of actual snowflakes, I came across one I thought was really cool, so I decided to try something similar with white polish, but of course I had to amp it up a little by adding some holo!

IMG_4581---1

IMG_4319---1
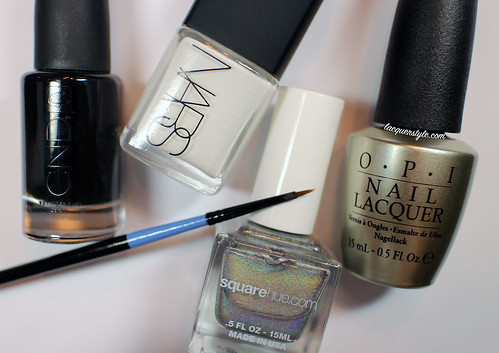
CND Blackjack (the best!), Nars Ecume, Square Hue Times Square, OPI Pure, and a size10/0 brush (from Michael’s)

IMG_4483---1

Here’s a closeup that I posted on Instagram the other day:
Untitled

I also filmed a tutorial of my snowflake, so I hope you all enjoy it.  Please let me know if you have any other questions or requests, and feel free to tag me @kgrdnr in your photos on Instagram if you try it! :)


I hope you all have an amazing holiday, and thank you for reading! :)


Kristin


Connect with me:
Instagram  |  Twitter  |  Facebook  |  Pinterest

Follow on Bloglovin


Tuesday, December 17, 2013

Glamorous Mix & Match Nails + Tutorial

Tuesday, December 17, 2013
Hello!

I posted these nails two weeks ago on Instagram, and I was surprised at the amazing response they received!  Originally, I wasn’t even going to post them anywhere, but I’ve had a few requests, so I decided to finally share them on my blog.  You can view the tutorial down below! :)

IMG_1972-1

IMG_3741-2
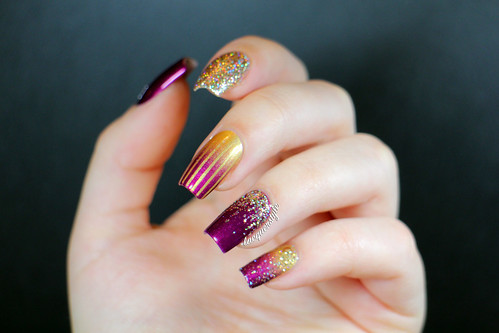
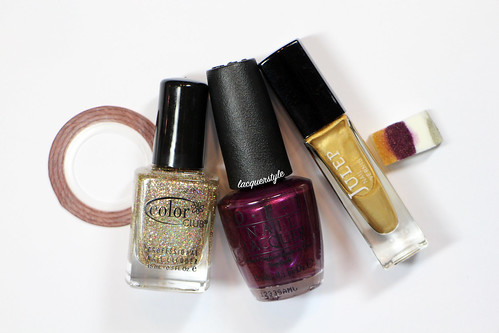
Color Club Gingerbread, OPI Diva of Geneva, Julep Felicity


View the tutorial:

Enjoy!


Please let me know if you have any other questions or requests, I would love to answer them!


Thank you for reading! :)

Kristin


Connect with me:
Instagram  |  Twitter  |  Facebook  |  Pinterest

Follow on Bloglovin


Sunday, December 15, 2013

Reindeer Love - Rudolph & Clarice

Sunday, December 15, 2013
Hello everyone!

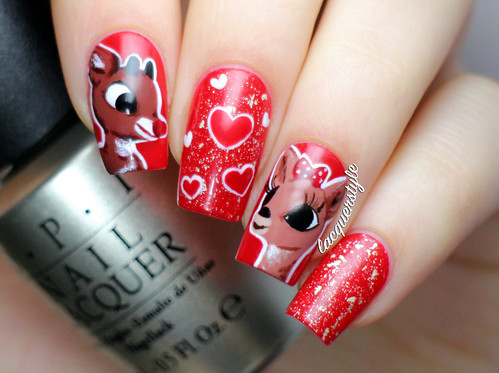
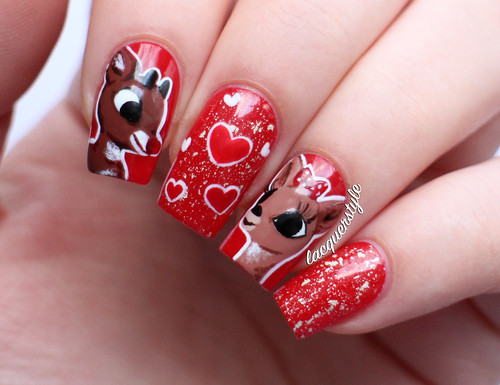
The theme for the final week of the Nail Polish Canada Holiday Challenege is “holiday memories”.  I don’t really have the greatest holiday memories, as sad as that may sound, but I do remember always watching Rudolph the Red Nosed Reindeer on TV for years when I was younger, so that was my inspiration!

IMG_3717----1

The base of these nails (CND Rouge Red) was kind of a happy accident;  I was originally going to do some sort of pale blue snowy background with snowflakes or something, but I already had this red on my nails from the day before and wanted to practice painting Rudolph.  It ended up being pretty cute over red, and Rudolph turned out great on my first try so I just decided to keep it!

IMG_3480-1

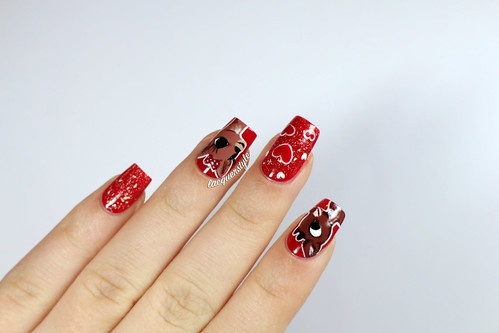
Rudolph and Clarice were painted with a size 5/0 brush from Michael’s using a bunch of browns and tans from Essie, which I’m so glad I had in my collection!  I outlined both of them in white so that they really stand out on the bright red base.   What I really think makes the whole design though, is OPI Pure, the 18K White Gold & Silver top coat.  It looks really beautiful over red and makes it really festive for the holidays.

IMG_3724-1
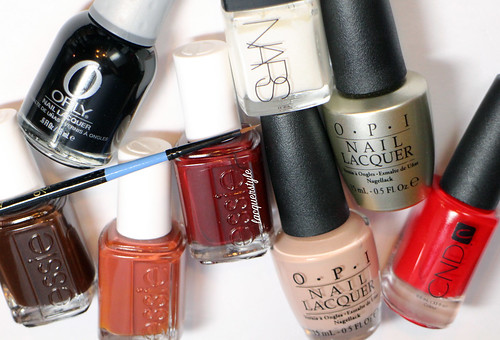
Orly Liquid Vinyl, Nars Ecume, OPI Pure, CND Rouge Red, OPI Don’t Pretzel My Buttons, Essie Chocolate Cakes, Very Structured, and Little Brown Dress

I’m extremely happy with how these turned out;  I think I’ll probably make them matte before removing them though, so I might update this with some more photos.

IMG_3613-1


If you have a few seconds, please head over to NPC and vote for me!  Just select lacquerstyle.com from the drop down menu, I would really appreciate it! :)


I hope you all enjoyed these nails, and thank you for reading!


Kristin

Connect with me:
Instagram  |  Twitter  |  Facebook  |  Pinterest

Follow on Bloglovin


Sunday, November 24, 2013

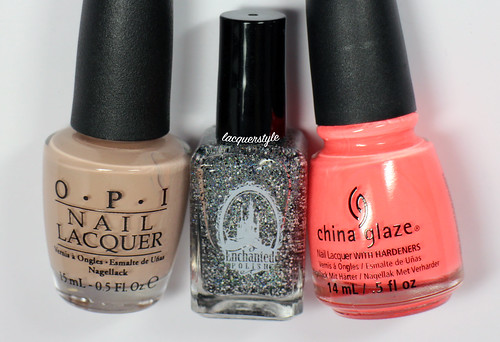
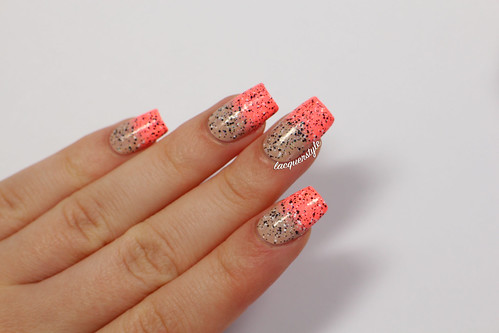
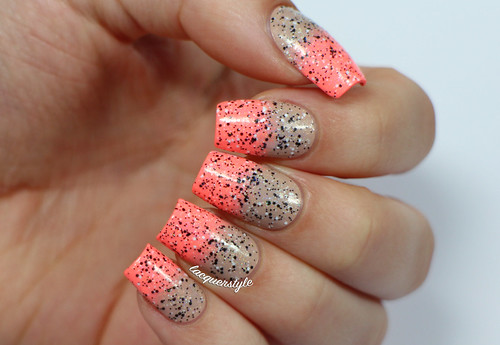
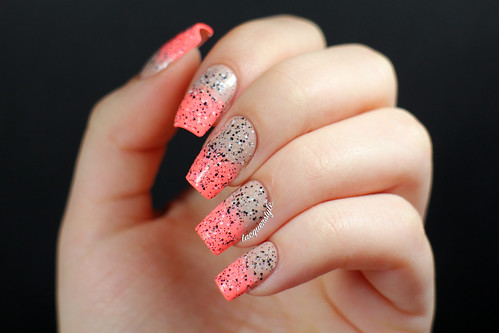
NOTD: Neon & Nude + Enchanted Polish Seven Nation Army

Sunday, November 24, 2013
Hi everyone!

I went with some bright nails for today’s NOTD.  I guess I just needed something to cheer me up since we now have snow here :(.  Today was also an Enchanted Polish restock, and I think this mani must have been good luck since I was quite successful!

enchanted-polish-seven-nation-army3

enchanted-polish-seven-nation-army1

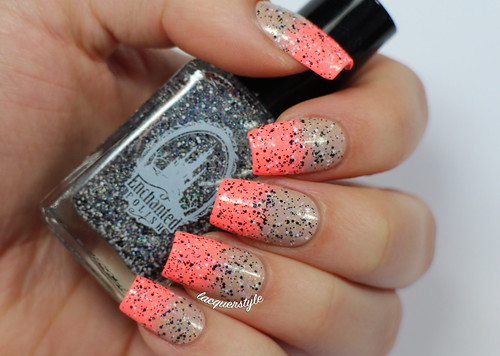
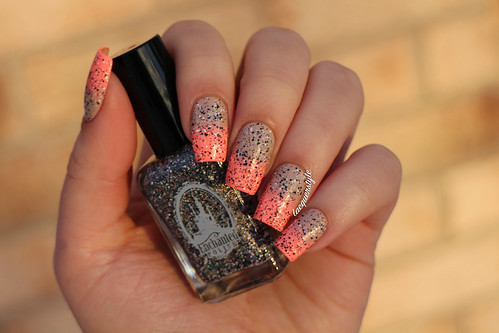
Enchanted Polish Seven Nation Army is basically a holographic topcoat, filled with lots of black and white glitter in a few different sizes.  The glitter is so dense that only one coat is necessary if you are layering it, but it could also be worn alone, it's just awesome!

enchanted-polish-seven-nation-army5
OPI Don't Pretzel My Buttons, Enchanted Polish Seven Nation Army, and China Glaze Flip Flop Fantasy

enchanted-polish-seven-nation-army2

enchanted-polish-seven-nation-army4

enchanted-polish-seven-nation-army10


Hope you all had a lovely weekend, and thank you for reading! :)


Kristin


Follow me:
Instagram  |  Twitter  |  Beautylish  |  Pinterest


Tuesday, September 24, 2013

31 Day Challenge - Day 14: Fall Florals + Tutorial!

Tuesday, September 24, 2013
Ok, so I may have failed the #31DC2013, but I figured I would still post the last nails I created for the challenge (I know I'm like 10 days late, sorry!).  They were for Day 14: Flowers.


I was actually inspired to create these floral nails after I found a random print on google.  I really liked the color combination, especially for fall, so I tried to get it as close as possible.  I'm not exactly happy with them, but I spent so much time on them that it would've been silly not to post them. 

Polishes used: Deborah Lippman Human Nature, OPI Ate Berries In the Canaries, Ciate Kiss Chase, Essie Like to Be Bad, Essie Meet Me At Sunset, and Lime Crime Once In a Blue Mousse.


Update: I finally got a tutorial up on YouTube. Enjoy!


Thank you for reading!


Kristin


Thursday, September 12, 2013

31 Day Challenge - Day 9: Rainbow Nails

Thursday, September 12, 2013
Day 9 of the #31DC2013 was Rainbow Nails.

I just did some rainbow nails recently, so I wasn't too excited about creating another set.  I am pretty happy with how take two turned out though; I might even like them better than the first ones!


I started with two coats of Lime Crime Milky Ways, then I freehanded some curved lines for each color of the rainbow, leaving some of the base peeking through.  The accent nail is one coat of Enchanted Polish TenderHeart, and I placed one of the heart glitters in the middle of my nail.  Then, I added some loose red hexes surrounding the heart, and a few more randomly around my nail.

OPI Conquistadorable Color, Essie Action, Square Hue Bikini Beach, Barry M Key Lime Gelly, Bourjois Bleu Fabuleux, Orly Beach Cruiser, Lime Crime Milky Ways, and Enchanted Polish TenderHeart


My little one (Chloe) wanted in on the rainbow love as well, so here is her first feature on my blog! :)


Thank you for reading!


Kristin

Wednesday, September 11, 2013

31 Day Challenge - Day 8: Metallic Nails

Wednesday, September 11, 2013
Metallic Nails was Day 8 of the #31DC2013!  I have been following along and doing nail art every day, but I've got a lot of catching up to do when it comes to blog posts.  Oops!


I went with a simple fishtail mani for my metallic nails.  I used three of Essie's Mirror Metallics, Good As Gold, Penny Talk, and No Place Like Chrome.  I love working with these polishes because with the right base coat (I used CND Stickey) they are all one coaters and have the best chrome finish.


My accent nail is OPI Honey Ryder which is nearly identical to Good As Gold in color, but of course it's a Liquid Sand.  It's also opaque in one coat and super shiny.  I added a silver pyramid stud to tie it all together.  


Thank you for reading! 


Kristin

Lacquerstyle.com © 2014