Thursday, February 27, 2014

Elevation Polish Haleakala Swatches & Review

Thursday, February 27, 2014
Hello everyone!

I wore this amazing holo called Haleakala by Elevation Polish a few weeks ago.  It’s one of the most beautiful holographic polishes I’ve seen recently.  My nails were still oval here, but I thought this color was so flattering on them.

IMG_1695-2

Haleakala is the loveliest shade of purple with a hint of red, and the formula is absolutely perfect in two coats.  The color is surprisingly bright, but also deep enough to be slightly vampy, and there is a faint gold shimmer in the base, which makes this polish so unique in my collection.  Haleakala also has a very strong holographic effect, which always makes me happy.  I am just head over heels in love with it!

IMG_1648-1

IMG_1657-2

IMG_1655-1

It looks like Haleakala is sold out at the moment, which I can totally understand, but I highly suggest checking it out at the next restock, because it’s just gorgeous!


Thank you for reading! :)

Kristin


Connect with me:
Instagram  |  Twitter  |  Facebook  |  Pinterest

Follow on Bloglovin


Wednesday, February 26, 2014

Vintage Gradient Floral Nails

Wednesday, February 26, 2014
Hi everyone!

Looking back on some of my favorite nail art that I’ve done this past [almost] year, my favorite has always been my floral Vampire Weekend nails.  I don’t think I could ever recreate them, but whenever I look at them I want to create some new floral nails, and floral nails are just so fun to do!

I decided to create some “vintage” florals this time, so I started with two coats of China Glaze V as my base, which is such a beautiful, peachy, terracotta polish.  Then, I added a gradient using Zoya Jacqueline and Square Hue Westminster.  I’ve never painted florals over a gradient base, but I’ve had the idea in my head for a while now.  The flowers took me a few hours to paint (per hand - yes, I did both), because I wanted each nail to be unique, and they turned out just as I had hoped.

IMG_4951-3

While I was at Michael’s recently, I found this really amazing brush that I wanted to show you all as well.  It’s the only brush I used to paint these floral nails, and I just went back to get another one because it’s that good.  It’s the 18/0 Round brush by La Corneille.

IMG_5132-1

To paint the flowers, I used twelve different polishes.  I know that sounds like a lot, but I like to use at least 3 shades of polish per flower so that they look more realistic.  I’m just going to list all of the polishes I used down below, because I would be writing this for ages if I listed specifics!

Polishes used:
China Glaze: V, and Westside Warrior
CND: Flamingo Feather, and Tropic Coral
Dior: Grege
Essie: Fiji, Da Bush, Mind Your Mittens, and Warm & Toasty Turtleneck
Square Hue: Buckingham, and Westminster
Zoya: Jacqueline

IMG_5082-3

IMG_4929-2

Untitled

I hope you all enjoyed these nails as much as I do, and thank you for reading! :)


Kristin


Connect with me:
Instagram  |  Twitter  |  Facebook  |  Pinterest

Follow on Bloglovin


Saturday, February 22, 2014

Nautical Nail Art featuring Simply Spoiled Beauty

Saturday, February 22, 2014
Hi everyone!

Recently, I was sent a few products to review from Simply Spoiled Beauty.  I received a bag of some adorable striped bows, and as soon as I saw the navy and white striped bow, I knew I had to create some nautical nails.

IMG_4099-2

To create my nautical nails, I started with blue, white, and red alternating bases.  From Simply Spoiled Beauty, I also received three nail art pens, so I chose the Silver Sparkle glitter pen to draw the anchor on my ring finger.  The nail art pens have a tiny metal tip where the polish comes out, so it’s easy to paint really clean lines.  There is also a striper brush if you remove the cap, which is great for another option.

IMG_4045-1
OPI My Boyfriend Scales Walls, Nails Inc. Matte Gatwick, Amuse “Silve Sparkle” Nail Art Pen, and Barry M Gelly Blue Grape

IMG_4065-1

I added a silver stud on my pinky and thumb, and on my middle finger I applied silver striping tape.  Originally, I was going to paint a matte top coat over the tape to create matte and shiny stripes, but I really loved how the silver tape coordinated with the other nails, so I ended up keeping the tape on for a cool mirrored look.

IMG_4056-1


If you would like to order from Simply Spoiled Beauty, you can use my coupon code “lacquer” for 30% off your purchase.  They offer a flat rate of $5 for shipping.


I hope you enjoyed my nautical nail art, and thank you for reading! :)


Kristin


Connect with me:
Instagram  |  Twitter  |  Facebook  |  Pinterest

Follow on Bloglovin


Monday, February 17, 2014

PolisHaus Swatches & Review

Monday, February 17, 2014
Hello everyone!

I had the pleasure of swatching five beautiful PolisHaus polishes recently, but I’ve been away all week without wifi, so I finally found time to post them!

Untitled

IMG_1850-1 

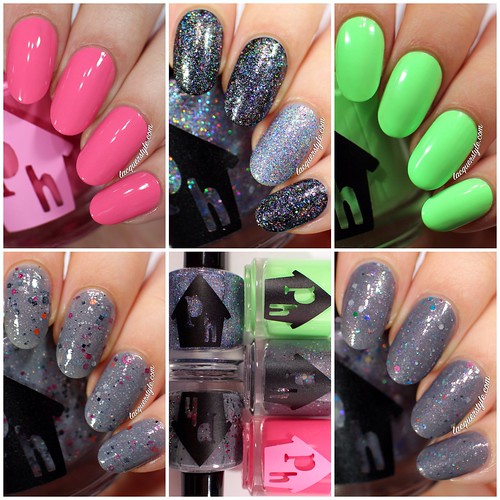
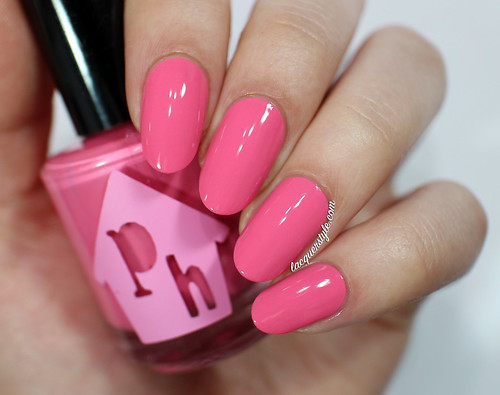
Mine is a peachy pink creme.  It dried slightly dull so it definitely needed top coat, but the formula was really great.  I’m wearing two coats plus top coat in the photo below.

IMG_2374-1

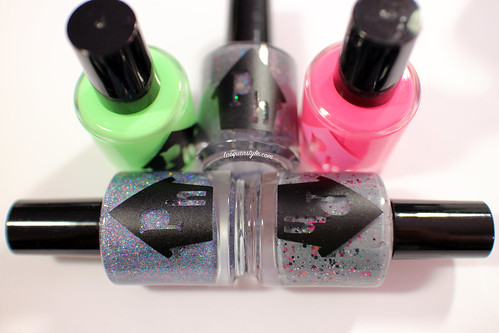
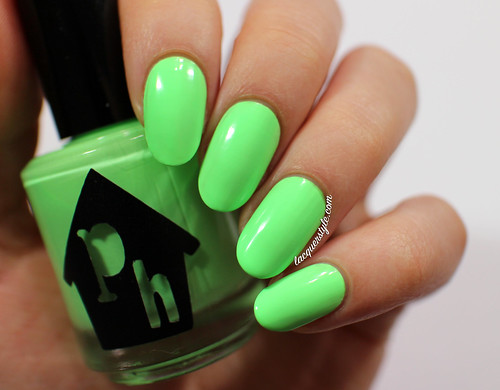
Frankie is a light, but very bright green creme.  This one is borderline neon, but still has a pastel feel to it.  It’s so much prettier in person, and just like the previous creme it was perfect in two coats.  I was surprised Frankie actually dried shiny, but I still added top coat for the photo below.

IMG_2489-1

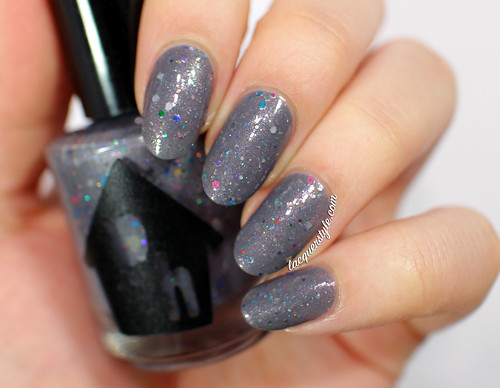
Farewell is a shimmery grey creme, with rainbow colored glitter and holographic shimmer.  There is a really pretty silver sheen in the base that makes this polish interesting.  There’s also a few large pieces of circle glitter, but I didn’t manage to get any on the nail.   I used two coats plus top coat for the photo below.

IMG_2437-1

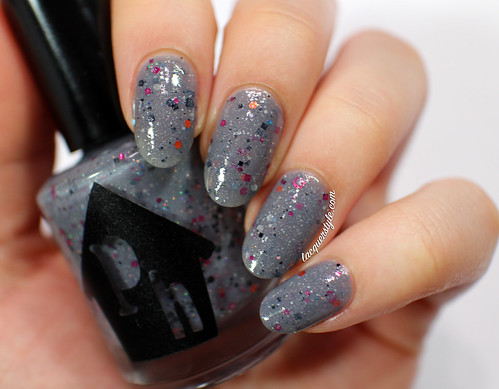
Argentine is a medium grey jelly, with silver holographic glitter, and different sizes of raspberry pink, orange, and black glitter.  It also has a really beautiful holographic shimmer in the base.  I really love this one; it’s so unique, and the color combination is lovely.  I used two coats plus top coat for the photo below.

IMG_2404-1

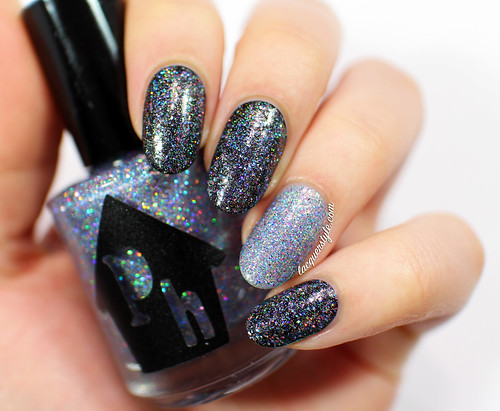
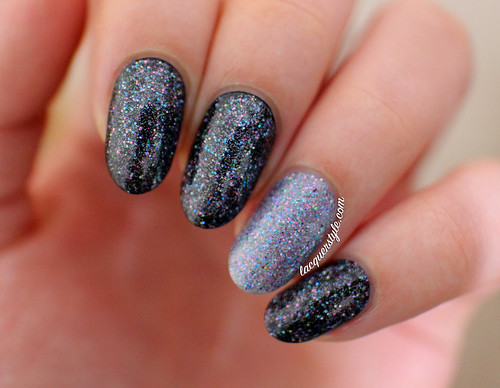
Moon Sand is a stunning polish, loaded with holographic shimmer, and blue & pink holographic glitter.  I can’t even explain how awesome this one is.  It looks amazing layered over different colors, but it’s dense enough to wear by itself in two or three coats.  In the photos below, I’ve shown it over black, pink as well as alone.

IMG_2515-2
Moon Sand over one coat of CND Blackjack, two coats of Moon Sand alone on the ring finger.

IMG_2568-1
Moon Sand over one coat of CND Blackjack, two coats of Moon Sand alone on the ring finger.

IMG_2581-1
Moon Sand over one coat of CND Blackjack, two coats of Moon Sand alone on the ring finger (in the shade).

IMG_2385-1
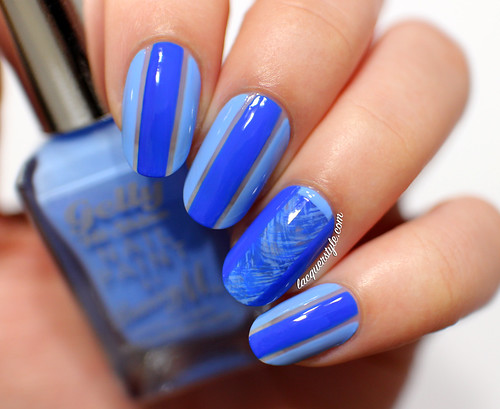
One thin coat of Moon Sand over Mine.


Moon Sand and Frankie, along with a collection of new PolisHaus polishes will be available March 7th at 6 pm PST on the PolisHaus bigcartel shop.  The formulas of the ones I've tried were really lovely, so be sure to check them out!


Thank you for reading!


Kristin


Connect with me:
Instagram  |  Twitter  |  Facebook  |  Pinterest

Follow on Bloglovin


Wednesday, February 05, 2014

Negative Space “Racing Stripes” + Tutorial (Valentine’s Version)

Wednesday, February 05, 2014
Hi everyone!

I’m back with some negative space nails for you today.  It’s funny, because I used to never really care for the negative space look, but ever since my nails are no longer yellow-stained, I just can’t get enough of them!

IMG_0206-3

The “racing stripes” idea was actually inspired by a video I found by Jin Soon on Sephora’s website.  It’s such a simple design and I absolutely love the look of it.

I went with a blue theme originally, because I’ve been dying to use Color Club Bright Night and Barry M Blueberry Gelly, and I think they look gorgeous together.  I really loved wearing them!


I filmed a tutorial for these nails as well, but instead of the blues, I created a Valentine’s version with a few different shades of pink (CND Taffy Pink & Girlie Pink, and Orly Miss Conduct).  You can watch the video down below!

Untitled


Enjoy! :)


Thank you for reading!


Kristin


Connect with me:
Instagram  |  Twitter  |  Facebook  |  Pinterest

Follow on Bloglovin


Lacquerstyle.com © 2014