Showing posts with label nails inc.. Show all posts

Saturday, February 28, 2015

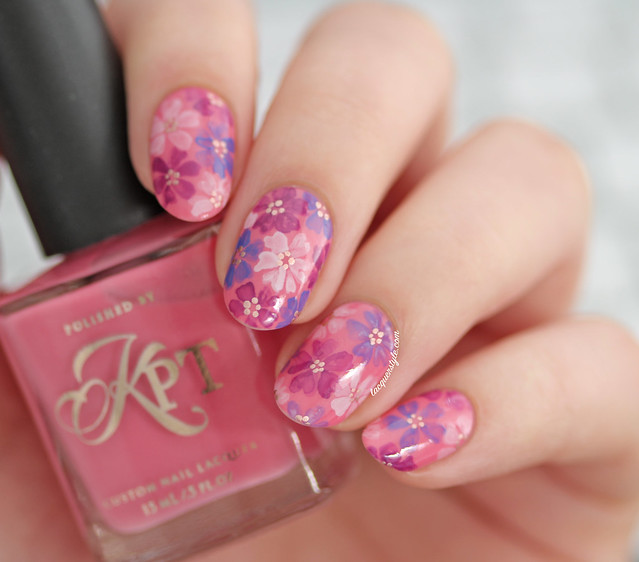
Spring "Watercolor" Florals featuring Polished by KPT Roses for Juliet + Tutorial

Saturday, February 28, 2015
Hi everyone!

If you haven't seen my swatches of the Basic Series Thermals by Polished by KPT, which will be restocked tomorrow (March 1st), you can view the post here: Polished by KPT Basic Series Thermals & Nail Care

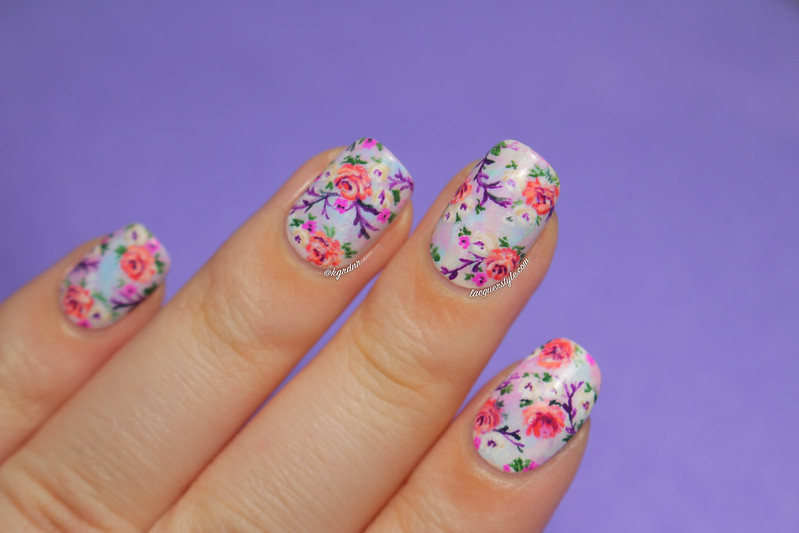
After swatching Roses for Juliet, I knew I wanted to create some sort of floral nail art to go on top.  The pink is so girly and Spring-ish, so I knew it would be the perfect compliment.  I thought it would also be cool to paint the flowers in a "watercolor" style using nail polish, so that when the base transitions to a different color the flowers would look slightly different too.

IMG_7778-

I wont write too much about it here, because I filmed a tutorial for the design and added my first voiceover for the instructions as well.  If you have any other questions though, feel free to leave them in the comments below. :)

Saturday, August 09, 2014

Summer Pastel Floral Nails

Saturday, August 09, 2014
Hello everyone!

This post is going up at a pretty random time, but I'll explain the reason down below.  Anyways, I thought I would point a few things out first, one being that you may notice a change in appearance on the blog.  This past week, I've been completely re-designing it, and I've basically started from scratch doing all the coding myself.  It's not 100% complete, so you might notice a few more changes as the week goes on, but I'm pretty happy with the way it's going so far.  Let me know what you all think though!  Any ideas for a header??

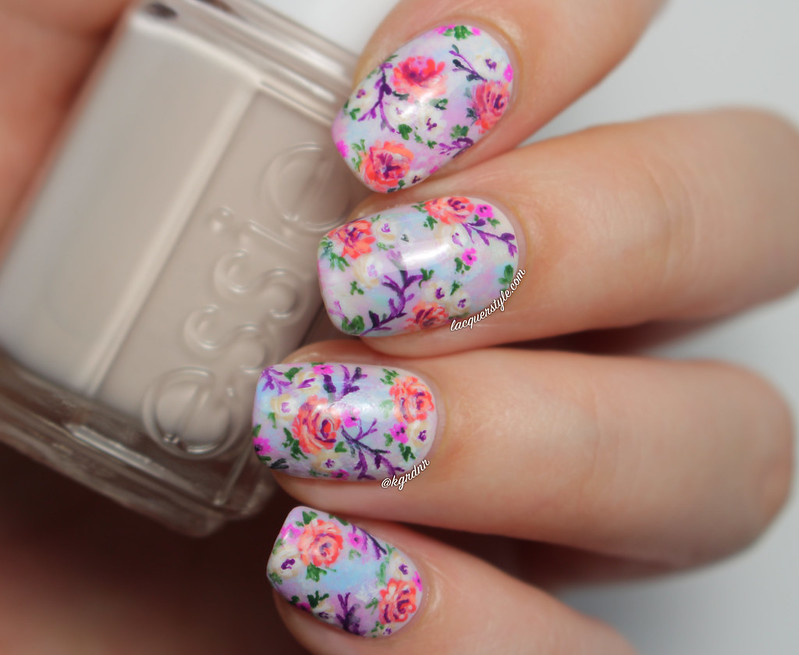
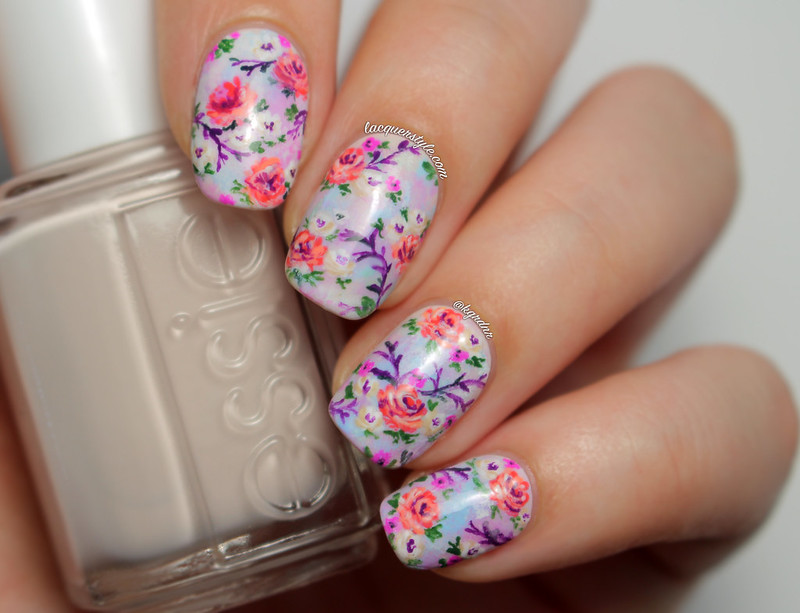
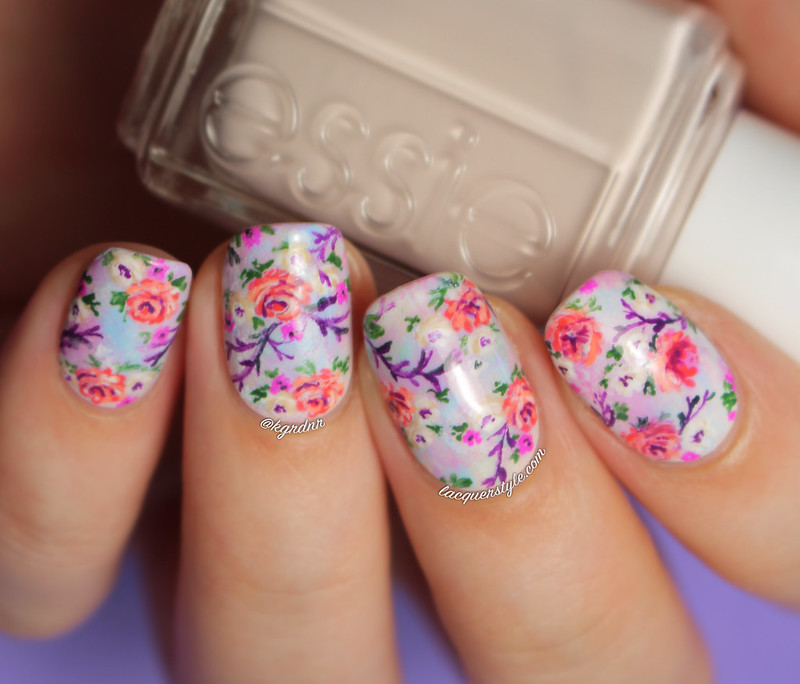
Now onto what I'm really here to show you all today.  I created a new set of floral nails after seeing this really beautiful photo in my google searches.  It was a really lovely floral print in mostly pastels, but has several pops of brighter colors.  It has a sort of romantic, watercolor look to the photo with an amazing multicolored background, so that really spoke to me.  I just loved the combination so much, that I had to recreate them for the Nail Polish Canada Summer 2014 Nail Art Challenge.

IMG_7314-2

IMG_7313-2

Of course, the theme is "Summer", and for me, I just love to wear floral prints in the Spring and Summer, so I thought they would be perfect for the challenge.  I only have a few hours left to submit them, so that's why this post is going up this late!

IMG_7301-1

I used several different polishes for the design, mostly pastels by Essie, including the gorgeous Urban Jungle as my base (pictured), and Fashion Underground, Under Where?, Blanc, and Tart Deco are in there somewhere too.  I might update with a full list later, but if you would like to know any specifics, don't be afraid to ask me in the comments below. :)

IMG_7294-1


I hope you all love them!  And, if you would like to vote for me in the challenge, head over to the Nail Polish Canada page, and select "lacquerstyle.com" from the list (you don't have to be signed up or anything).  I would really appreciate it!


Thank you so much for reading, if you made it this far, too! :)


Kristin


Connect with me:
Instagram  |  Twitter  |  Facebook  |  Pinterest

Follow on Bloglovin


Tuesday, July 01, 2014

Simple, Realistic Galaxy Nails + Tutorial, featuring JINsoon Obsidian

Tuesday, July 01, 2014
Hello everyone!

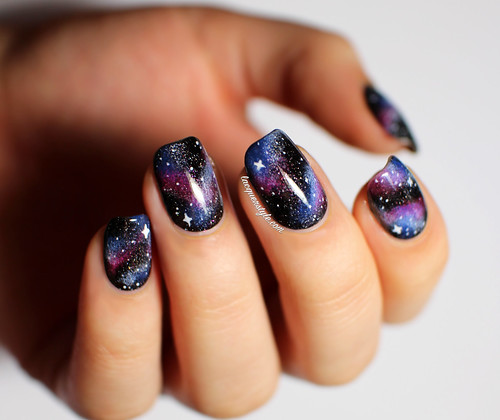
I've taken a little break from blogging lately, as you may have noticed, but I've still been posting quite often over on Instagram.  Last week, I posted an updated version of my galaxy nails, and they got a really great response.  I was so happy about how well they were received, because they are definitely the most simple, but also most realistic version I've created so far, I think!

When I created this version a few months ago, I also made a photo tutorial to share with all of you, so you can view it at the end of the post.

IMG_3576-1

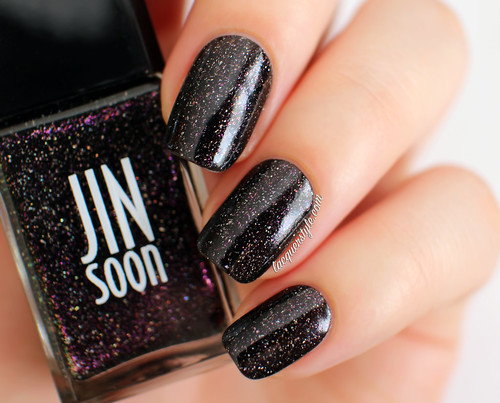
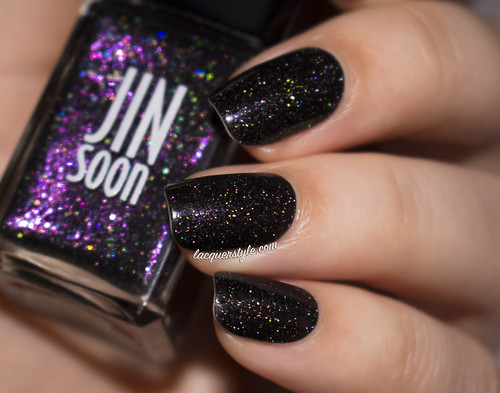
The one major difference between this version and my previous ones, is that I let my base do all the work.  I used two coats of the incredible JINsoon Obsidian, which is a black base filled with holographic flecks and bright purple shimmer.

Jin-soon-obsidian

In natural daylight (above) the purple shimmer is very visible, then, in the sun, or once you switch on some bright lights (or with flash, as shown below), the beautiful holographic shimmer sparkles.  It's amazing, but not totally in your face like some holos can be (although that is not a bad thing!).  I wore this on my nails for several days, before adding the galaxy on top, so there is the slightest tip wear in the photos.

IMG_0195-1


To create the galaxy, I used the technique shown below in my tutorial.  Of course I am only showing one nail, but definitely try to have fun with different placement and colors to create the feel of movement on the nails.  I think that is the best way to create a more realistic design!

Now, onto the tutorial!
(click for full size)

Galaxy-Nails-Tutorial-Simple-Realistic

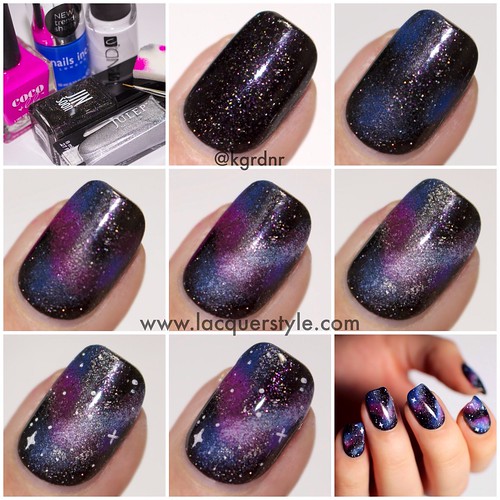
1.  Gather your supplies and prep your nails with a base coat.  You will need a cosmetic sponge, a nail art brush (or dotting tool), a black or navy with holographic shimmer, two bright or neon colors, a white (I prefer a semi-sheer one), and a holographic silver polish (optional).

2. Paint one or two coats of your base color.  I used JINsoon Obsidian, which is this amazing black base filled with holographic flecks, and bright purple shimmer.  Zoya Storm could be a good alternative, or just a black creme with a holographic shimmer top coat (like inm Northern Lights) could be an option as well.

3. Sponge on a cobalt blue in a few spots on the nails.  I used Nails Inc. Baker Street, one of my favorite blue polishes.

4. Sponge on a neon pink overlapping some of the blue polish.  I used Coco & Lulu Ma Belle, an amazing fuchsia neon polish.

5. Lightly sponge on a bit of white polish over the other two colors.  I used CND Brilliant White.  I've realized, looking at a bunch of actual galaxy photos, that the white should be used more sparingly.  And, it almost gives a 3D effect to the other colors.

6. Lightly sponge on a silver holographic polish to the edges of the white polish.  I used Julep Rebel, which has a pretty subtle holographic effect.  This gives such a great sort of misty effect, and of course a little added sparkle.

7. With a nail art brush or dotting tool, add a few tiny white dots and "stars".  For the bigger stars, I always just create a + and then fill in the inner corners slightly.

8. Finish with a shiny or matte top coat, and enjoy! :)


If you have any questions, feel free to leave them down below.  And, if you need any other tips for galaxy nails, or would rather watch a video, I have a few tutorials on YouTube here:


Thank you all for reading! :)


Kristin


Connect with me:
Instagram  |  Twitter  |  Facebook  |  Pinterest

Follow on Bloglovin


Monday, May 05, 2014

Gradient Baroque Nails + Tutorial!

Monday, May 05, 2014
Hello everyone!

I’m sorry I have been super slow at blogging lately.  I need to get a schedule going to get back into it!

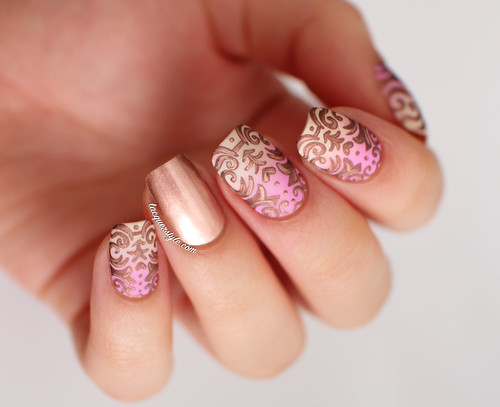
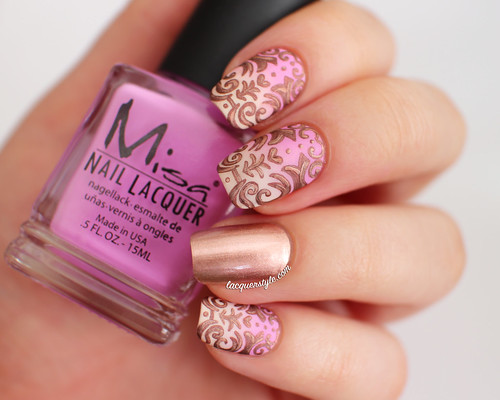
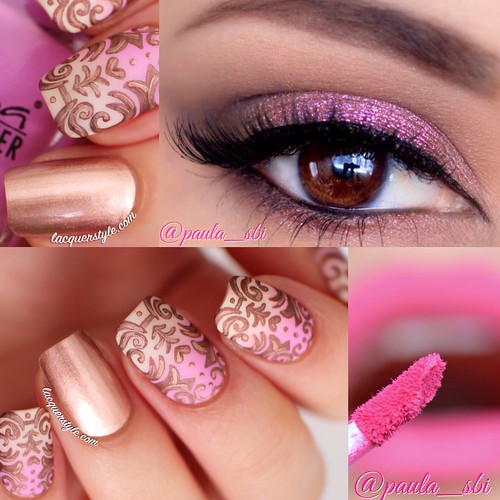
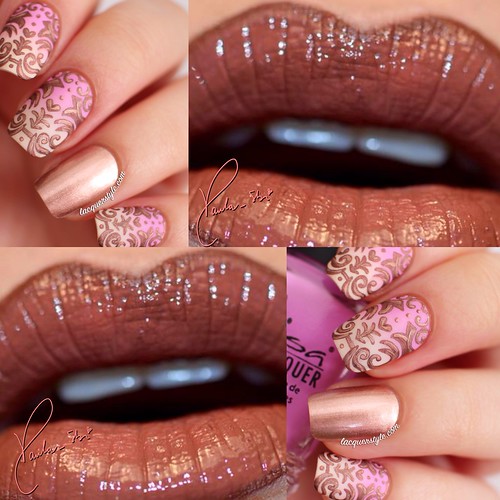
Anyways, I have been creating these baroque-style nails a lot recently (as you may have seen in my previous post), and this time they were inspired by a gorgeous makeup look created by Paula Sbi on Instagram.  We did a collaboration recently, and I think it turned out amazing, which I will show you down below.

IMG_2252-2

IMG_2231-2

As soon as I saw the gorgeous eye makeup that Paula created, I was so inspired by the colors and metallic finish.  Pink’s and brown always seem to play nice together, and the shimmer is very elegant.  The colors I chose for my nails really remind me of Neapolitan ice cream as well, so I thought that was fun.  I think they are the perfect pairing! 

image

The photo below is an alternate version Paula created with a chocolate brown lip, using Lime Crime Salem as the base.  Love it!

image-2


All of the products I used are listed at the beginning of the video, and if you would like to see how I created this design, here it is:


I hope you all love the design, and let me know what you think of it in the comments below!  Also, if you have any requests I would love to hear them!


Thank you all for reading! :)

Kristin


Connect with me:
Instagram  |  Twitter  |  Facebook  |  Pinterest

Follow on Bloglovin


Saturday, February 22, 2014

Nautical Nail Art featuring Simply Spoiled Beauty

Saturday, February 22, 2014
Hi everyone!

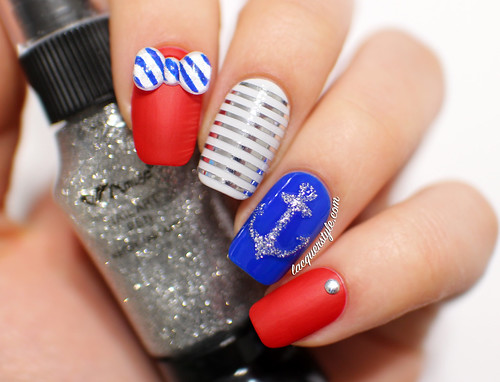
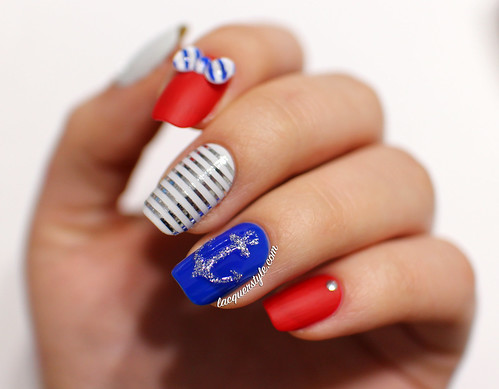
Recently, I was sent a few products to review from Simply Spoiled Beauty.  I received a bag of some adorable striped bows, and as soon as I saw the navy and white striped bow, I knew I had to create some nautical nails.

IMG_4099-2

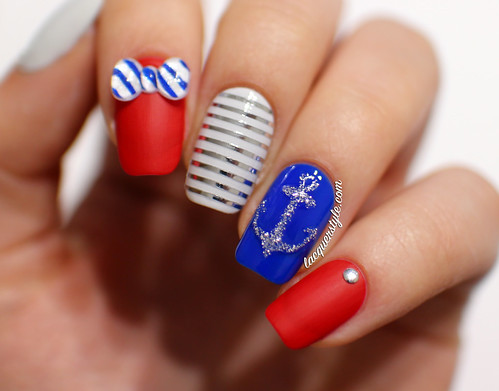
To create my nautical nails, I started with blue, white, and red alternating bases.  From Simply Spoiled Beauty, I also received three nail art pens, so I chose the Silver Sparkle glitter pen to draw the anchor on my ring finger.  The nail art pens have a tiny metal tip where the polish comes out, so it’s easy to paint really clean lines.  There is also a striper brush if you remove the cap, which is great for another option.

IMG_4045-1
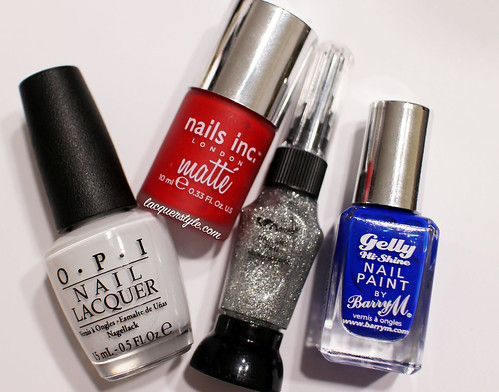
OPI My Boyfriend Scales Walls, Nails Inc. Matte Gatwick, Amuse “Silve Sparkle” Nail Art Pen, and Barry M Gelly Blue Grape

IMG_4065-1

I added a silver stud on my pinky and thumb, and on my middle finger I applied silver striping tape.  Originally, I was going to paint a matte top coat over the tape to create matte and shiny stripes, but I really loved how the silver tape coordinated with the other nails, so I ended up keeping the tape on for a cool mirrored look.

IMG_4056-1


If you would like to order from Simply Spoiled Beauty, you can use my coupon code “lacquer” for 30% off your purchase.  They offer a flat rate of $5 for shipping.


I hope you enjoyed my nautical nail art, and thank you for reading! :)


Kristin


Connect with me:
Instagram  |  Twitter  |  Facebook  |  Pinterest

Follow on Bloglovin


Wednesday, July 03, 2013

Abstract Fireworks Nails

Wednesday, July 03, 2013
Happy Canada Day (I know I'm a bit late!) and Fourth of July!

Well, I attempted some nail art that is supposed to look like fireworks, and while they don't really look that much like fireworks, I actually quite like the outcome.  I think they turned out a bit more abstract than I was imagining though, so I guess that's what I'll call them!


Here's a basic run down of what went into creating this look, for those who would like to know:

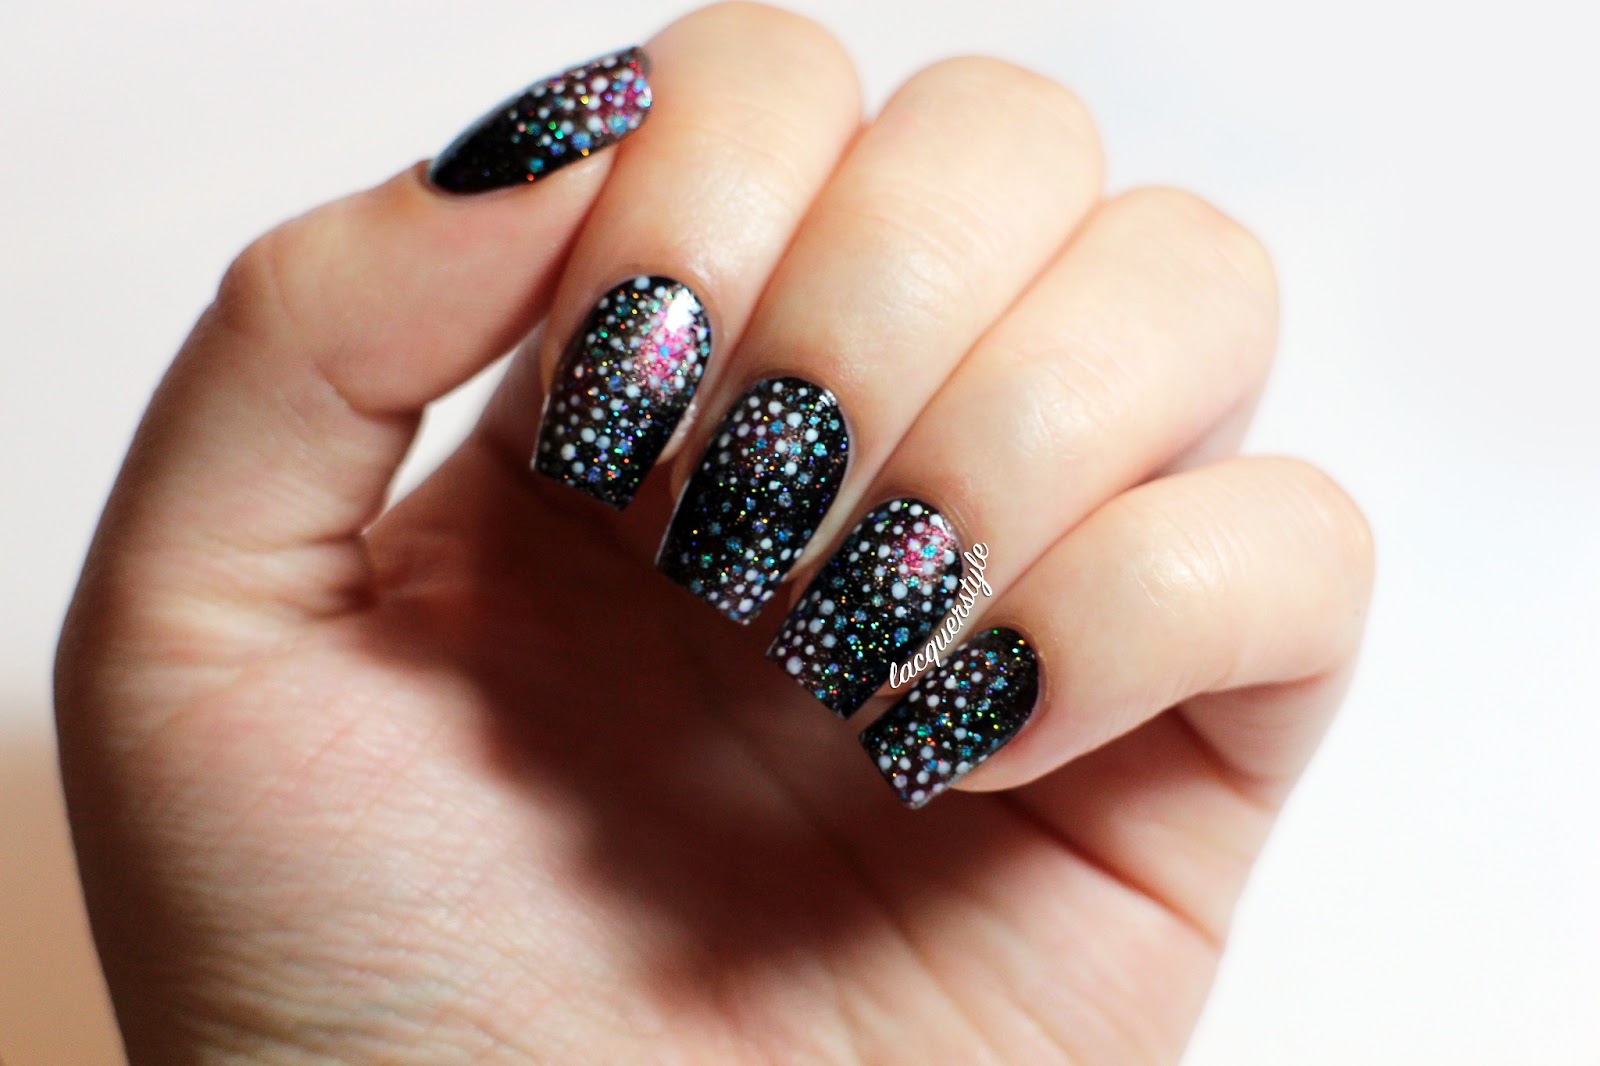
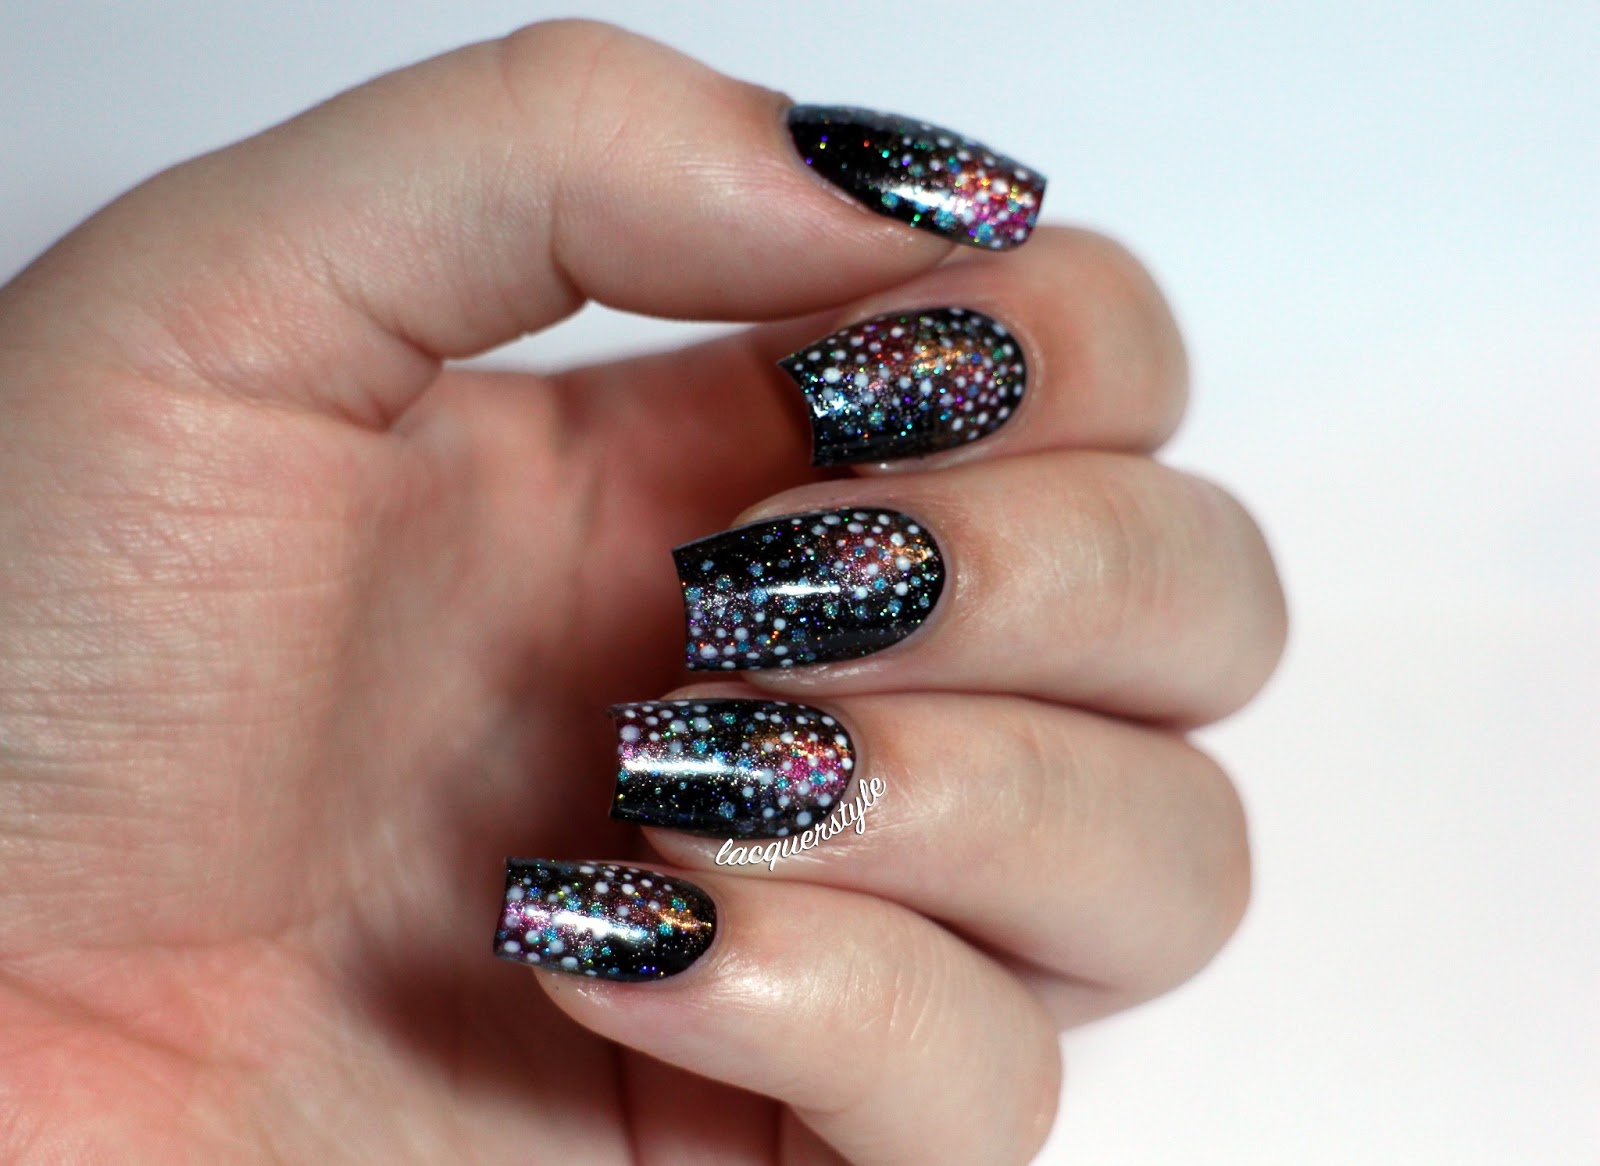
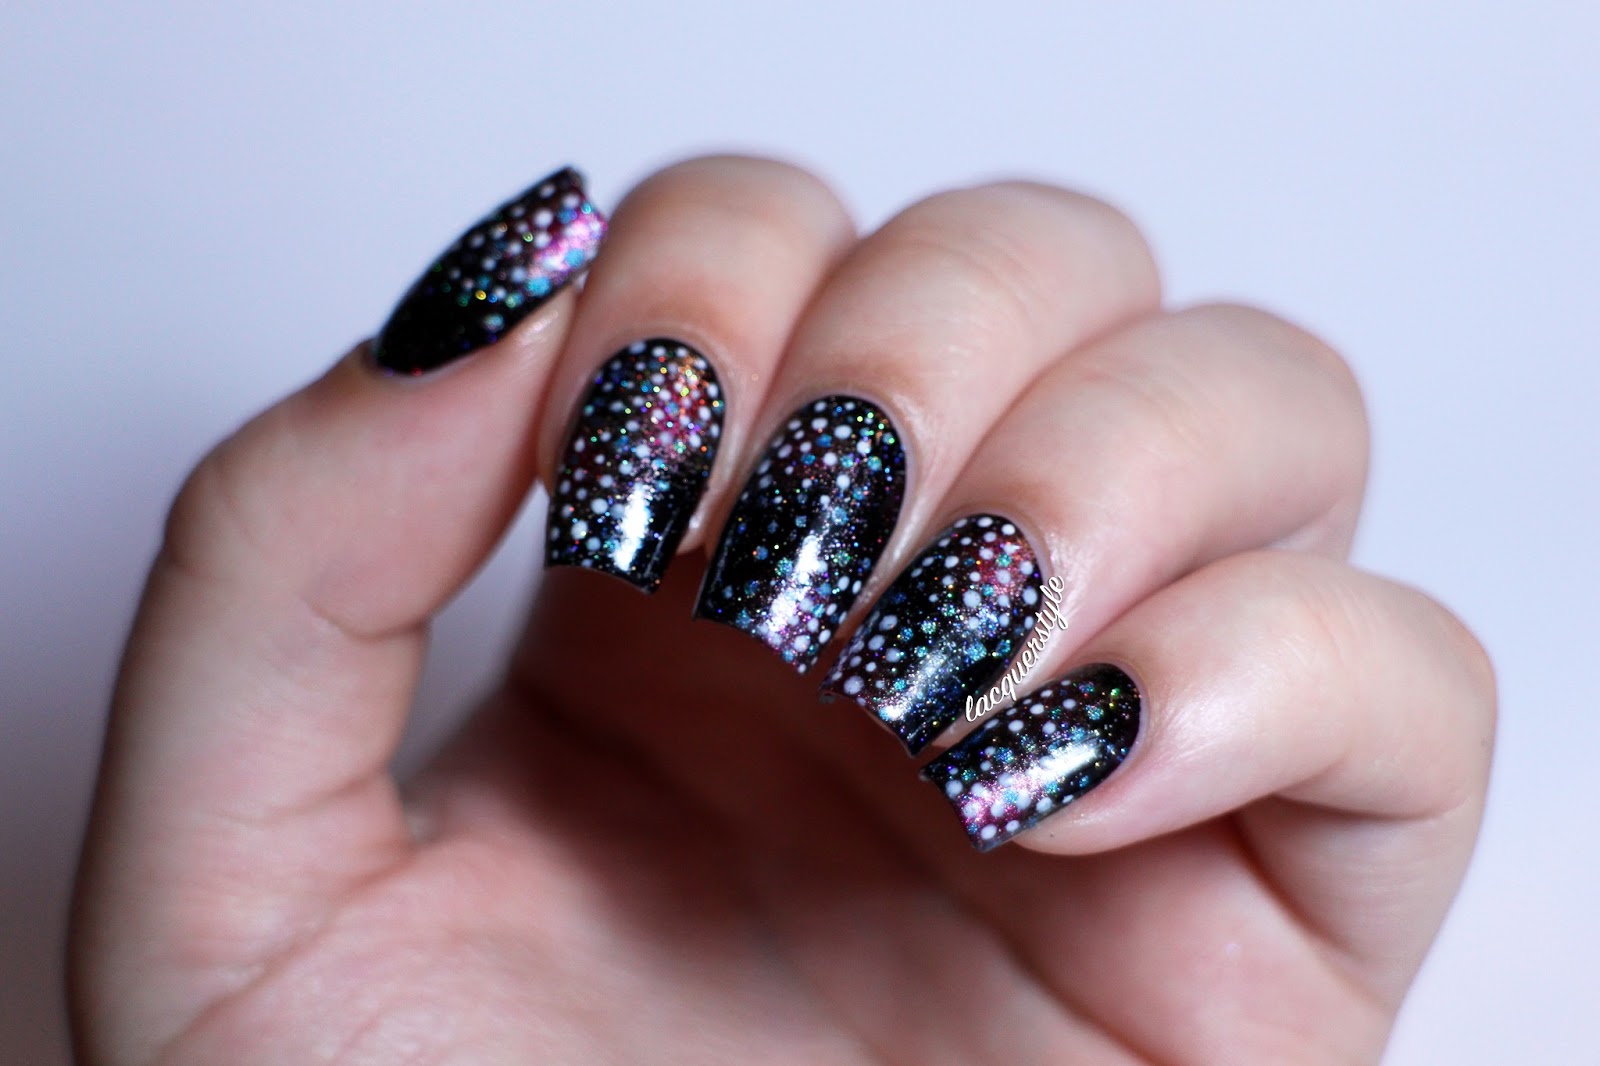
First, I painted my nails with one coat of a-England Lancelot, a gorgeous nearly black red creme.  Then, I sponged on a bit of Essence Jacob's Protection (in a few spots) for a hint of blue shimmer.  I then sponged on Nails Inc. Stratford and Finger Paints Hollydazzle in circular shapes, and made a whole bunch of random exploding dots (with a dotting tool) using CND Brilliant White and Layla Ocean Rush.  I finished the look with my beloved Northern Lights top coat, of course.

Layla Ocean Rush, Nails Inc. Stratford, Finger Paints Hollydazzle, CND Brilliant White, Essence Jacob's Protection, and a-England Lancelot


Let me know what you thought of this look, and if you have any fun nail art planned for your your Fourth of July festivities!  Or, what nails you wore for Canada Day, if you're a fellow Canadian. :)

Have a lovely day!


Kristin


Lacquerstyle.com © 2014