Showing posts with label christmas. Show all posts

Sunday, December 28, 2014

#WNAC2014 - December / Sparkle: Roundup

Sunday, December 28, 2014
Hi everyone! I hope you're all having or had lovely holidays!

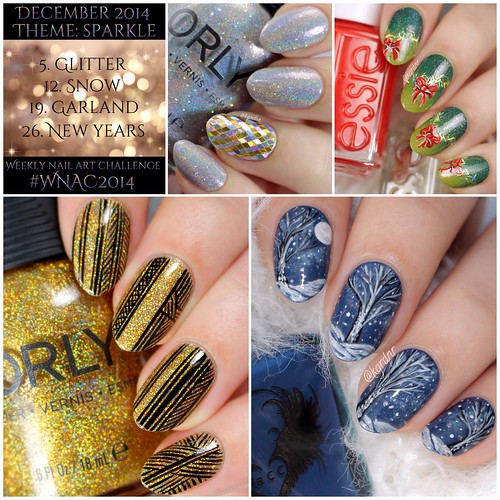
We're nearing the end of December, and our Weekly Nail Art Challenge for the month was sparkle themed - so perfect for the holidays!  Here's a quick roundup of all of the nail art I've been posting on Instagram, after the jump.

  #WNAC2014 - December / Sparkle

Saturday, December 20, 2014

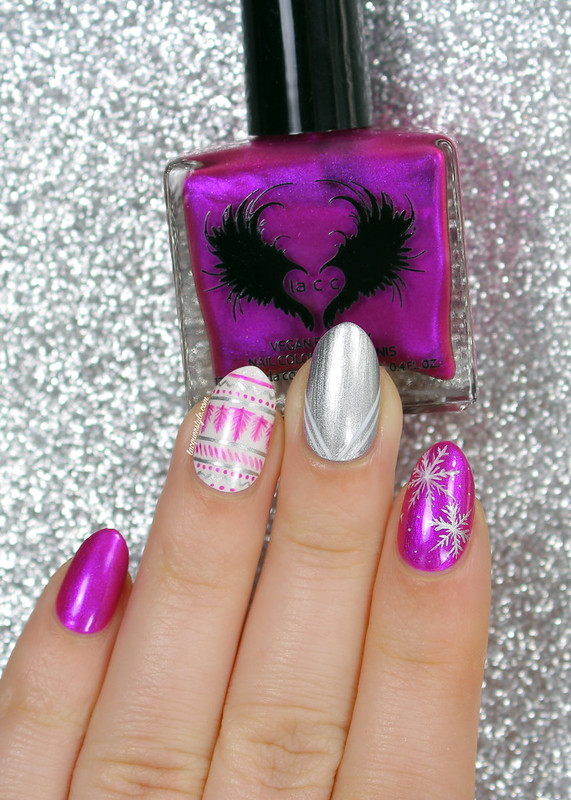
Bright Holiday Nail Art Featuring the Lacc (La Couleur Couture) Holiday Collection

Saturday, December 20, 2014
Hi everyone!

For today's post, I created some bright holiday mix & match nails using the remaining colors from the Holiday Collection by Lacc (La Couleur Couture).  This is my second post featuring the Lacc Holiday Collection, and if you missed the first, you can view it here: Festive Poinsettia Nails


IMG_7957--

Tuesday, December 16, 2014

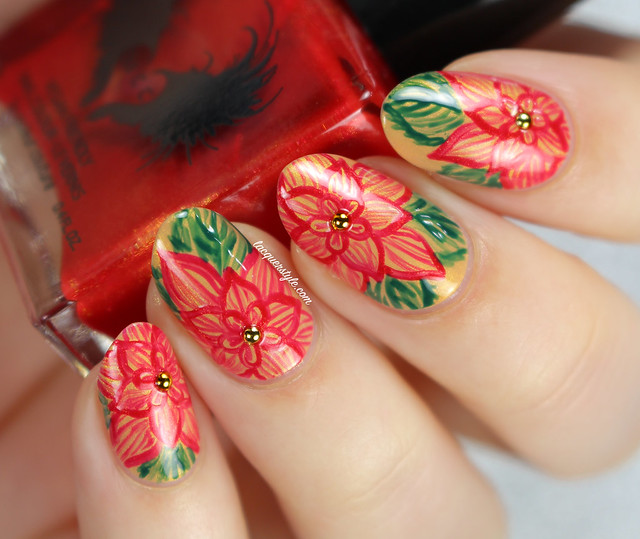
Festive Poinsettia Nail Art Featuring the Lacc (La Couleur Couture) Holiday Collection

Tuesday, December 16, 2014
Hi everyone!

I created some festive poinsettia nail art, using a couple Lacc (La Couleur Couture) polishes from their new Holiday Collection.  They are kind of in the same style as my recent gradient flowers (but more detailed), and I also wanted to do something different than my poinsettias from last year, so I'm pretty happy with them!  View more photos, and a bit about how I created them after the jump!

Untitled

Wednesday, December 25, 2013

OPI Pure 18K Top Coat with Snowflake Nail Art + Tutorial!

Wednesday, December 25, 2013
Hello everyone!  And, Merry Christmas!

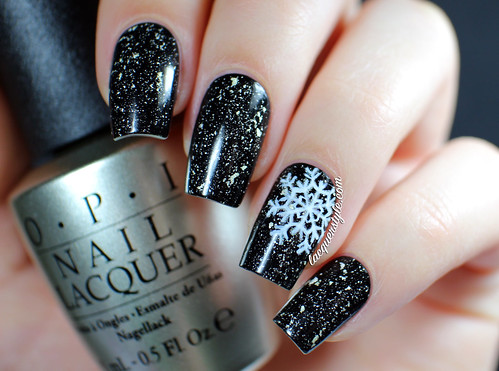
I've been obsessed with OPI Pure lately, the 18K White Gold & Silver top coat (I posted a little glimpse of it here).  I think I even like it more than the gold leaf top coats that were so popular this past year, and I absolutely loved those ones.  I think with this version, the white gold looks amazing over every single color, whereas with the gold, I feel like some colors suit it much better than others.

I don't have the OPI gold version (The Man With the Golden Gun), but compared to several of the other gold leaf top coats that I have, the formula of Pure is just perfection.  It has the perfect amount of clear base to white gold & silver, and it's just a dream to apply.  There are also lots of varying sizes of flakes, so you get really great coverage on the nail in just one coat.

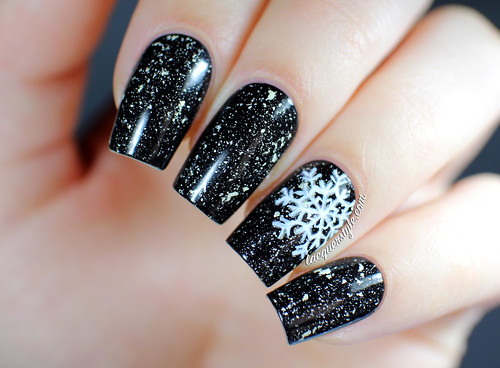
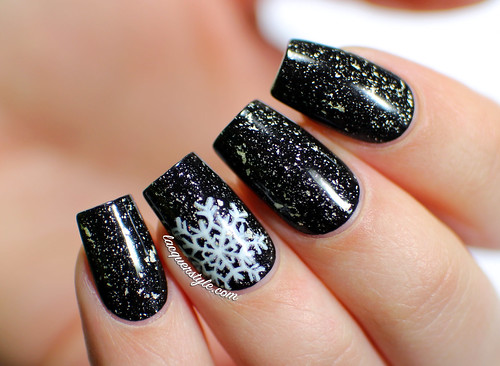
I was looking forward to trying it over black, and the look is so chic and pretty, just as I imagined.

IMG_4602---1

As you can see (or may have already seen on Instagram the other day), I added a snowflake on my ring finger, and I am very happy with how it turned out!  While I was googling photos of actual snowflakes, I came across one I thought was really cool, so I decided to try something similar with white polish, but of course I had to amp it up a little by adding some holo!

IMG_4581---1

IMG_4319---1
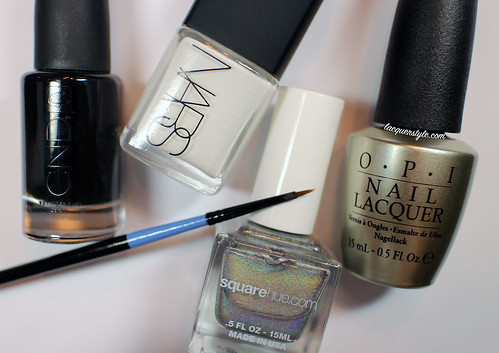
CND Blackjack (the best!), Nars Ecume, Square Hue Times Square, OPI Pure, and a size10/0 brush (from Michael’s)

IMG_4483---1

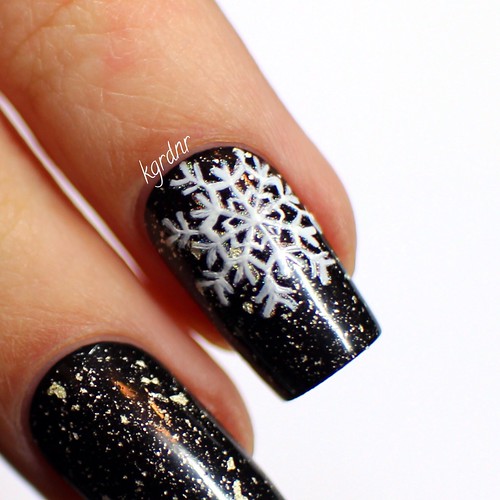
Here’s a closeup that I posted on Instagram the other day:
Untitled

I also filmed a tutorial of my snowflake, so I hope you all enjoy it.  Please let me know if you have any other questions or requests, and feel free to tag me @kgrdnr in your photos on Instagram if you try it! :)


I hope you all have an amazing holiday, and thank you for reading! :)


Kristin


Connect with me:
Instagram  |  Twitter  |  Facebook  |  Pinterest

Follow on Bloglovin


Saturday, December 21, 2013

NOTD: Christmas Dots

Saturday, December 21, 2013
Hello Everyone!

Let me just start by saying, thank you so much to everyone who voted for my Rudolph nails in the Nail Polish Canada Challenge; I received the most votes for week 3, which I still can't believe, so seriously, thank you!!  I truly appreciate it, and I'm going to have an amazing birthday this year because of all of you lovely people!

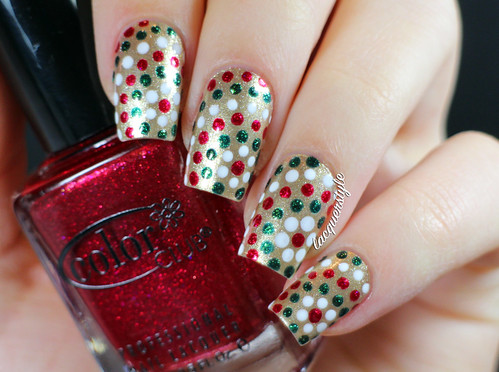
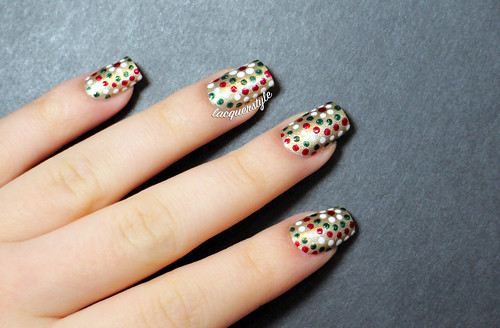
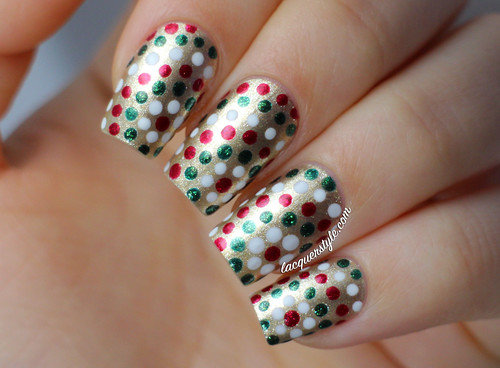
Now for some nail art.  I needed something quick on my nails the other day, so I created some simple dotted nails using a bunch of shimmery, holiday colors.  I think they turned out pretty cute and festive. :)

IMG_3927-1

I started with a pale gold metallic base (two coats of Topshop Heart of Gold).  Then, with a few dotting tools, I added alternating circles of dots using red, white, and green.  That's it!  Probably the easiest holiday nails ever.

IMG_3986-1
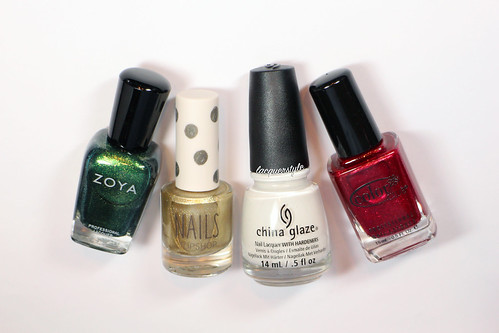
Zoya Logan, Topshop Heart of Gold, China Glaze White On White, Color Club Berry and Bright

IMG_3903-2

IMG_4005-1

Are you sick of all the holiday nails yet?  I'm already thinking about ideas for New Years and for my birthday, the week after.  There will probably be lots of glitter involved!  What are your plans?


Oh, and if you're interested in giveaways, Nail Polish Canada wanted to let all of my US & Canadian readers know that they are giving away three Babyliss Miracurl's (a $600 value).  All you have to do is tell them why you or a loved one should win one over on their site!  Have fun and good luck!  You can enter here: http://www.nailpolishcanada.com/products/miracurl-by-babyliss.html


Thank you for reading! :)


Kristin


Connect with me:
Instagram  |  Twitter  |  Facebook  |  Pinterest

Follow on Bloglovin


Sunday, December 15, 2013

Reindeer Love - Rudolph & Clarice

Sunday, December 15, 2013
Hello everyone!

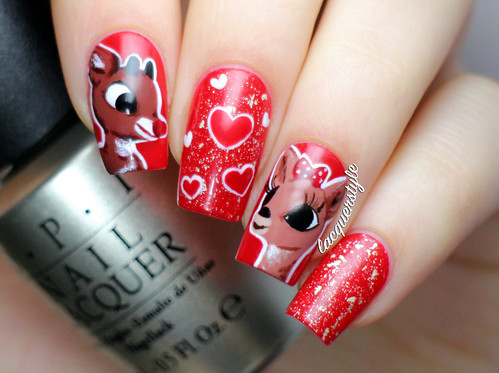
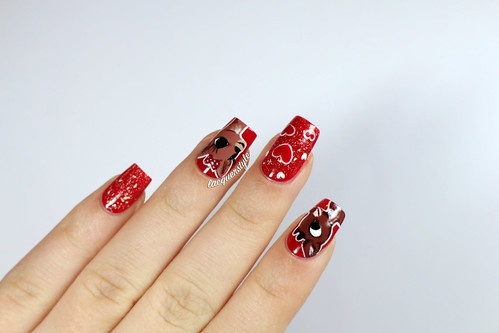
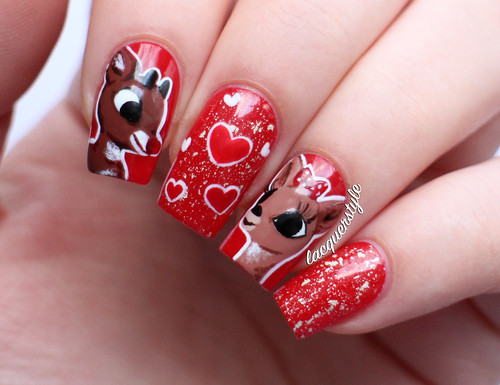
The theme for the final week of the Nail Polish Canada Holiday Challenege is “holiday memories”.  I don’t really have the greatest holiday memories, as sad as that may sound, but I do remember always watching Rudolph the Red Nosed Reindeer on TV for years when I was younger, so that was my inspiration!

IMG_3717----1

The base of these nails (CND Rouge Red) was kind of a happy accident;  I was originally going to do some sort of pale blue snowy background with snowflakes or something, but I already had this red on my nails from the day before and wanted to practice painting Rudolph.  It ended up being pretty cute over red, and Rudolph turned out great on my first try so I just decided to keep it!

IMG_3480-1

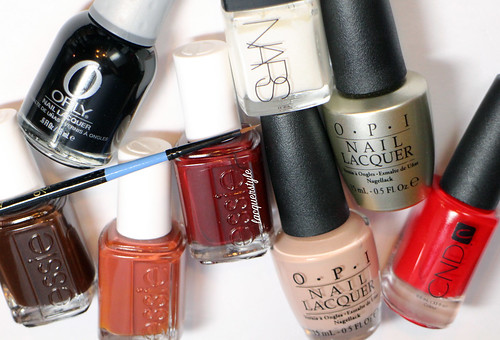
Rudolph and Clarice were painted with a size 5/0 brush from Michael’s using a bunch of browns and tans from Essie, which I’m so glad I had in my collection!  I outlined both of them in white so that they really stand out on the bright red base.   What I really think makes the whole design though, is OPI Pure, the 18K White Gold & Silver top coat.  It looks really beautiful over red and makes it really festive for the holidays.

IMG_3724-1
Orly Liquid Vinyl, Nars Ecume, OPI Pure, CND Rouge Red, OPI Don’t Pretzel My Buttons, Essie Chocolate Cakes, Very Structured, and Little Brown Dress

I’m extremely happy with how these turned out;  I think I’ll probably make them matte before removing them though, so I might update this with some more photos.

IMG_3613-1


If you have a few seconds, please head over to NPC and vote for me!  Just select lacquerstyle.com from the drop down menu, I would really appreciate it! :)


I hope you all enjoyed these nails, and thank you for reading!


Kristin


Connect with me:
Instagram  |  Twitter  |  Facebook  |  Pinterest

Follow on Bloglovin


Friday, November 08, 2013

F.U.N Lacquer Christmas 2013 Collection - Swatches & Review

Friday, November 08, 2013

Today I have a really awesome Christmas collection to show you all from a brand called F.U.N Lacquer (or Fabulously Unique Nail Lacquer).  F.U.N Lacquer is a hand-made nail polish brand from Singapore.  The Christmas 2013 collection consists of six beautiful polishes; one holographic, three thermals, and two glitter toppers.  It's such a fun collection!


DECENTber is a red holographic polish.  I would say this a true red, which is quite rare for holos since they usually look pink.  It has a great formula; two coats was more than enough.  It doesn't have the strongest holo effect, but it's one of those that is much stronger in person than I could capture in my photos.


Wishing Star is a shimmery yellow thermal.  I'm not a huge fan of yellow so I thought I wouldn't like this one, but it turned out to be one of my favorites!  It's the most perfect sunshine yellow in it's cold state, and it's an icy pale yellow when it's warm.  I was surprised that the formula was not streaky or hard to apply at all, and I only used two coats for the photos.  The thermals in this collection dry to a matte finish, and I think the matte finish just enhances the beauty of Wishing Star.


Xmas 201"Tree" is a shimmery bright green thermal.  When it's warmed up, it transitions to an icy white with green shimmer, and it almost looks turquoise as it's transitioning; so gorgeous.  I love green, so this one was right up my alley.  It was also opaque in two coats, and once again it dried to a matte finish.


Icy Snow is a shimmery bright blue thermal.  It has a purple sheen to it that is just spectacular when the light hits at certain angles.  When it's warm, it turns an icy white with blue shimmer.  This one just glows, and it's definitely my favourite in this collection.  It needed only two coats to be opaque, and dried to a matte finish.  Icy Snow is the perfect name too!


You can see the bit of purple on my index in this photo!


Gold Mark is a holographic gold glitter topper.  There are a few sizes of gold holographic hexes, squares, and a really pretty gold flake shimmer in a clear base.  The glitter was so easy and smooth to apply, I used just one coat over Wishing Star for the photos below.


Winter Wonderland is a holographic silver glitter topper.  It's basically the silver version of Gold Mark, except it has a bit of iridescent glitter in the base which makes it really special and quite unique in my collection.  The formula was great on this one as well, I used one coat over Xmas 201"Tree" for the photos below.


I also added one coat of Gold Mark (ring & index) and Winter Wonderland (middle & pinky) on top of DECENTber for the photos below.  


You can really see the iridescent glitter in Winter Wonderland when it's matte as well.


The F.U.N Lacquer Christmas 2013 Collection is available for preorder now at funlacquer.storenvy.com, or you can purchase them individually starting November 11th ($13 US for full size, $7.50 US for minis).


Thank you for reading!


Kristin

Lacquerstyle.com © 2014