Showing posts with label layla. Show all posts

Friday, July 19, 2013

Jin Soon Coral Peony + Fan Brush Nail Art

Friday, July 19, 2013
Coral Peony is my second Jin Soon nail polish (see Blue Iris here), and I am officially obsessed.  They are quite expensive which is annoying, but the two I have tried so far have the most gorgeous jelly finish and I love everything about them.  The bottle is so sleek and adorable, and the brush is to die for (it's not as wide as OPI's, but flatter and wider than Chanel's).  It makes polishing the nails quick and effortless.  From my experience, they have great lasting power as well.  The photos below were actually taken on day three of wear.


Coral Peony is a darker coral, but still very bright in certain lighting, probably due to the jelly finish.  It leans slightly more red on me in most lighting, but it still has a good amount of pink in it to keep it looking coral.  It glides on without any streakiness, dries very fast, and is opaque in two coats.


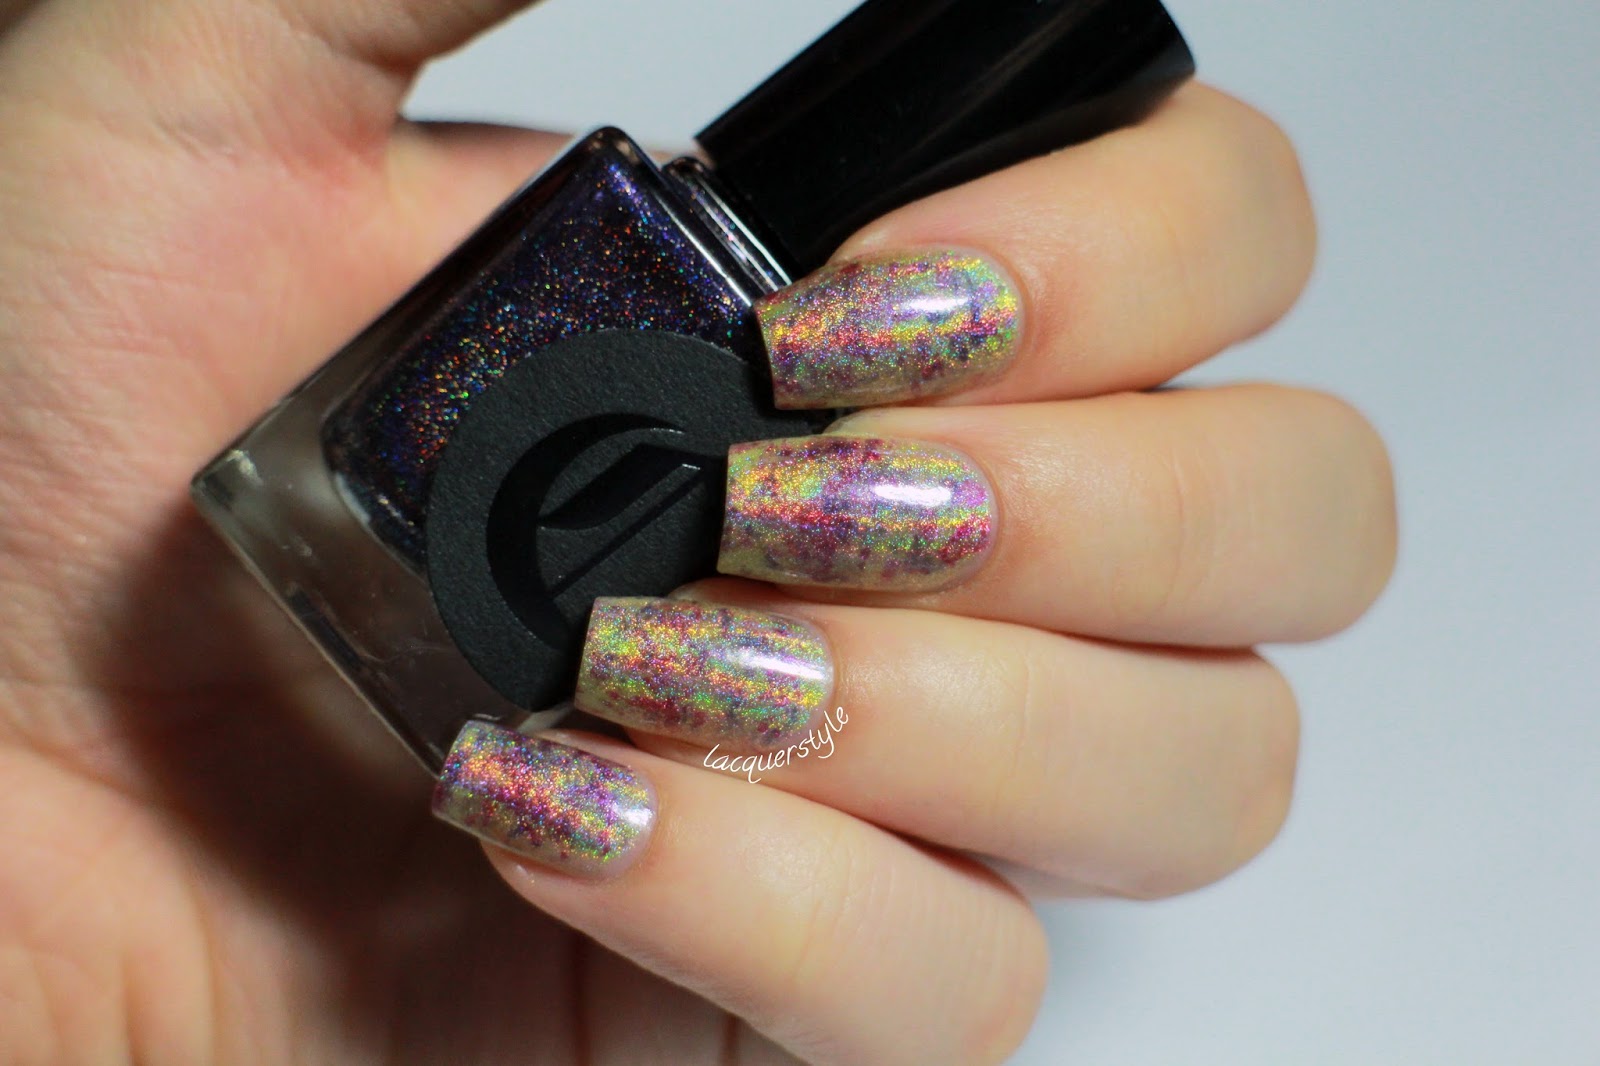
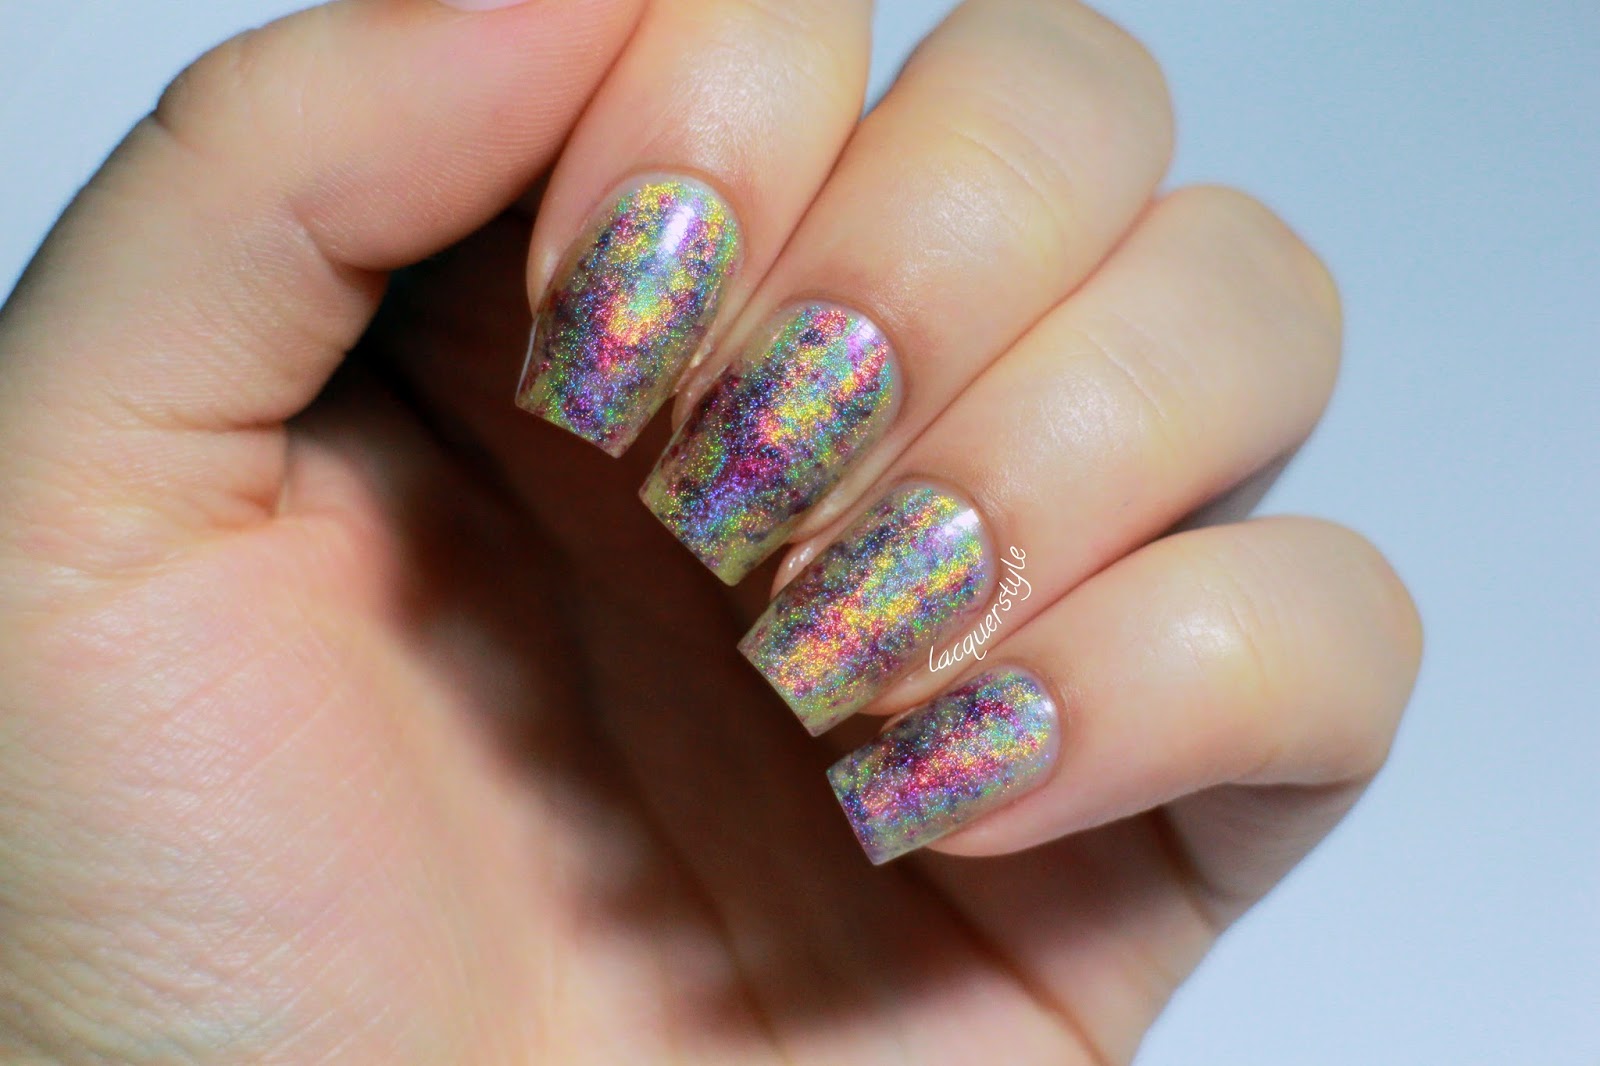
My accent nail is one coat of CND Gold Chrome and one coat of piCture pOlish Majesty on top.  Perfection.


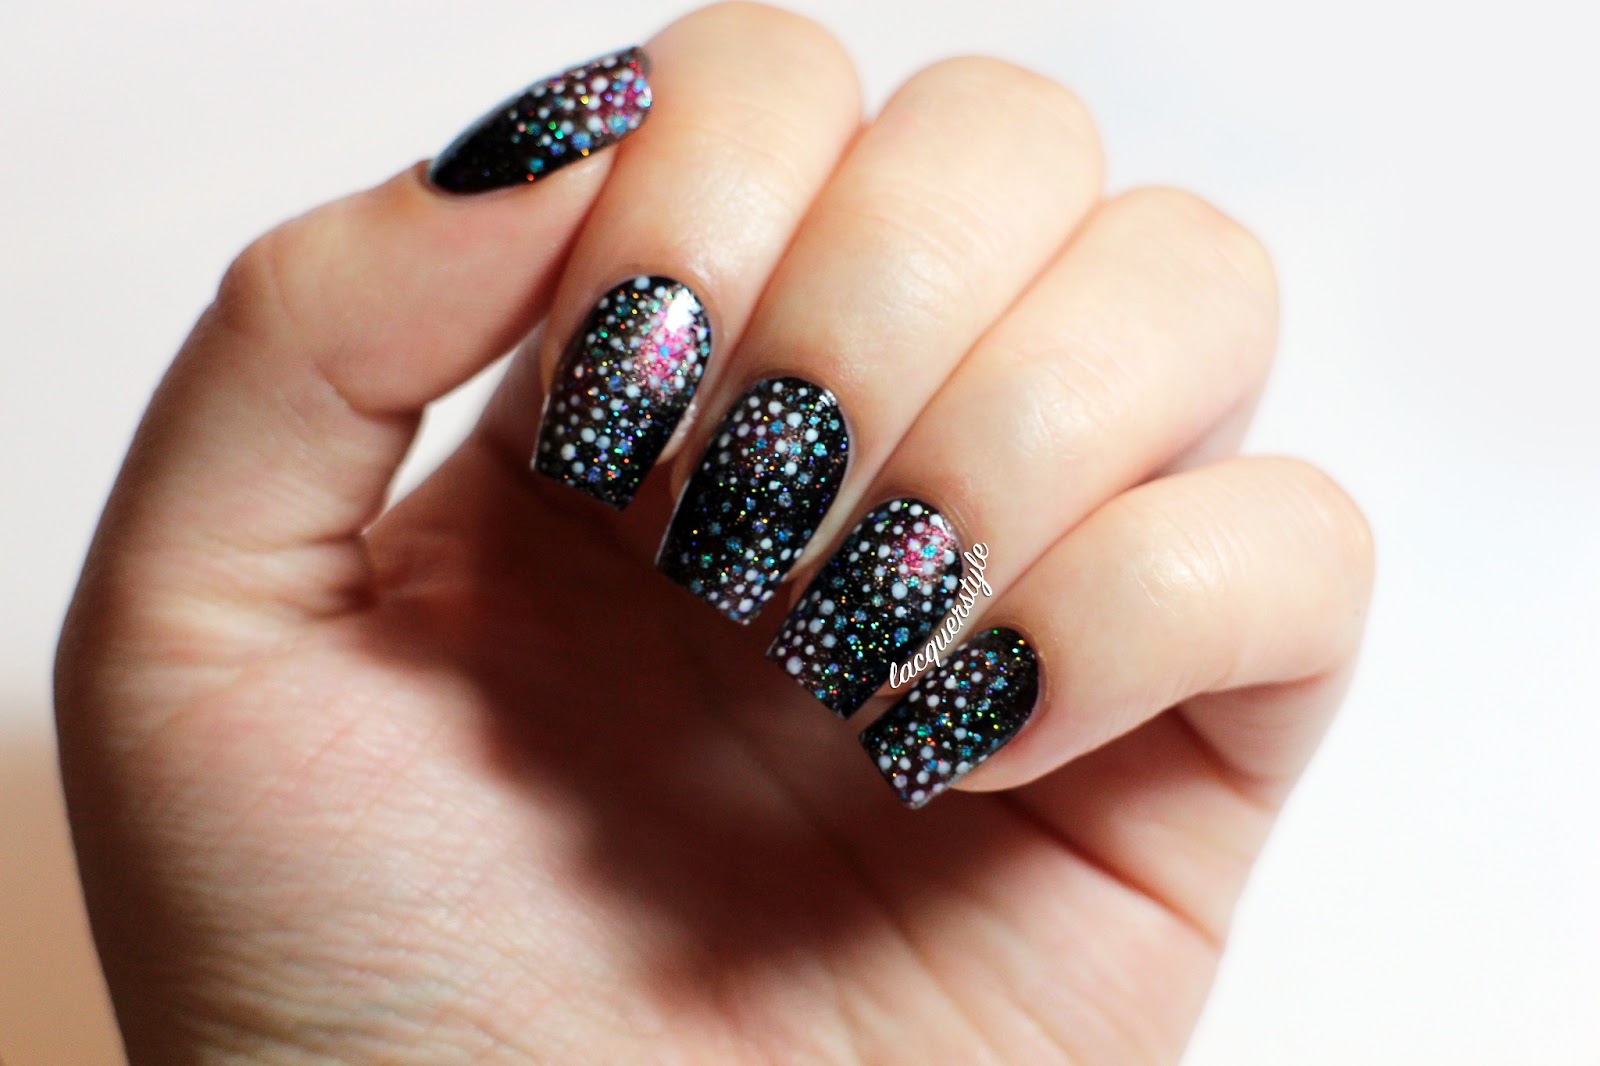
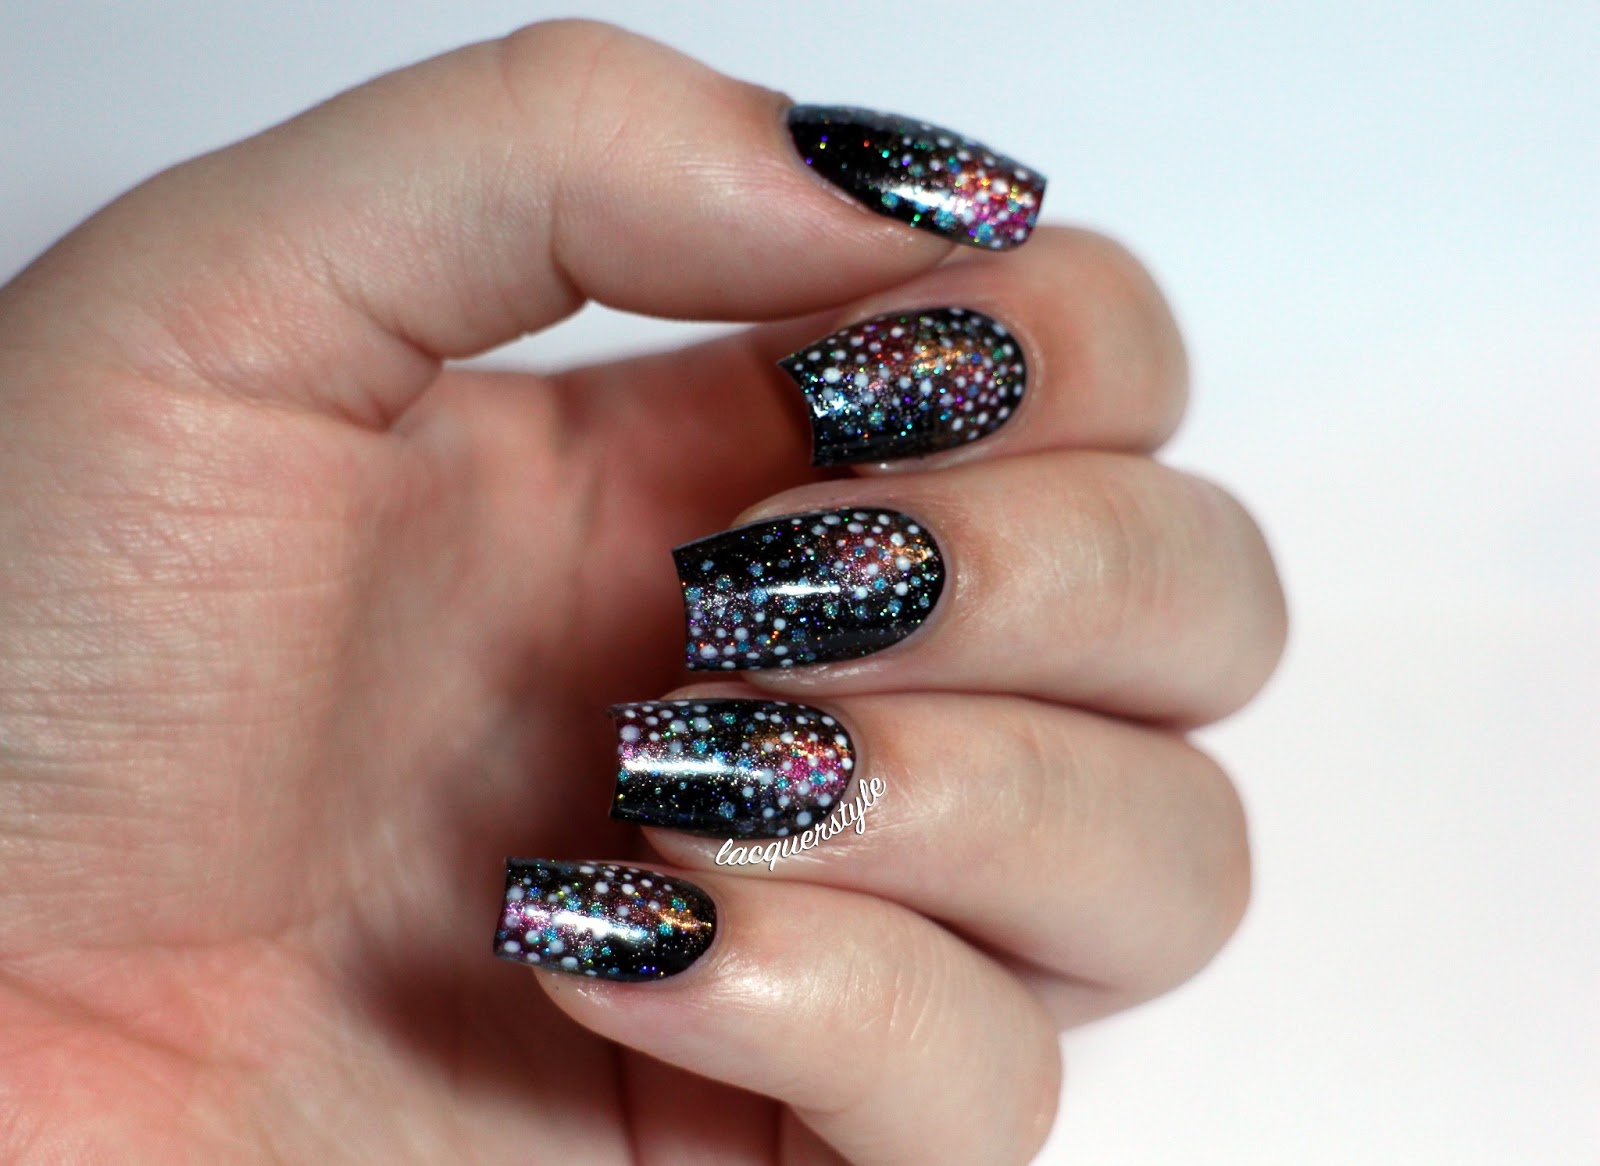
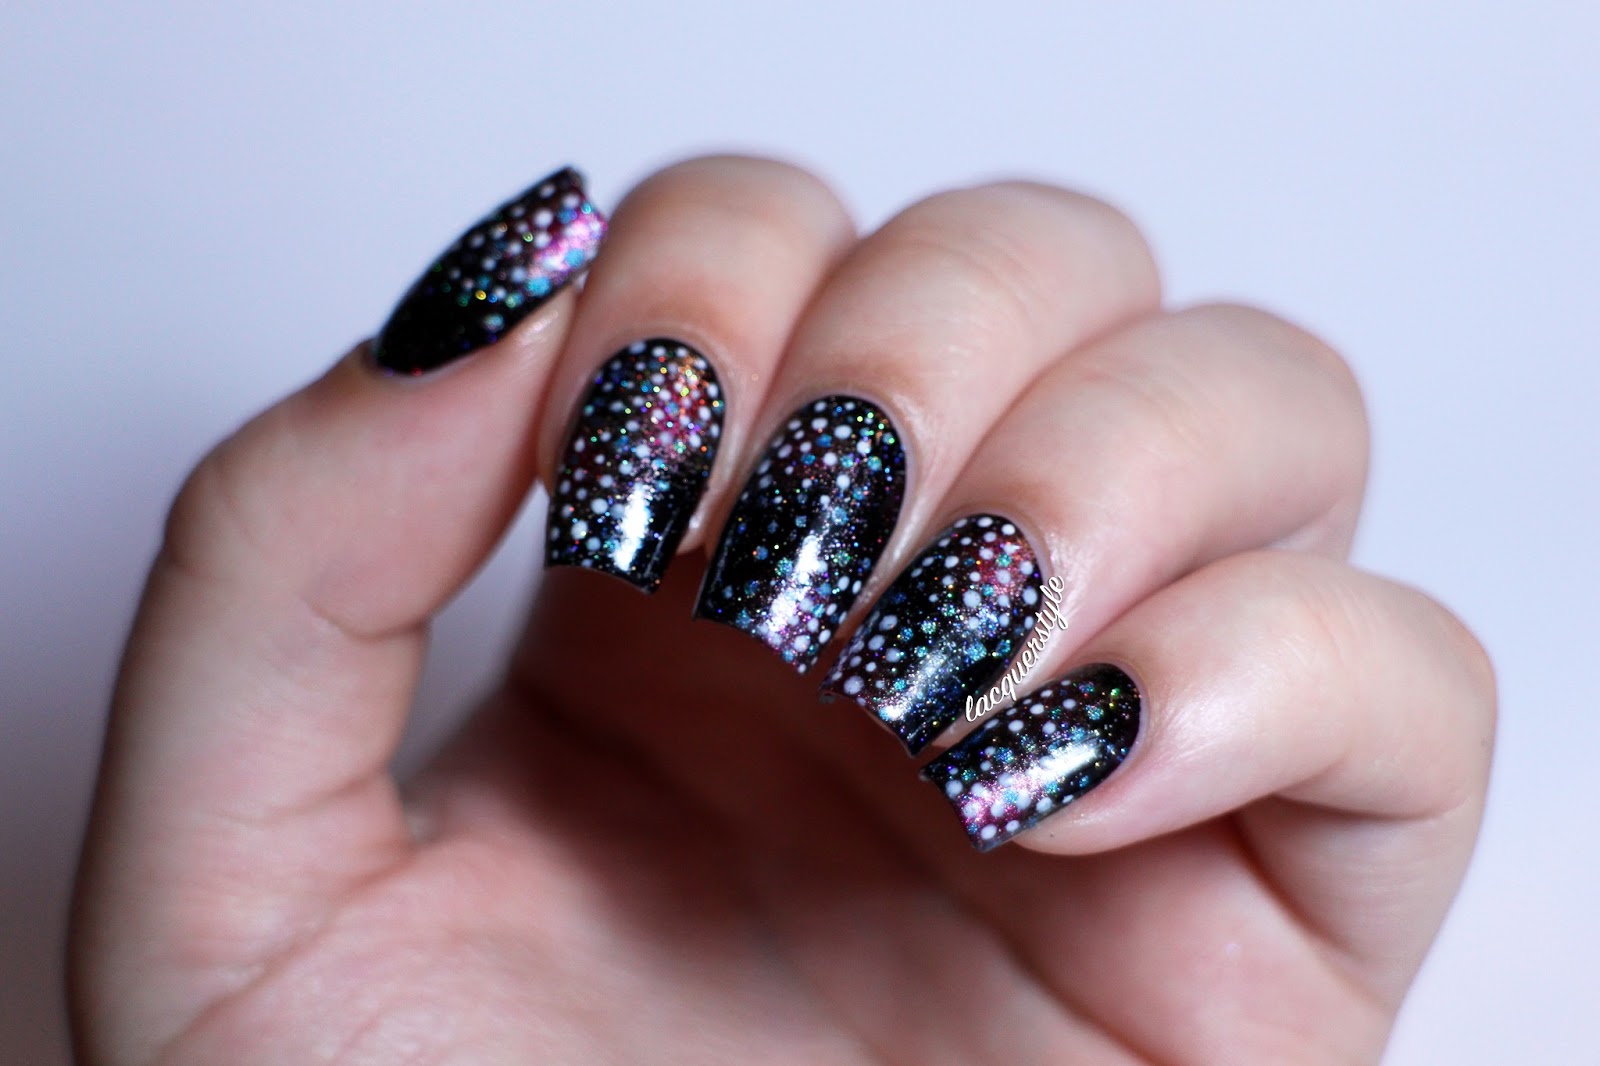
I have actually been wearing Coral Peony for four or five days now and it needed a bit of refreshing (I don't think the Dior top coat I used was a good match).  My new set of nail art brushes arrived recently, and a few people on Instagram wanted to see a look using the fan brush.  I did one layer with CND Gold Chrome, and then I added a light layer of Layla Gold Idol on top to play off of Majesty which has some amazing holographic shimmer in it.  I just love pairing coral with gold, and I am really happy with this look!


Coral is one of those colors that I never get tired of.  It always looks so elegant and flattering, yet it's still a bright, happy color that I especially love in the summer months.


Thank you for reading! :)


Kristin


Wednesday, July 03, 2013

Abstract Fireworks Nails

Wednesday, July 03, 2013
Happy Canada Day (I know I'm a bit late!) and Fourth of July!

Well, I attempted some nail art that is supposed to look like fireworks, and while they don't really look that much like fireworks, I actually quite like the outcome.  I think they turned out a bit more abstract than I was imagining though, so I guess that's what I'll call them!


Here's a basic run down of what went into creating this look, for those who would like to know:

First, I painted my nails with one coat of a-England Lancelot, a gorgeous nearly black red creme.  Then, I sponged on a bit of Essence Jacob's Protection (in a few spots) for a hint of blue shimmer.  I then sponged on Nails Inc. Stratford and Finger Paints Hollydazzle in circular shapes, and made a whole bunch of random exploding dots (with a dotting tool) using CND Brilliant White and Layla Ocean Rush.  I finished the look with my beloved Northern Lights top coat, of course.

Layla Ocean Rush, Nails Inc. Stratford, Finger Paints Hollydazzle, CND Brilliant White, Essence Jacob's Protection, and a-England Lancelot


Let me know what you thought of this look, and if you have any fun nail art planned for your your Fourth of July festivities!  Or, what nails you wore for Canada Day, if you're a fellow Canadian. :)

Have a lovely day!


Kristin


Tuesday, June 25, 2013

Galaxy Nails Take 3 + New YouTube Tutorial!

Tuesday, June 25, 2013
I love galaxy nails.  This is my third go at it, and it turns out to be a completely different look each time, which is one of the reasons I love it!  It is a very simple design to achieve, but it can take some time layering different colors for the outcome to be just right.  I went a little overboard this time because I thought the colors wouldn't show well on video, but I'm still very happy with them!

Here is my finished look, this time around:


Polishes used: Pupa 702, a-England Camelot, CND Brilliant White, Orly Skinny Dip, Misa Ripe Raspberry, Essie Lights, OPI Ate Berries In the Canaries, inm Out the Door Northern Lights topcoat

I took this photo midway through the tutorial!


As a little bonus, here is my previous set of galaxy nails (I think they're my favorite so far!):


And, as requested by many of my lovely followers on Instagram, I made a new YouTube video on how I create my galaxy nails!


If you have any other questions or comments, please do not hesitate; I absolutely love answering them all! :)


Kristin


Saturday, June 22, 2013

Holographic Plastic Wrap Nail Art + Video & Tutorial!

Saturday, June 22, 2013
You may or may not have noticed a little YouTube button in my side bar.  Well, the time has come, and I have finally uploaded my first ever video!

It is a very simple look that I have recreated per request from some of my followers on Instagram.  I really loved it the first time I wore it (about 20 weeks ago according to IG!), and this time is no different.  I really hope you enjoy the video, and when my new camera lens arrives hopefully I can create many more videos with a closer detailed look (floral nails, yes!).


And, here is my original look and Instagram tutorial (my nails were super long here!):


1. Gather your supplies and prep your nails.  I used Nfu Oh Aqua Base, Layla Gold Idol and Purple Illusion, Cirque Fascination Street, a piece of plastic wrap (bunched into a ball), a few precision tip Q-tips, and a piece of paper.

2. Paint two coats of your base colour.  In this case, I chose a gold holographic polish.  You can use any color combination you desire.  Make sure your base color is completely dry, or use a quick dry top coat before moving to the next step.

3. Work quickly with the next few steps!  Place a few drops of your first polish on a piece of paper.  Dip the plastic wrap into the polish, and dab it a few times on the paper before applying it to your nails. 

4. Immediately "sponge" the polish on your nails in a few random spots.  Don't overdo it, or your base color won't show through.  You want a nice balance of colours.

5. Repeat steps 3 and 4 as much as necessary, to achieve the desired effect.

6. If you are using a third color, repeat steps 3 and 4 in another contrasting color.  I chose a darker one so that it would pop against the light base color.

7. Make sure you are happy with the effect.  You may have to touch up a few spots if you feel it is not balanced enough.

8. Clean up around the cuticles with some nail polish remover.

9. Finish with a top coat.  

Have fun! :)


Please let me know what other tutorials and designs you would like to see in the future!


Kristin


Lacquerstyle.com © 2014